
Hello Friends! I’ve been using this theme for all the web-projects I’ve been working on recently. I polished it from project to project — and built everything into it that I learned from the data that I analyzed while using it.
It’s:
- SEO-friendly
- conversion-focused
- easy-to-install and easy-to-use
- clean code
- nice and clean design (that’s subjective, of course — so you can tweak it by your own taste)
In one sentence: it performs great — without significant compromise on the design!
The best part: when I start a new web-project now, I spend like ~1 hour, max, with the whole website setup. That’s a big relief. When you don’t have to worry about the look and the build of your website, you can focus better on building your product/service. And that’s what we all want.
In this tutorial, I’ll guide you through the whole setup process:
- Installing Elementor Builder and Elementor Pro
- Adding the “Hello Elementor” theme
- Importing the “SEO for Elementor” theme kit
- Activating the SEO for Elementor theme kit elements
- Fixing the top menu
- Elementor Site Settings – Customize colors, logo, favicon, etc.
- Editing Elementor pages, posts and landing pages
- Optimizing further
- Adding extra plugins for better technical SEO, page speed and SEO traffic (wprocket + webp converter)
- Adding a mid-article subscription form for better conversion!
- Setting the post URL formats for better SEO results!
- Adding iThemes Security for your WP security
Here we go!
Disclaimer: If you start this process with an already existing and functioning website — obviously — don’t forget to create BACKUPS before you get started! You use this theme at your own risk. If after installing the theme on your website, anything goes down, breaks, you lose data, or generally any unrecoverable happens: we are not responsible for it and we provide no warranties for anything.
Note: most of the links in this article are affiliate links. But I recommend nothing that I don’t use myself.
STEP #1: Install Elementor Builder and Elementor Pro!
Note: if Elementor Builder and Elementor Pro are already installed to your website, you can skip to STEP #2.
This theme kit is built on the top of Elementor. It’s the best website builder I know for Elementor. If you are using wordpress and if you are not using Elementor for it, you want to check it out right now. Here’s their website: Elementor.com. (Disclaimer: this is an affiliate link.)
For using this theme, you’ll have to use Elementor Pro, too.
You can choose from two of their offers depending on your situation:
- if you already have a website and a hosting service (and you are happy with your hosting service), you simply can choose their WEBSITE BUILDER product — it currently costs $49/year. Here.
- if you don’t have a website, neither a hosting service, you might want to go with the WEBSITE BUILDER + HOSTING package of Elementor. It costs $99/year and it’s an excellent value for money. Here. (You’d probably spend just this amount for hosting anyway. On the top of that, their hosting service is very reliable and high-performing solution.)
Did you choose? Great!
Let’s move on to the actual first step:
STEP #1.1: Installing WordPress
Note: if you are done with this step, skip forward to #1.2!
If you start with a brand new website, either you chose Elementor Hosting or anything else, you’ll start here:
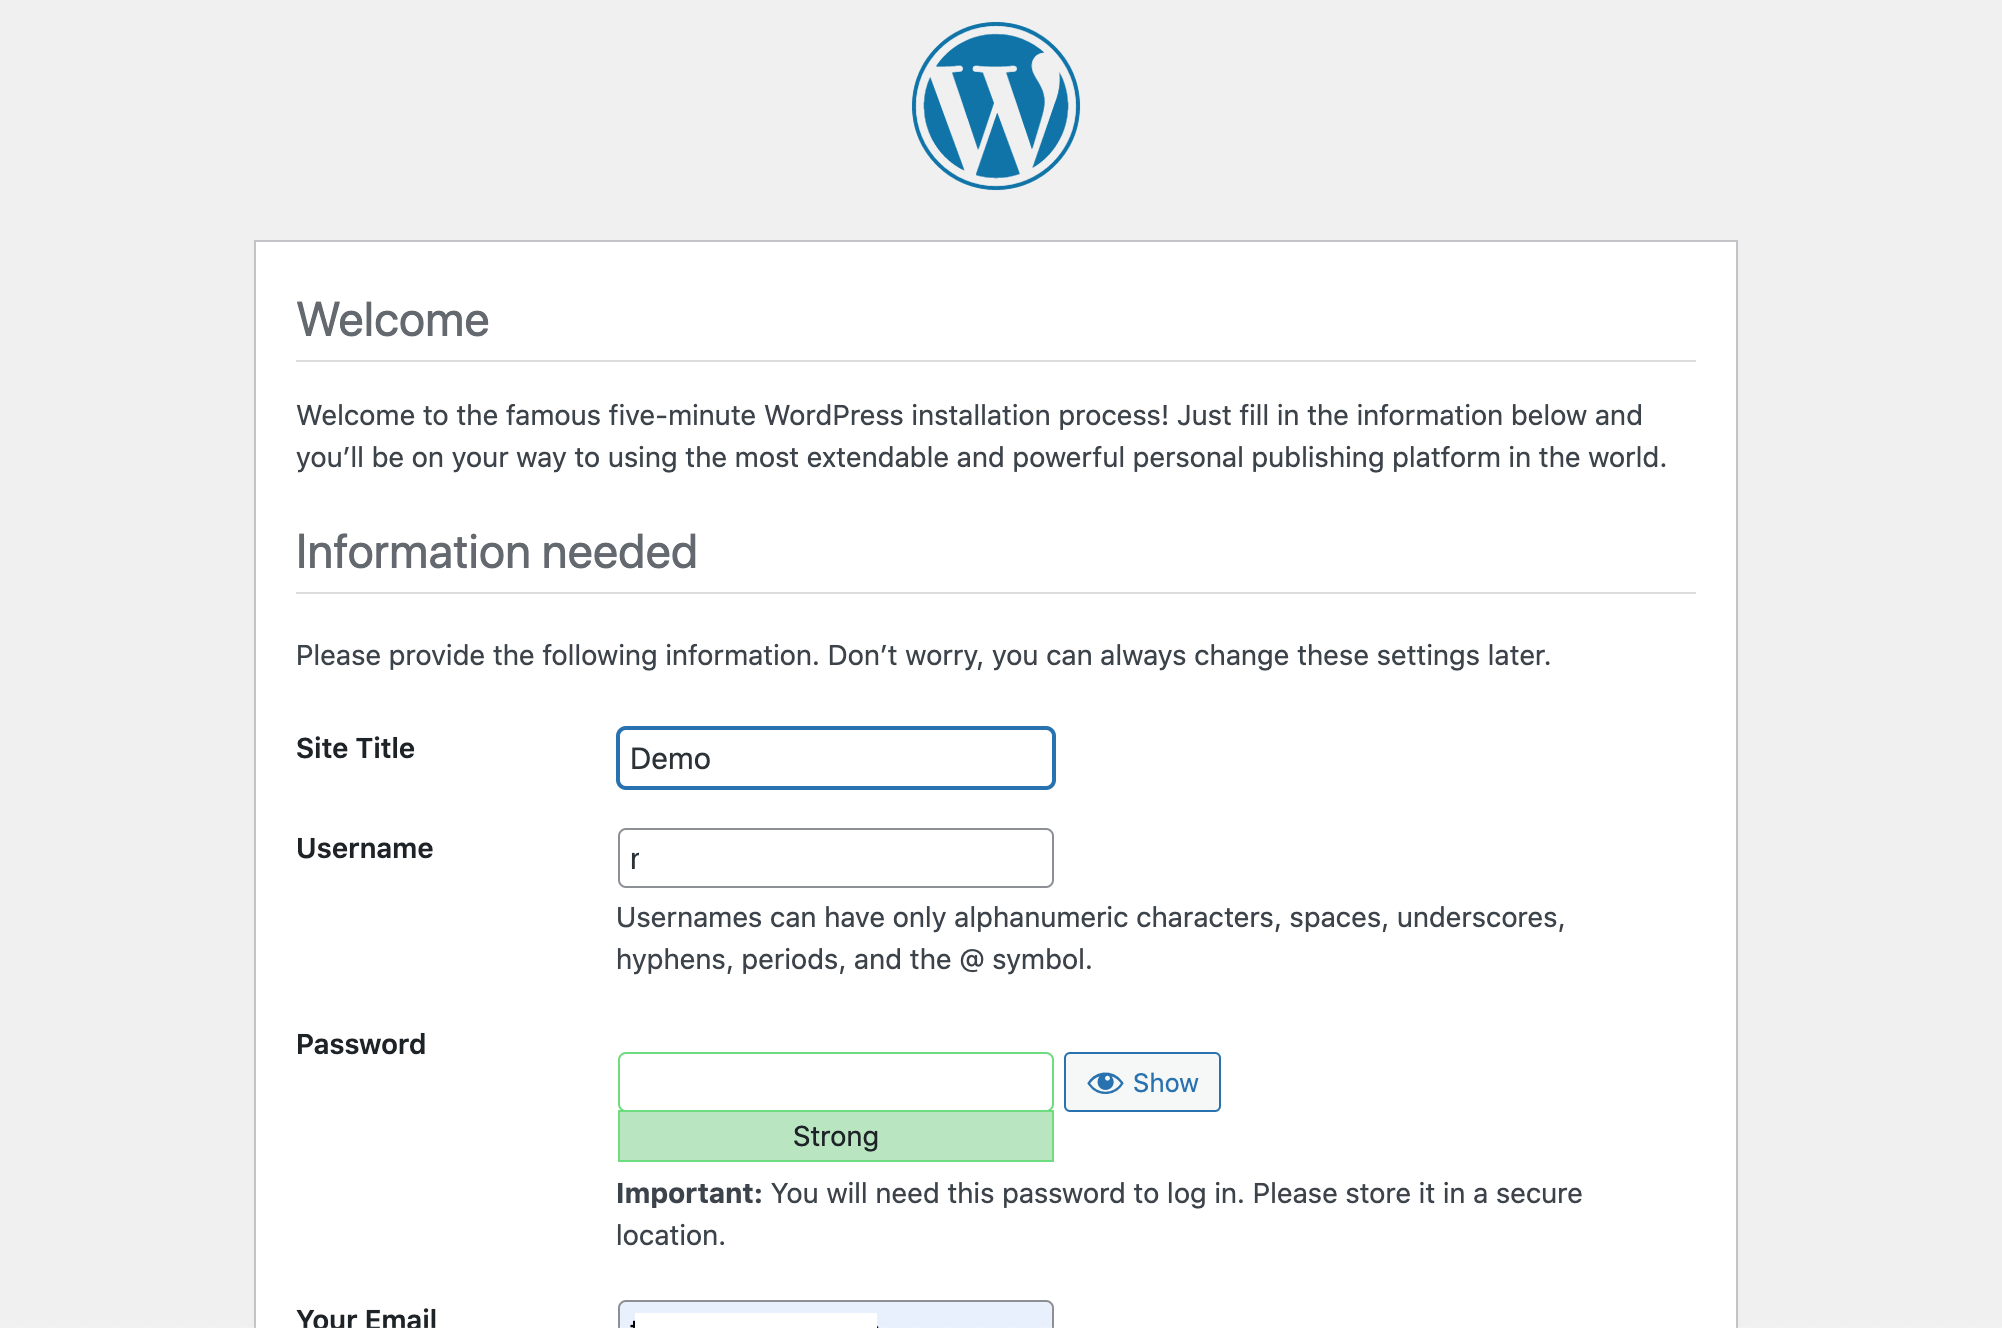
Just fill in the fields — follow the steps intuitively and boom, you’ll have your wordpress website:

The front-end will be ugly basic, but will start to work on that part soon!
STEP #1.2: Installing the Elementor Pro plugin!
When you bought Elementor Pro, you got a small .zip file that contains your Elementor Pro plugin. Now it’s time to use it and set it up!
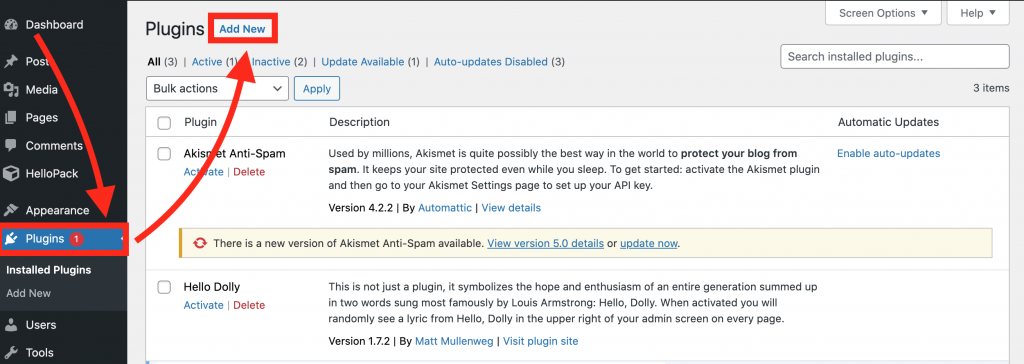
Go to your wordpress website’s admin surface. Click Plugins >> then click Add new!
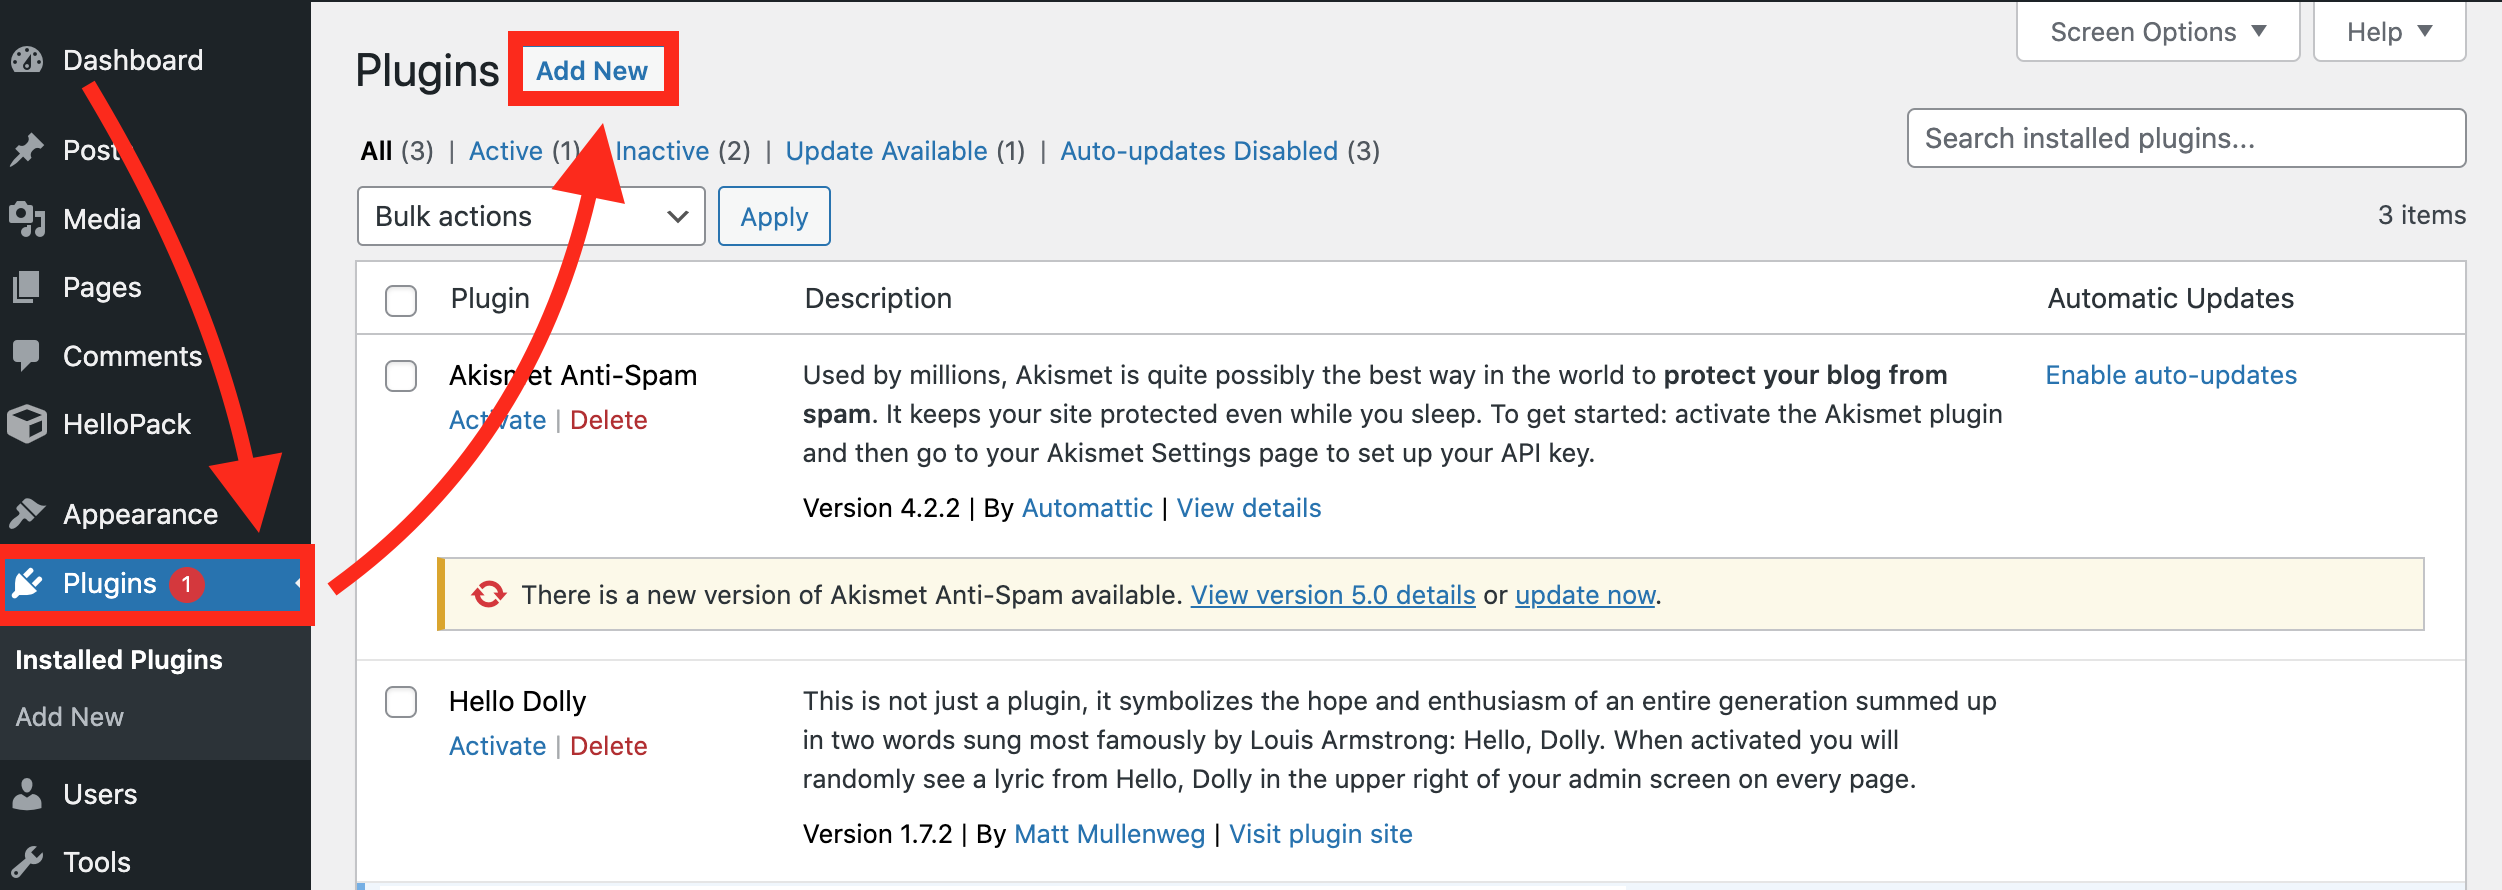
Here, just click: Upload Plugin.
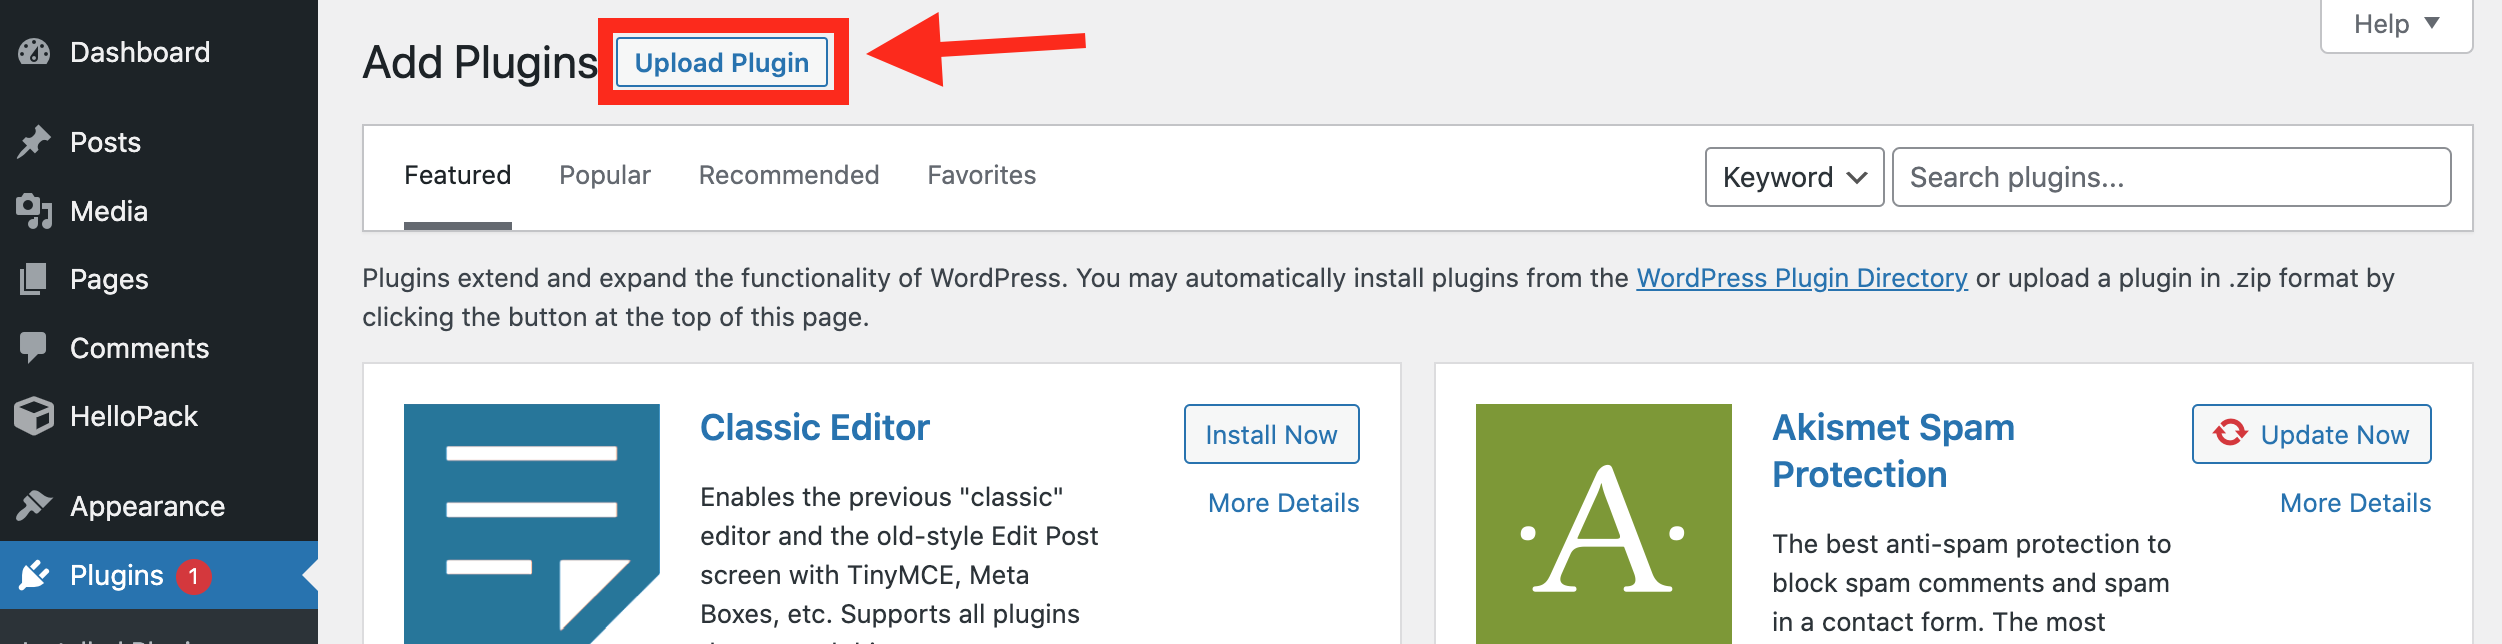
And upload your Elementor Pro .zip file!
From here on, follow the steps intuitively:
- click: “Install Plugin!”
- then click: “Activate Plugin!”
At this point you might or might not be asked by Elementor to activate your recently purchased Elementor Pro license. If you are asked to do so, just follow the steps they show and activate your license!
Then go back to the Plugins tab!
You’ll see this red popup on the top:

It asks you to install another Elementor Plugin. This actually is the so called “Elementor Builder” (or simply “Elementor”) plugin — which is free but required to use Elementor Pro. So just click: “Install Elementor“. Then again click: “Activate Plugin!”
You might or might not land here:

If you go back to the plugins tab again, you’ll see something like this (Elementor and Elementor Pro installed and activated):
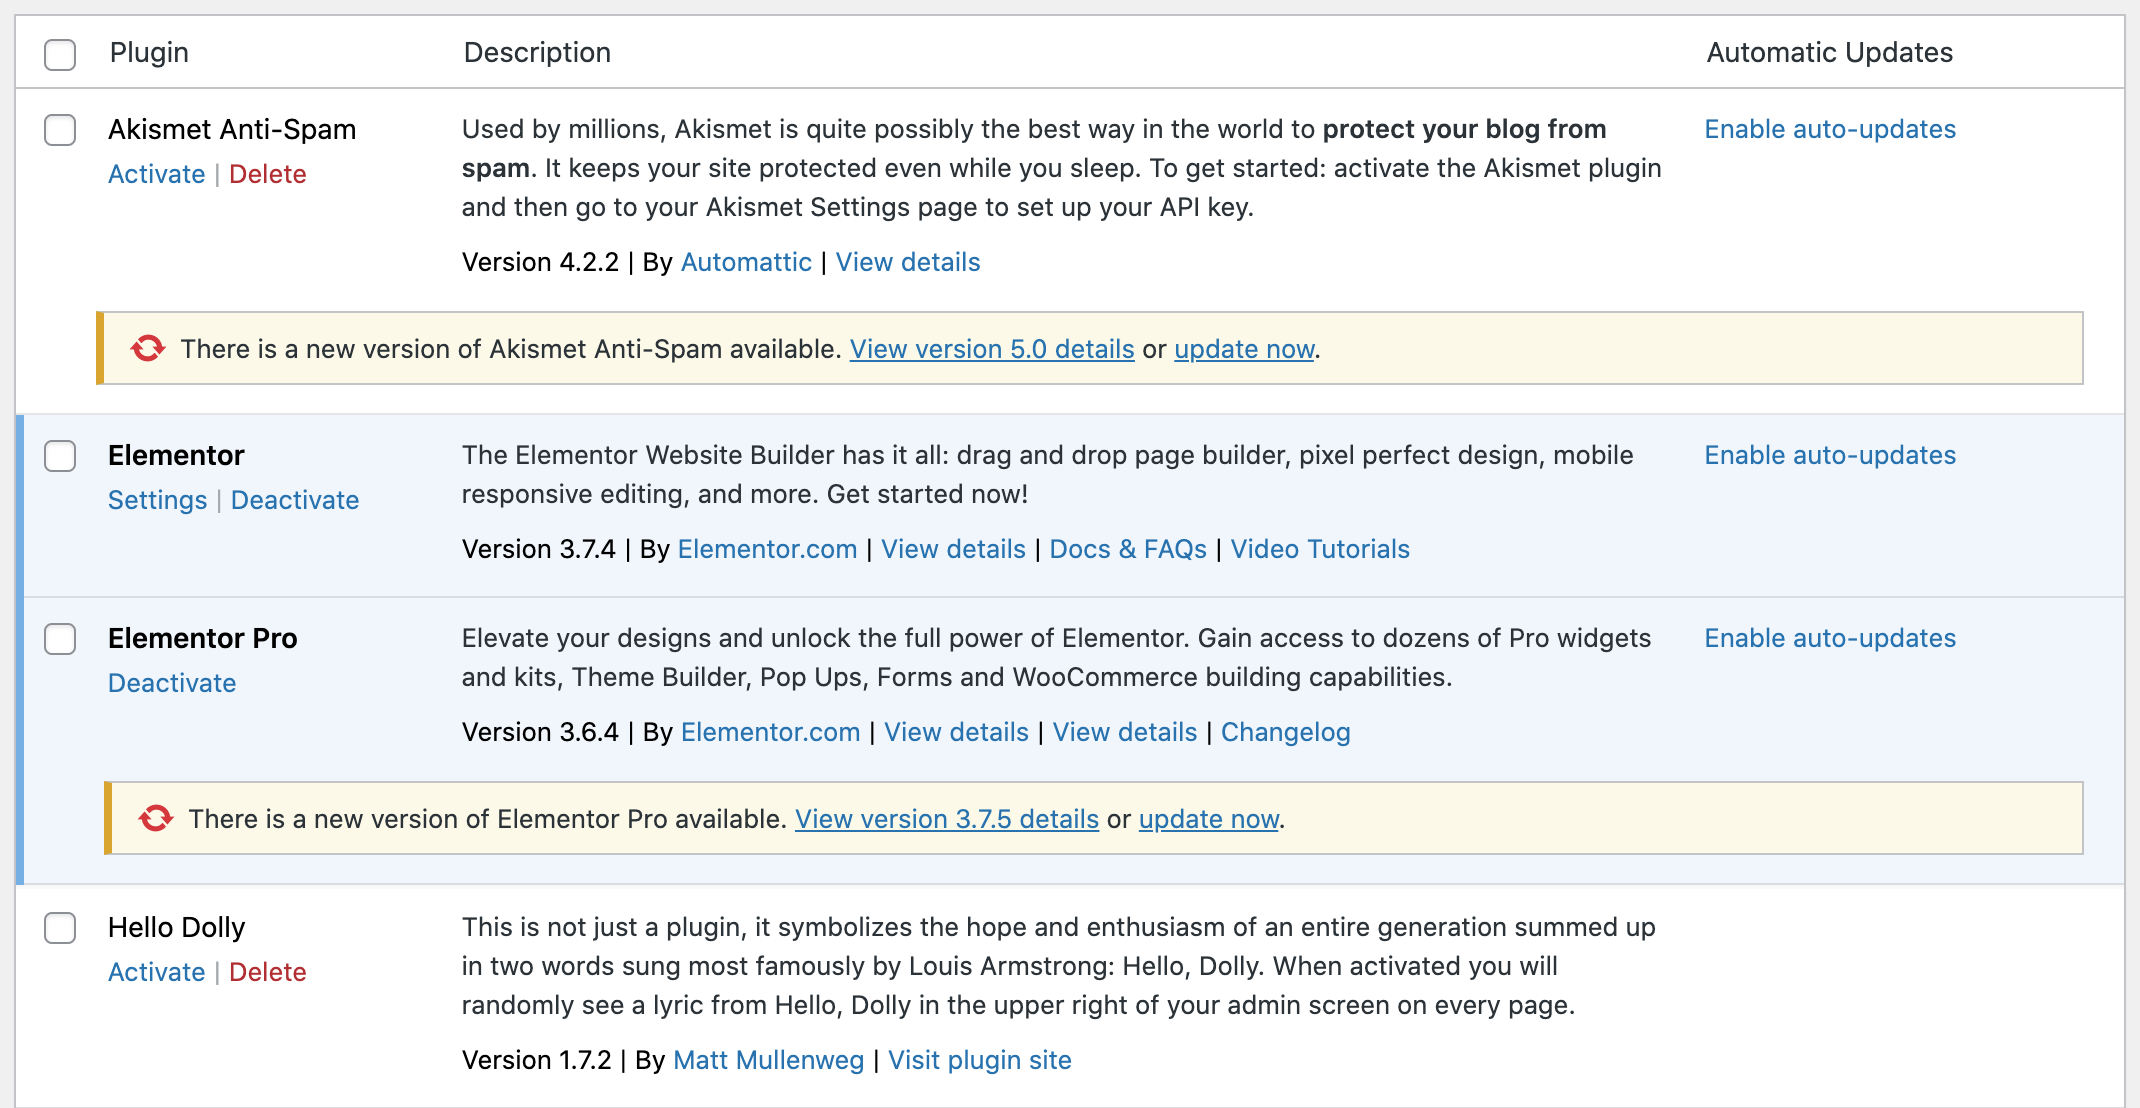
If it asks you to update your Elementor Pro plugin, just click the little “update now” text in the yellow frame… But apart from that, you are all set. The Elementor installation step is done!
STEP #2: Choose the “Hello Elementor” theme as your wordpress theme!
Note: if the Hello Elementor theme is already activated for you, you can skip to STEP #3.
The next step is choosing a new theme for the WordPress website. Elementor is built on top of WordPress and to make it work smoothly, you’ll have to use their own WordPress theme: Hello Elementor! It has a basic design that we won’t use. Yet, it’s needed to make the code part compatible with the soon-to-be-setup “Seo for Elementor” Theme Kit.
How do you do that?
On the wordpress admin surface you go to: Appearance >> Themes >> Add new
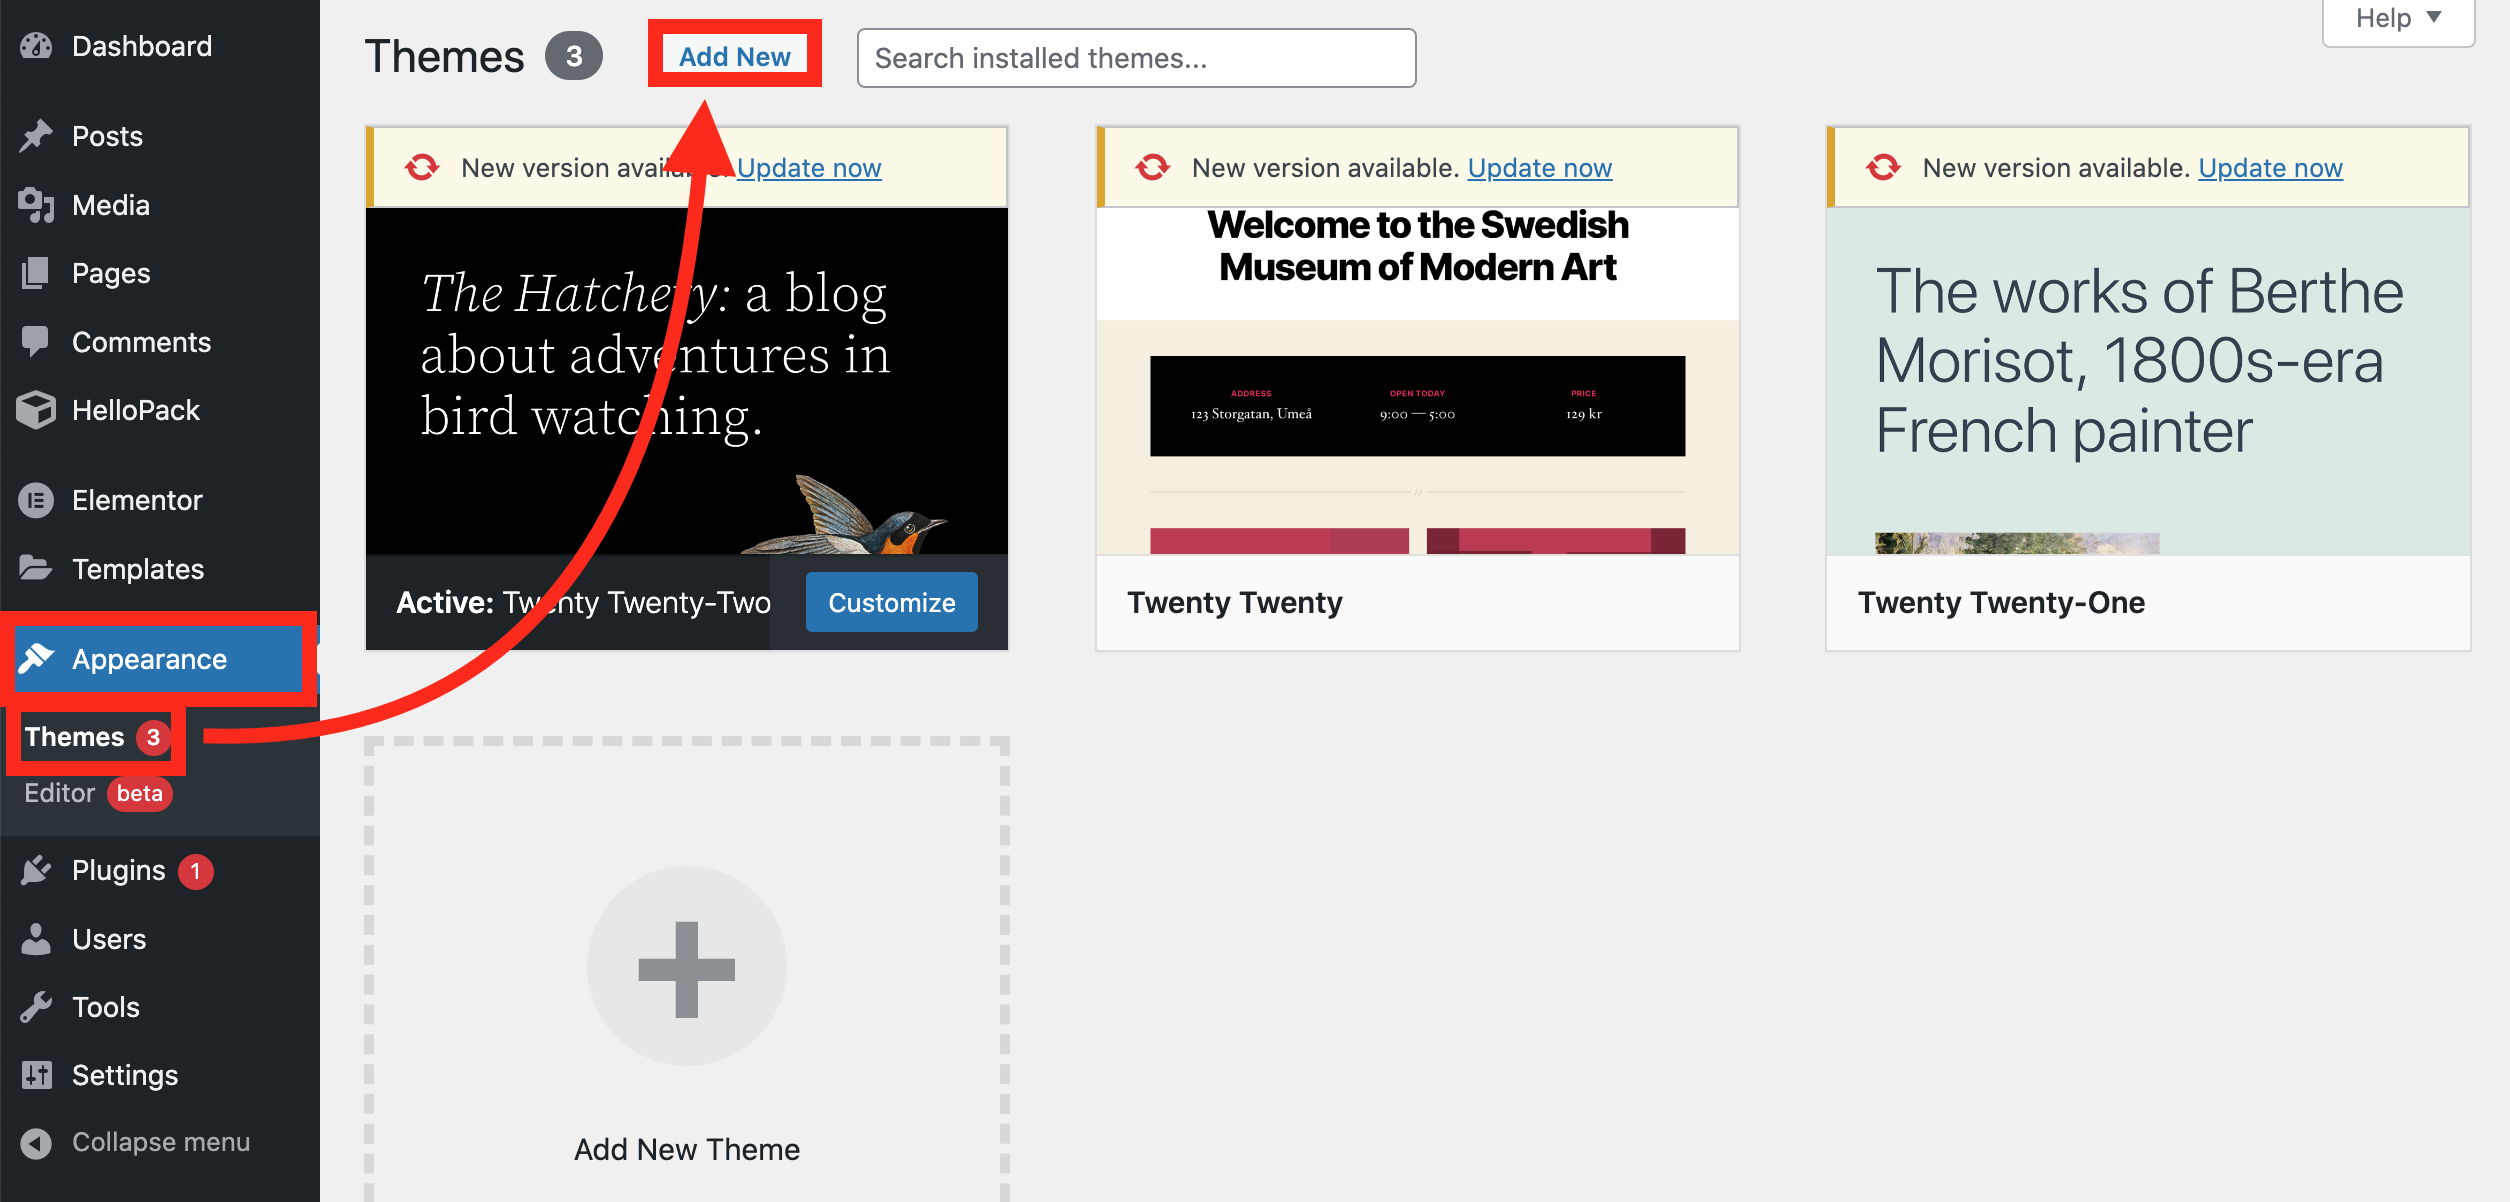
You’ll see a few pre-installed wordpress themes. You can just ignore these. (Or optionally, you can delete the ones that are not active now. You shall keep the one that is active, even after installing the Hello Elementor! theme.)
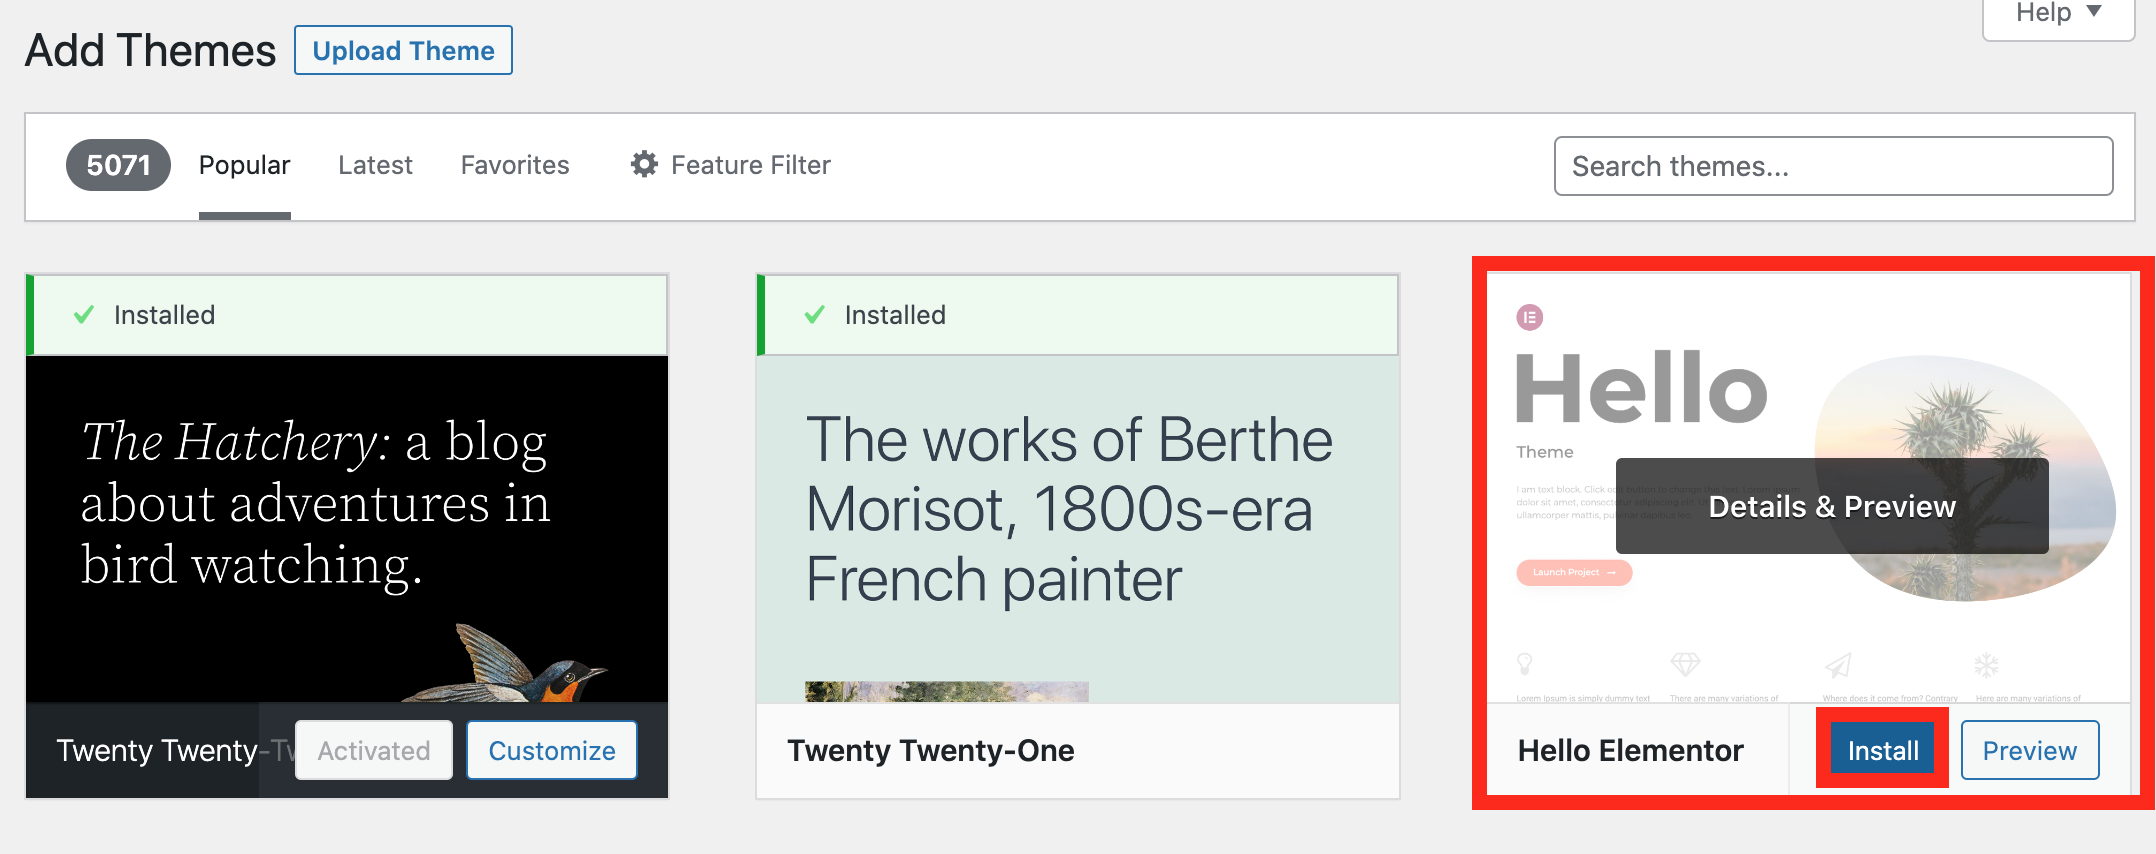
In the “Add theme” section, search for the “Hello Elementor” theme — it’ll be probably on the top, but if not, just type its name to the search bar and it will pop. Once you found it, click “Install“
Once it’s installed, click “Activate“!
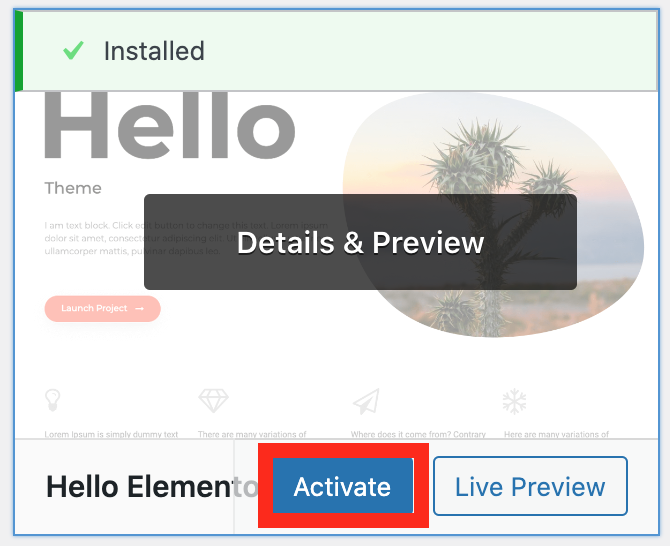
And with that the Hello Elementor theme is installed and activated!
Next step!
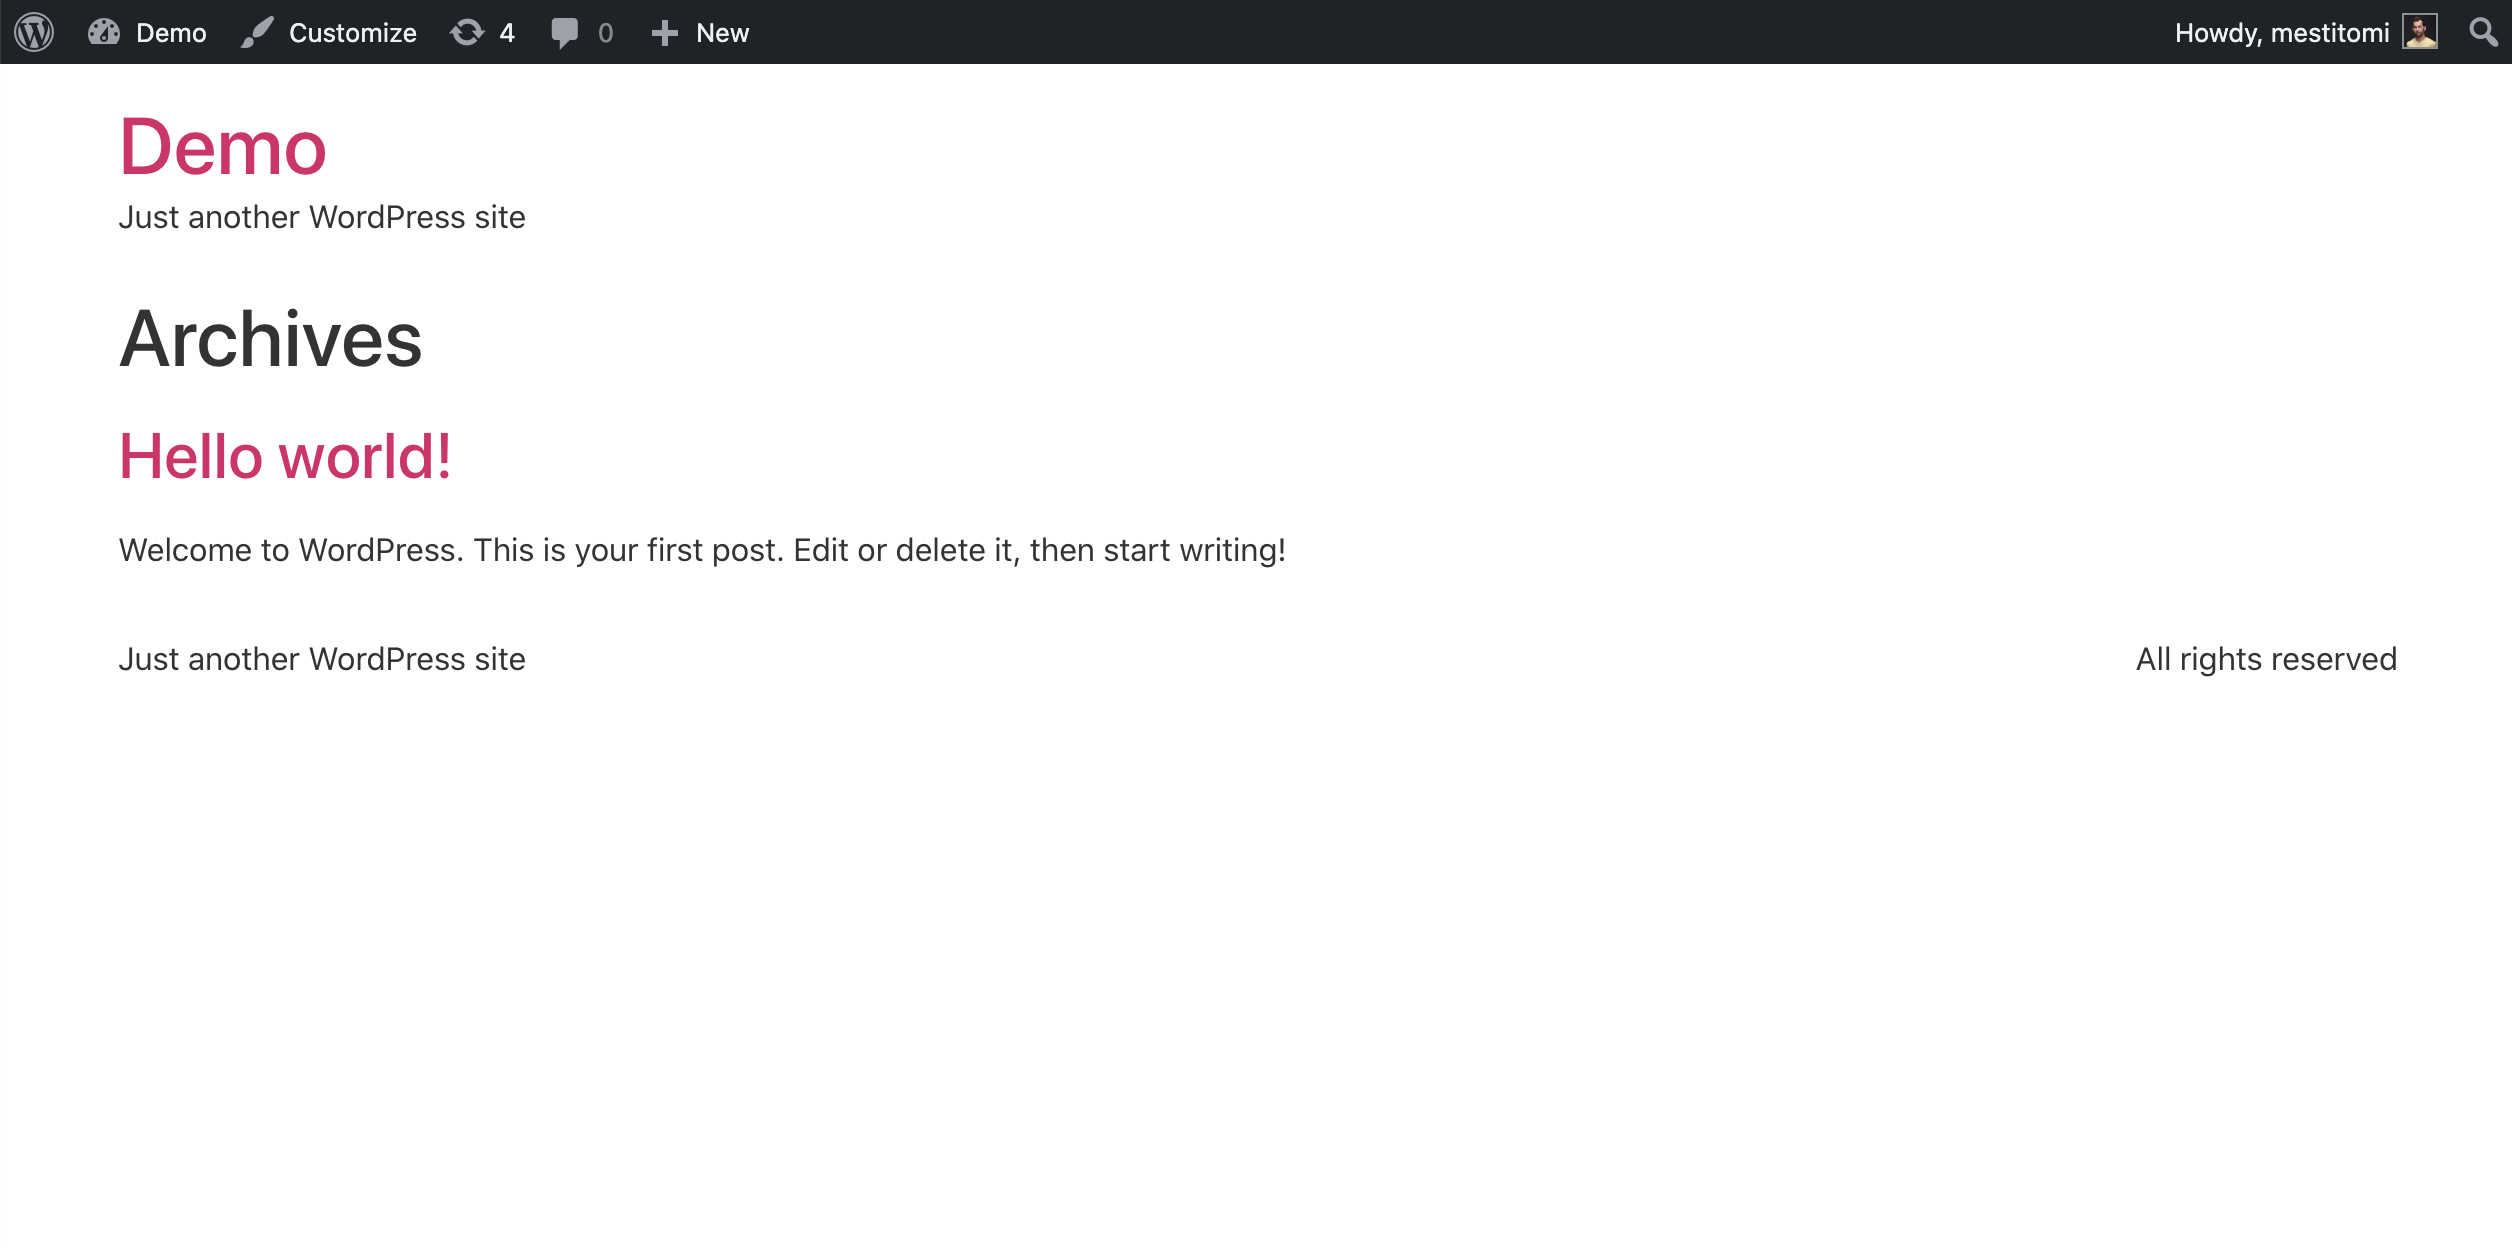
Side-note: If you bother to check, you’ll see that the front-end is still not nice. But again: don’t worry, so far we just built the frame of our website. In the next step comes the actual design!
STEP #3: Import the “SEO for Elementor” theme kit!
Okay, after the careful preparations, it’s showtime! We’ll bring the “SEO for Elementor” theme kit to your website.
I assume that you have already downloaded the .zip file that contains the theme kit. It’s called SEO_FOR_ELEMENTOR_v1_1.zip and I sent it to you via email. (Although the exact version number might be different for you.)
- If you don’t have the .zip file already, download it here: https://seoforelementor.com/download/.
- And if you have opted in already but can’t find the email I sent you, search for the “Here’s your SEO-friendly Theme Kit for Elementor” subject field in your inbox! The email will contain the zip file.
Okay, if you have the .zip file, we can continue!
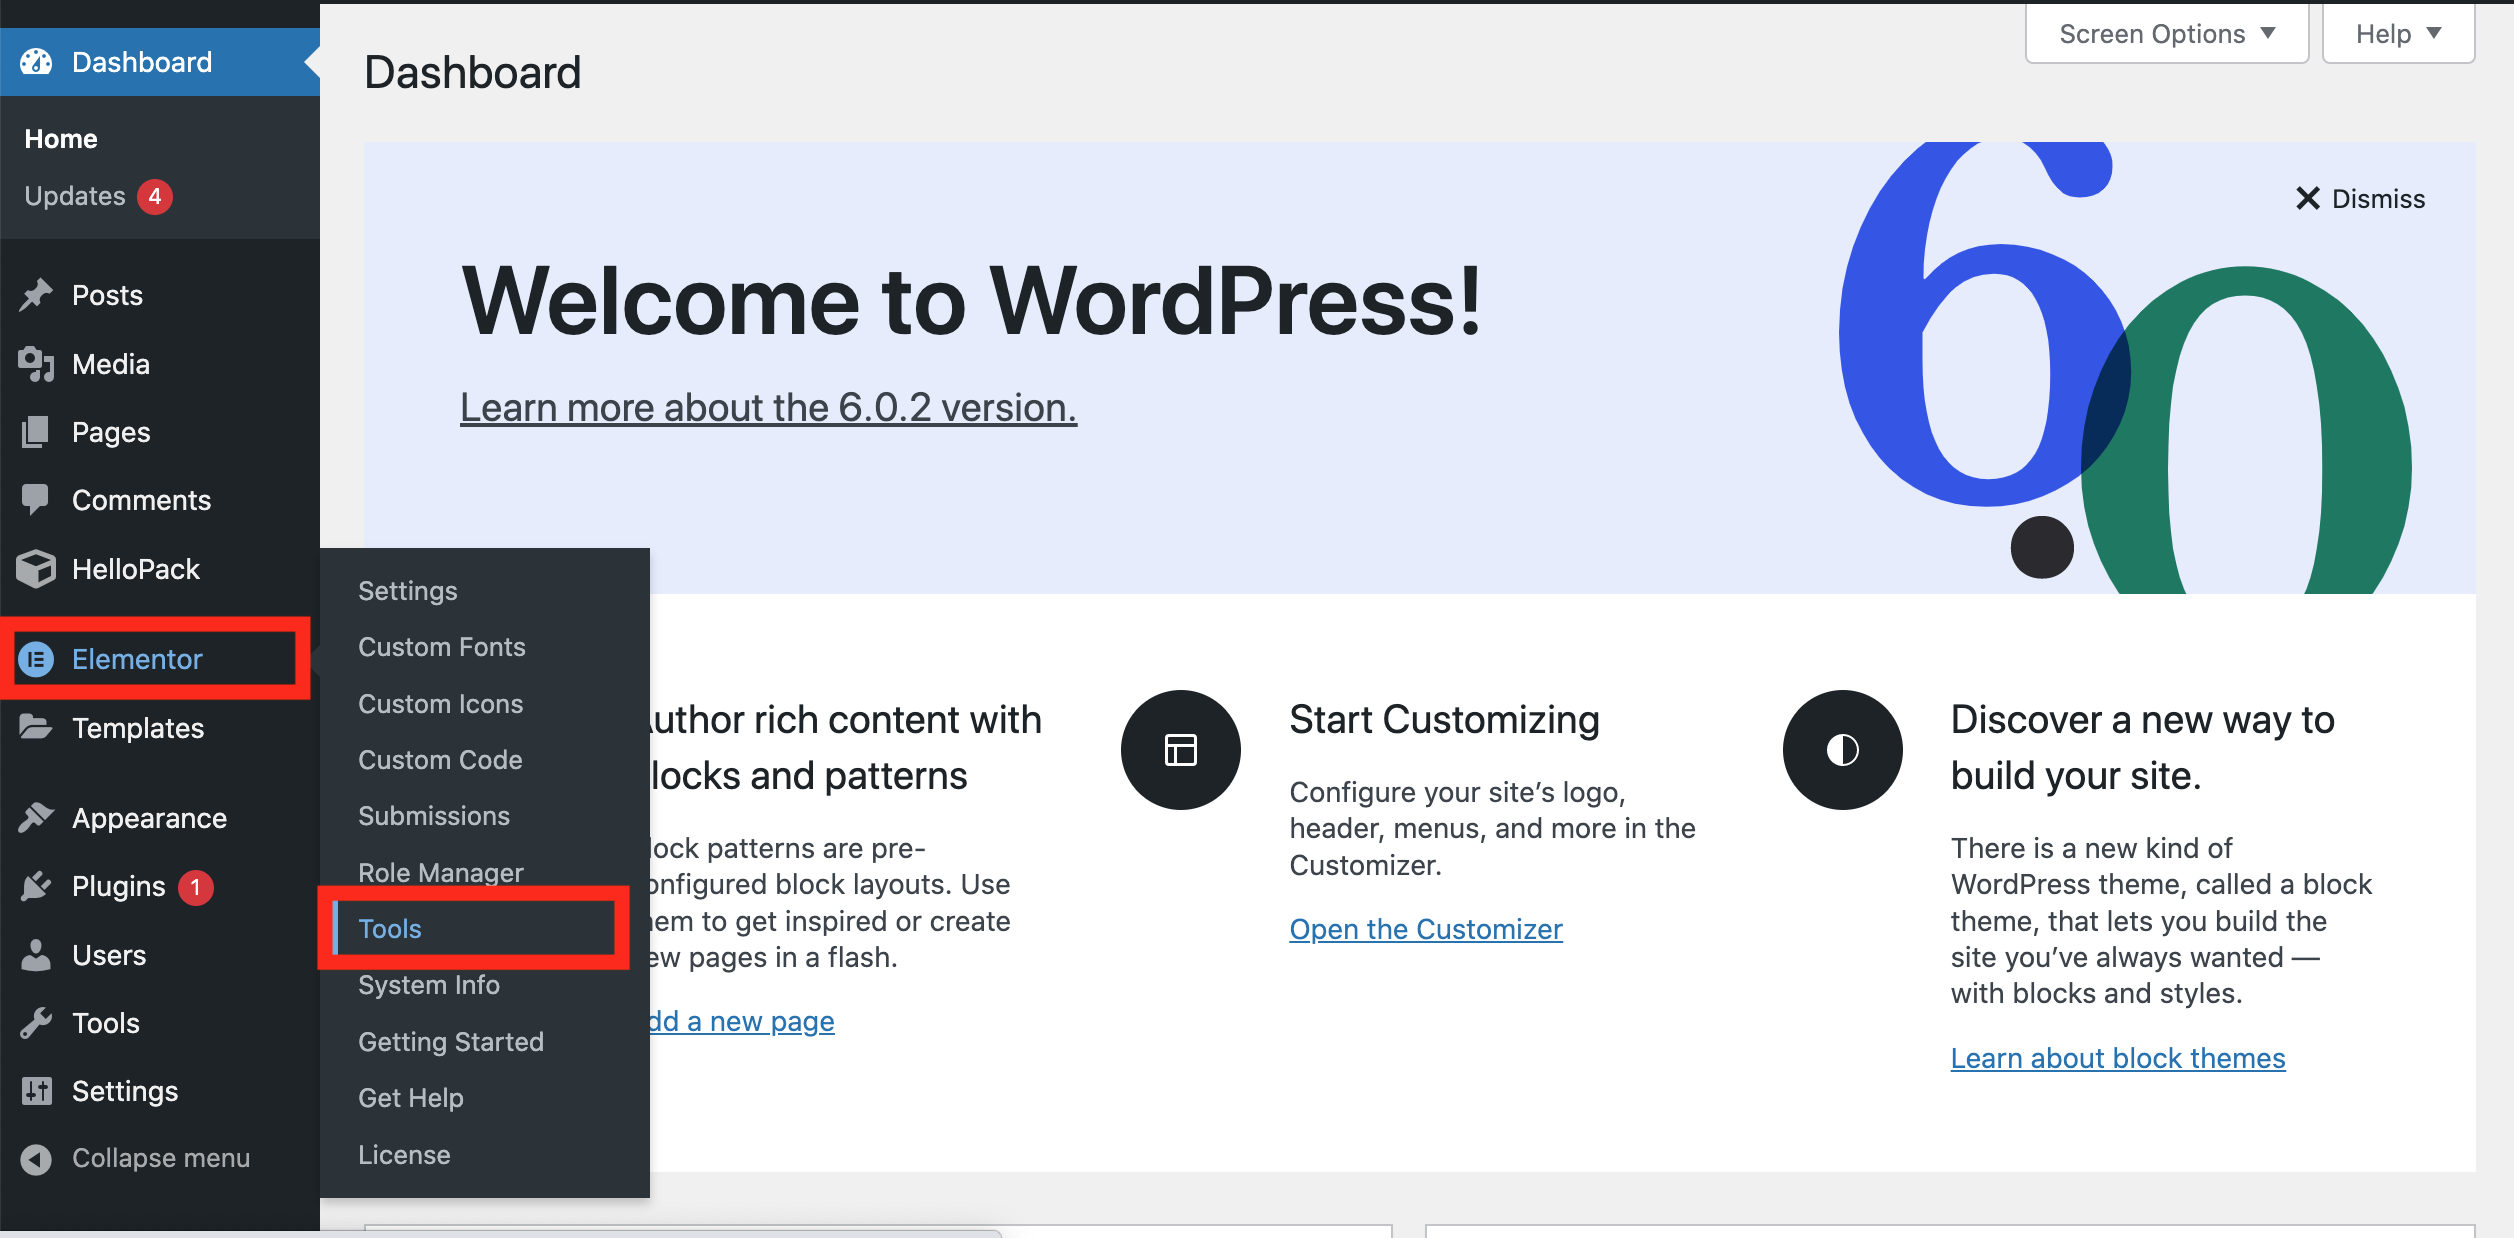
Go back to you admin surface and click Elementor >> Tools:
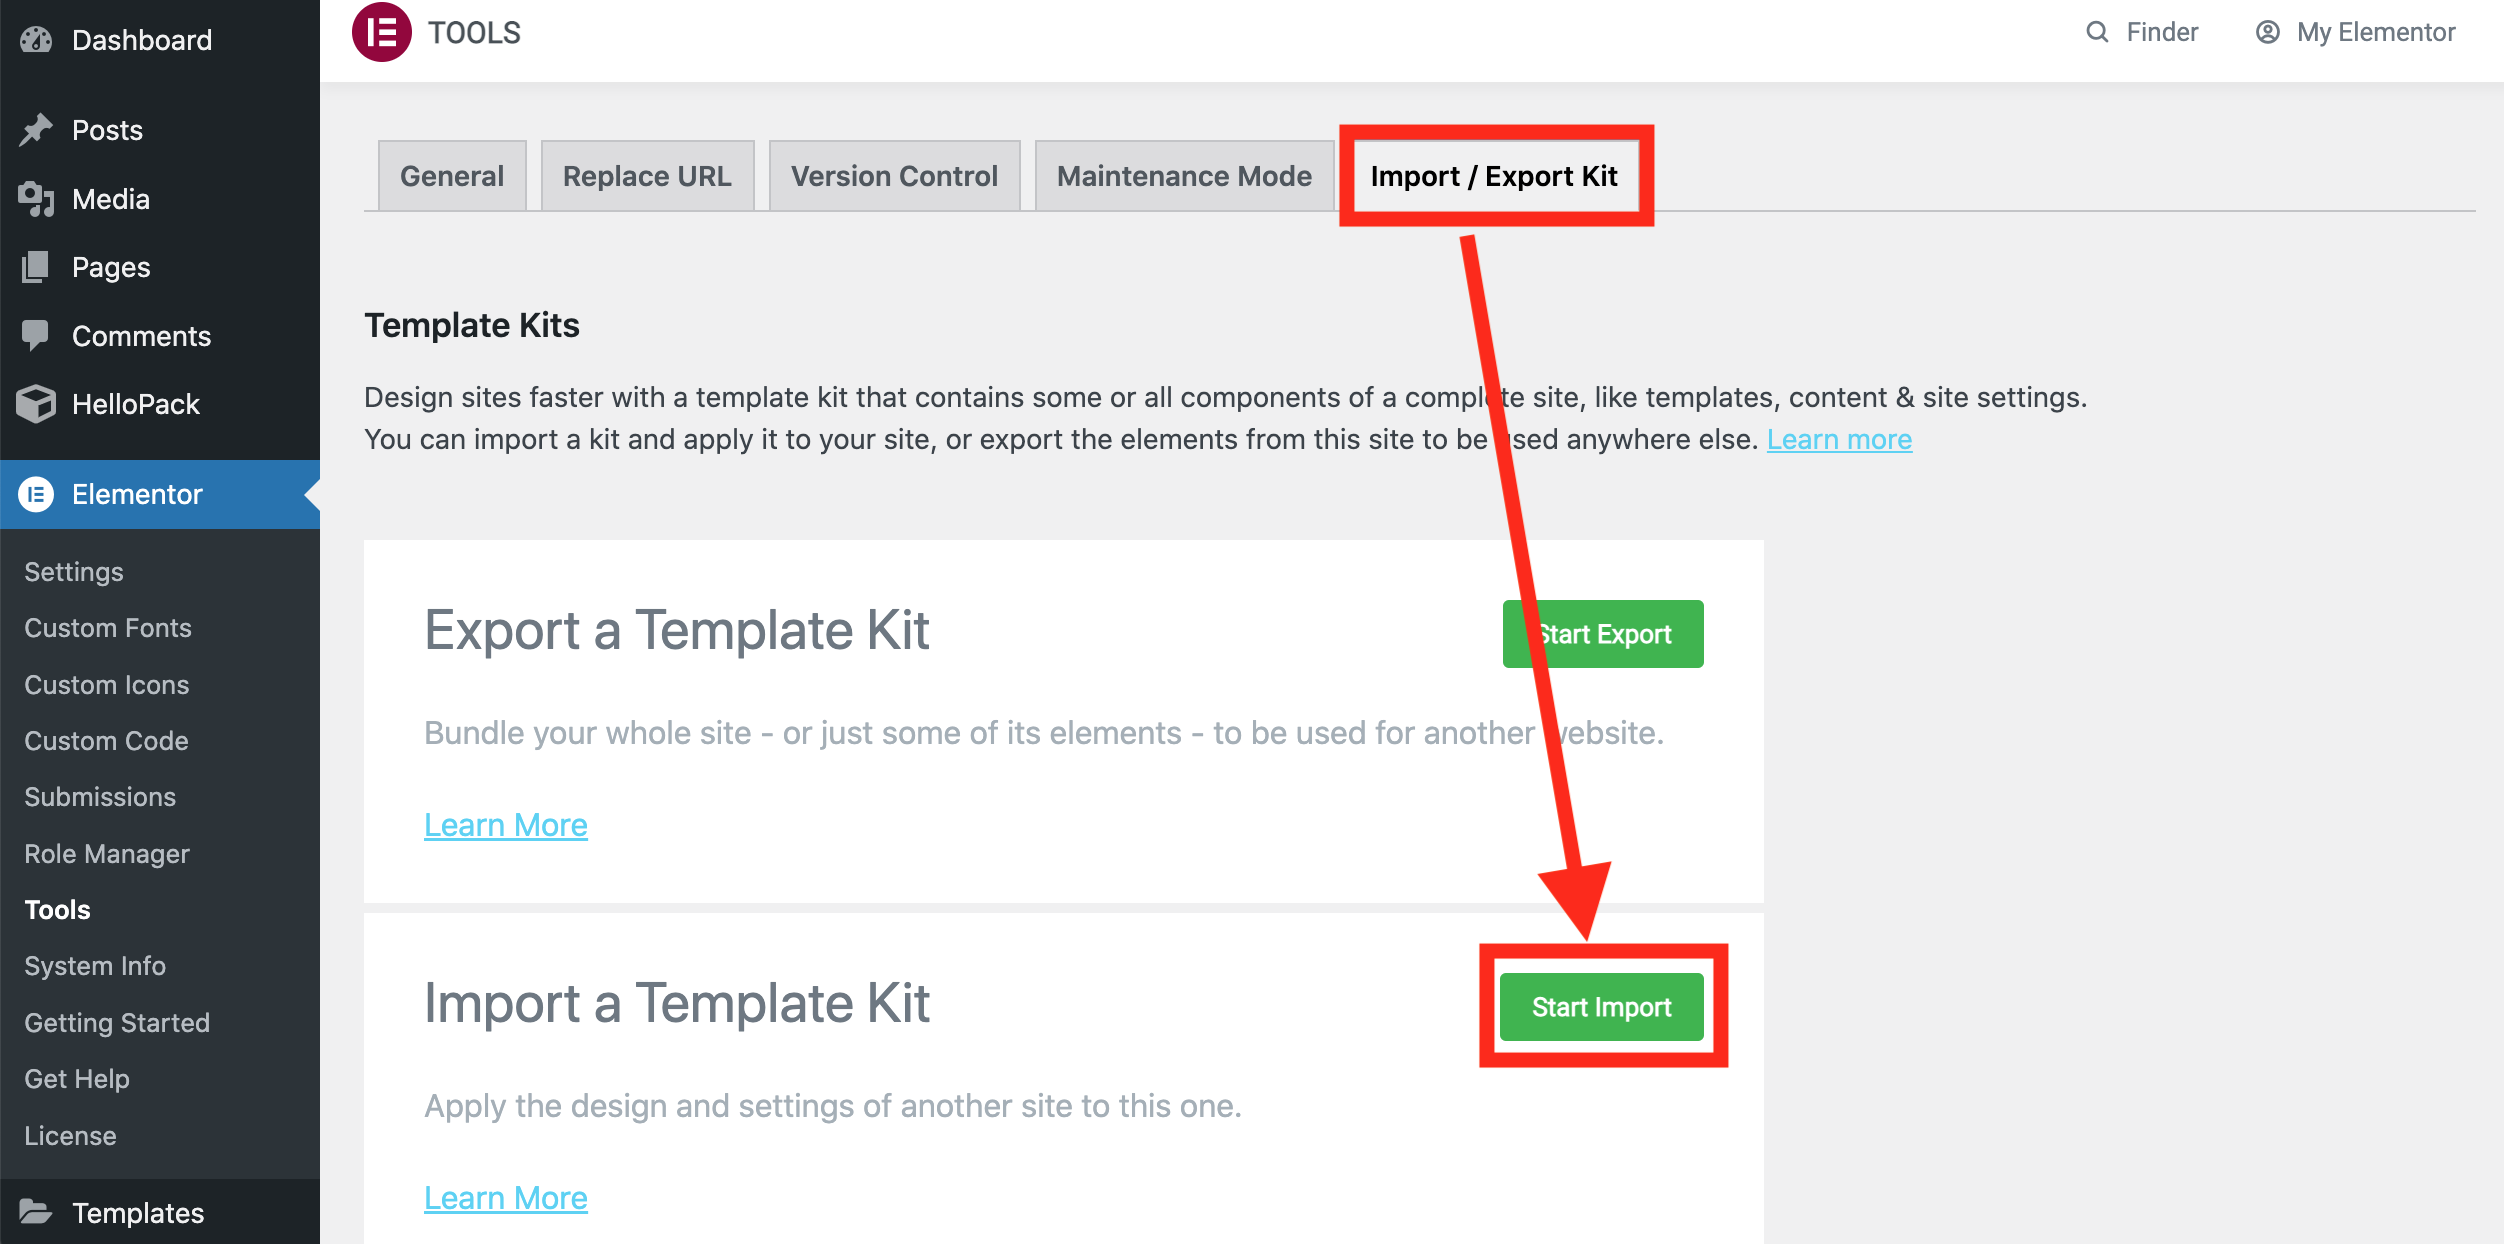
Then on the top menu Import/Export Kit >> then Start Import
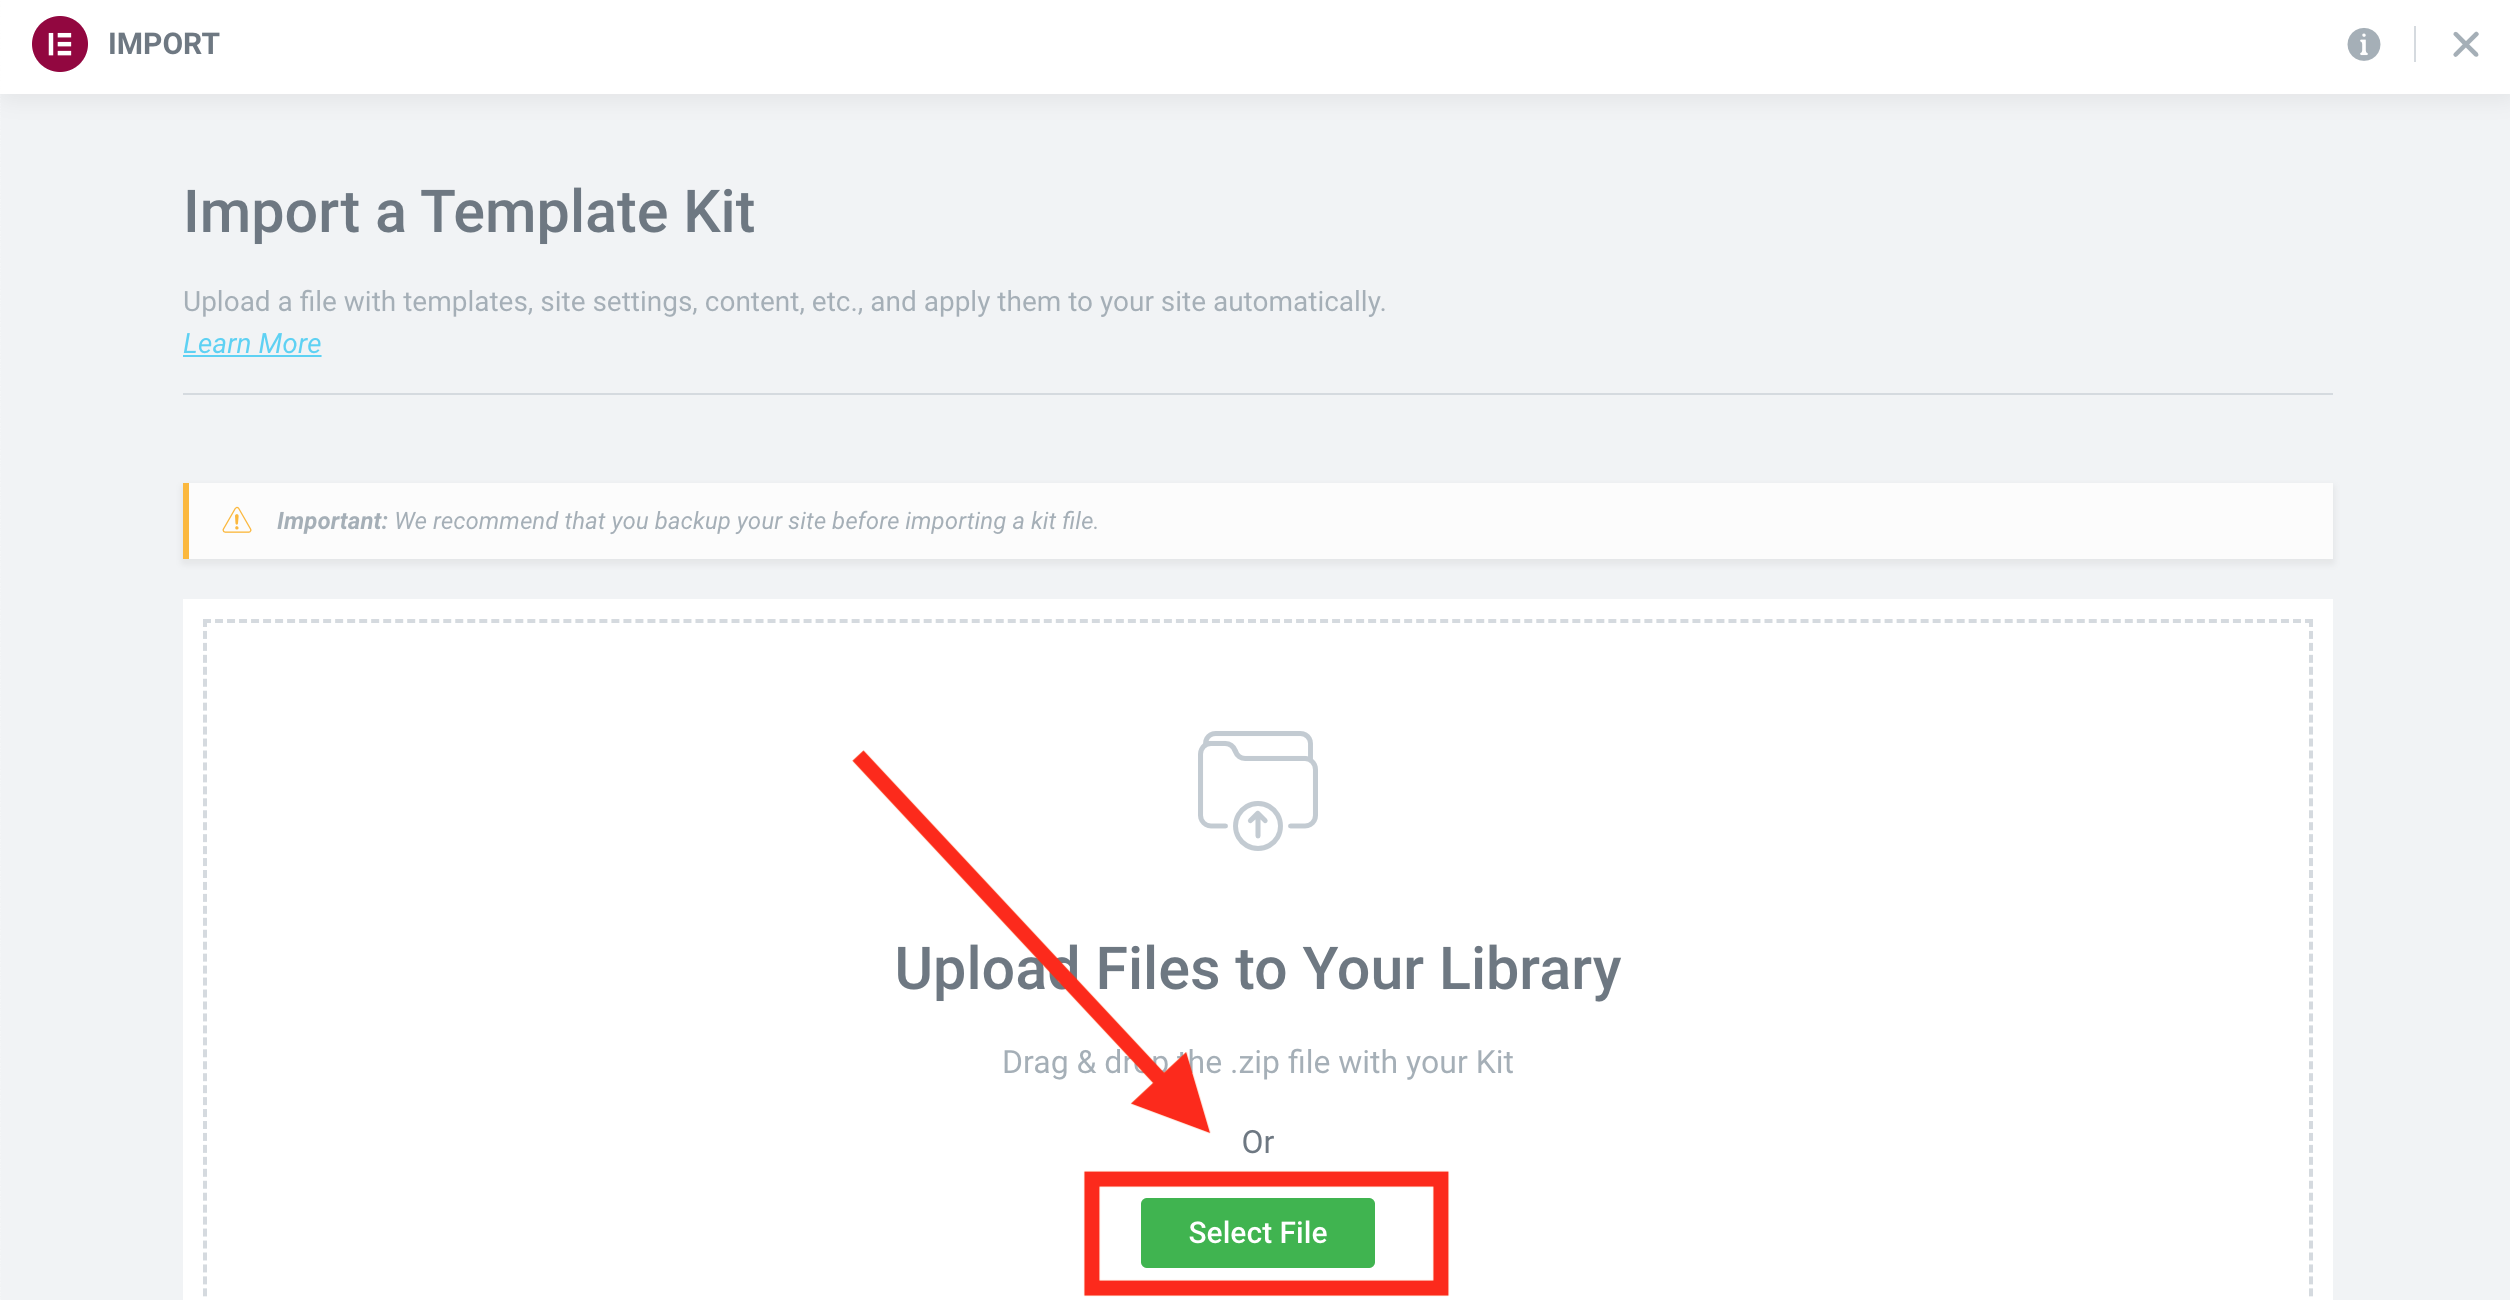
Then on the “Import a Template Kit” tab upload the .zip file. (Again, it’s called SEO_FOR_ELEMENTOR_v1_1.zip — the version number might be different and you got it in the email.)
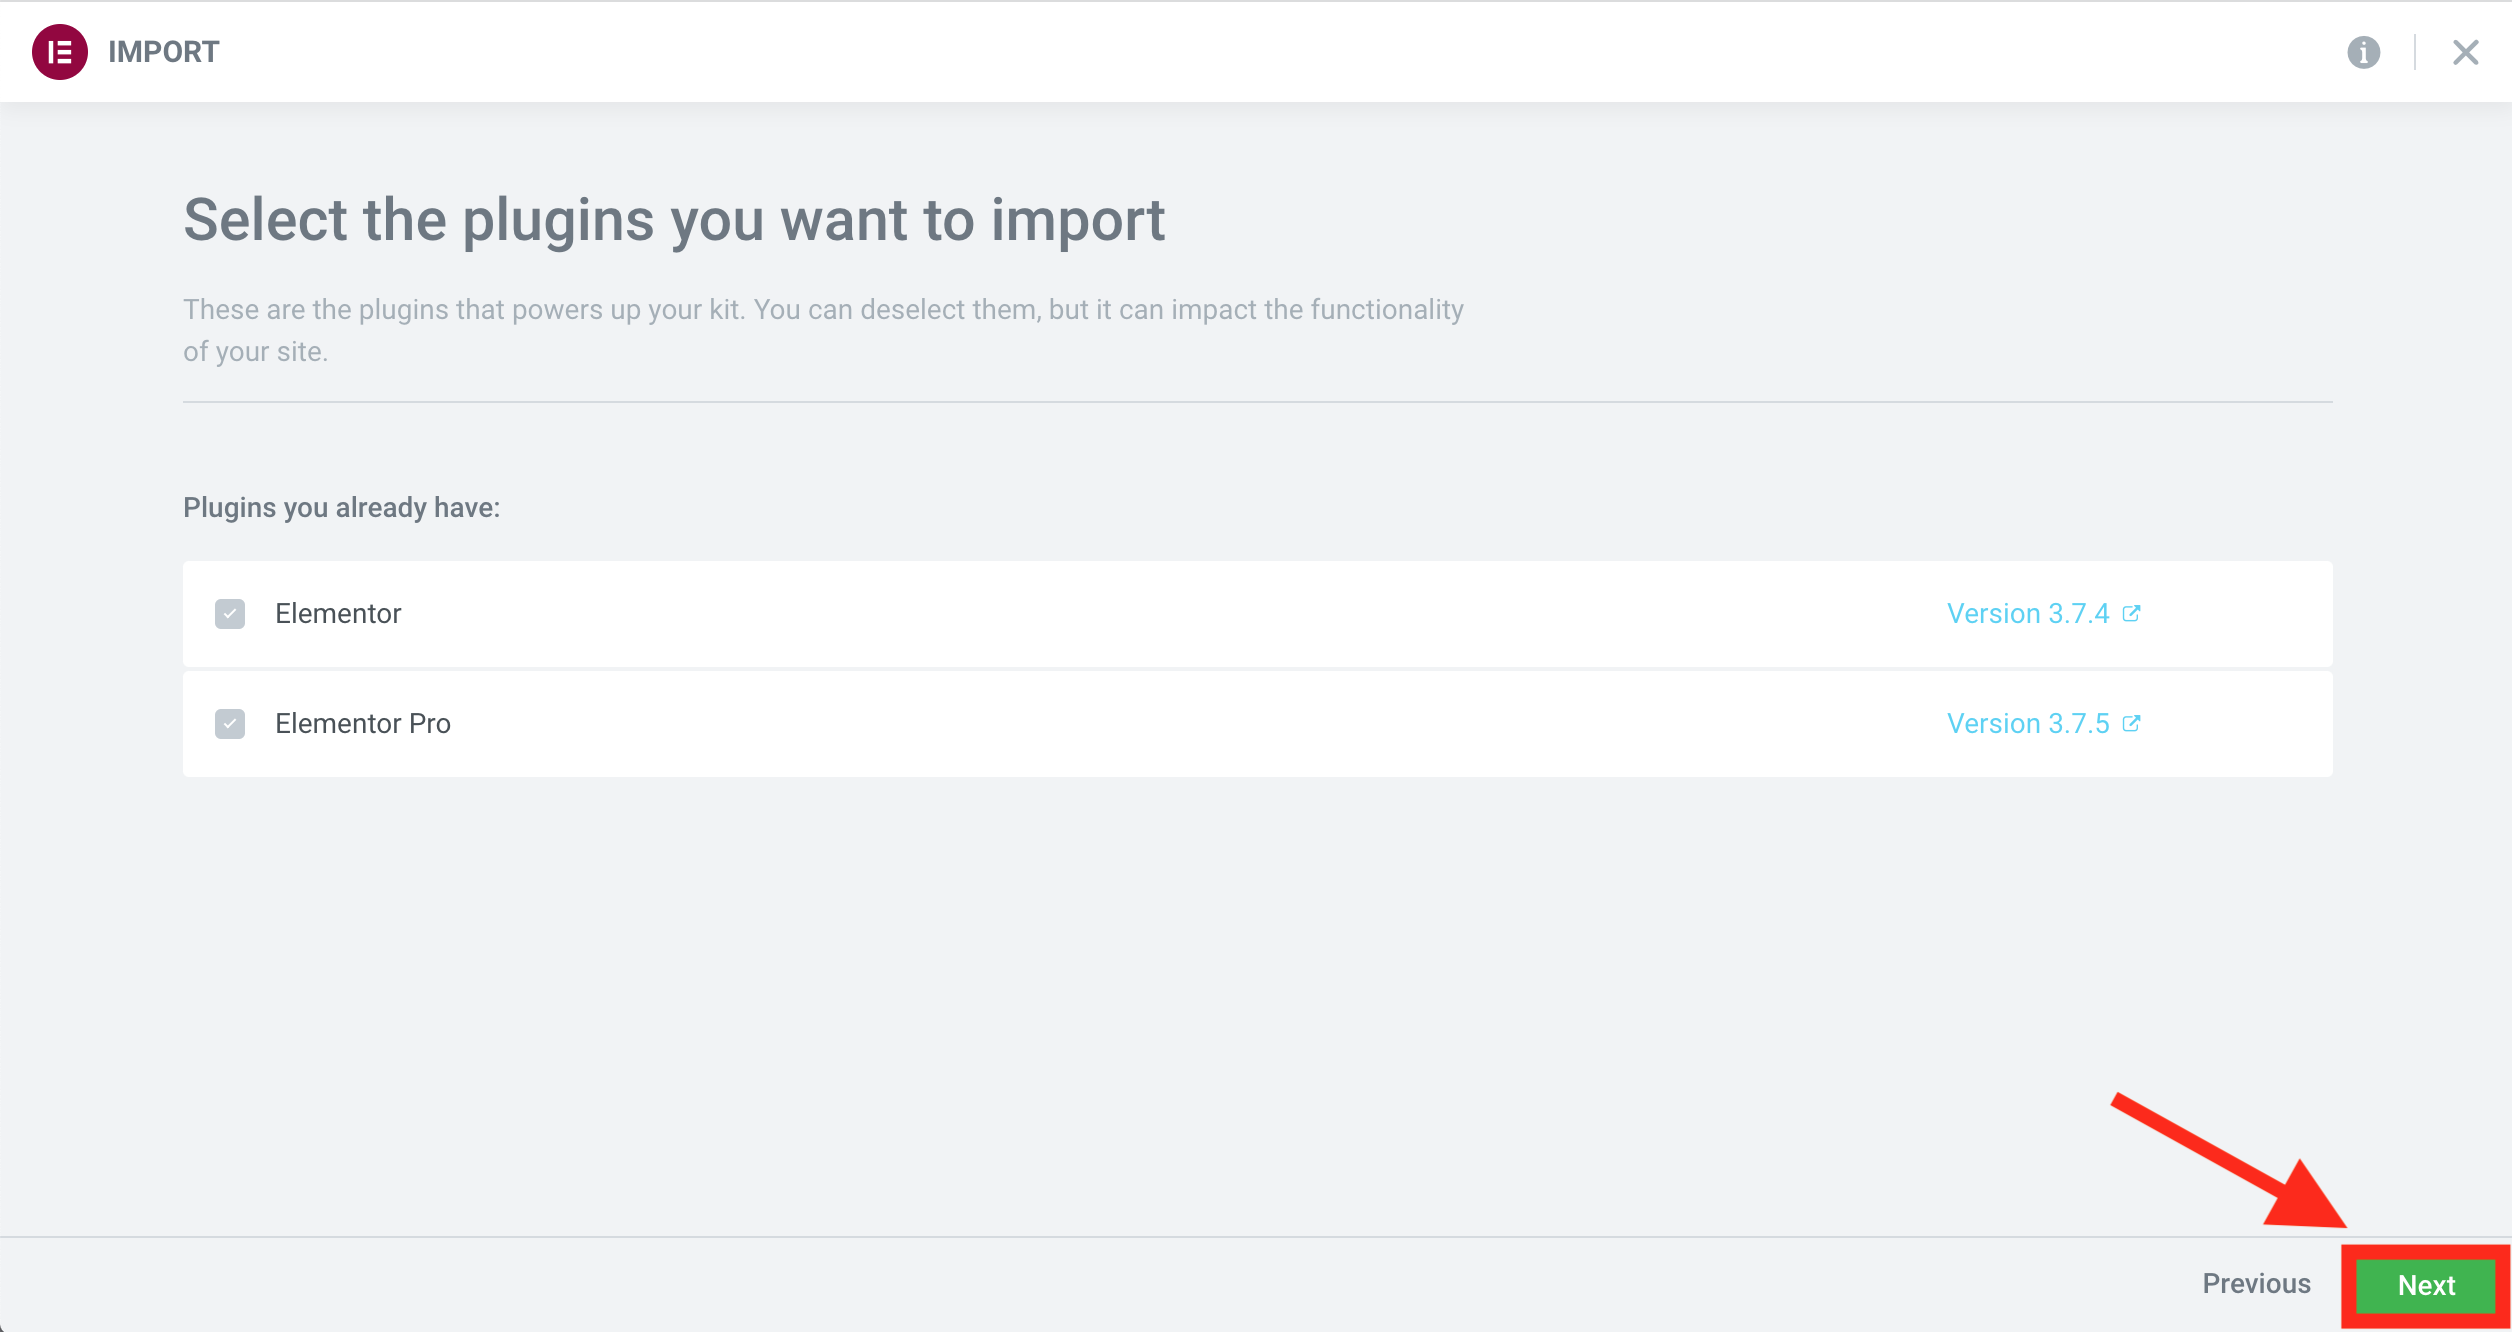
The next tab shows the plugin you need for the kit. If you have done the previous steps in this article, you won’t see any issues here. The SEO for Elementor Kit relies on Elementor and Elementor Pro — and we have installed them already. So just click Next.
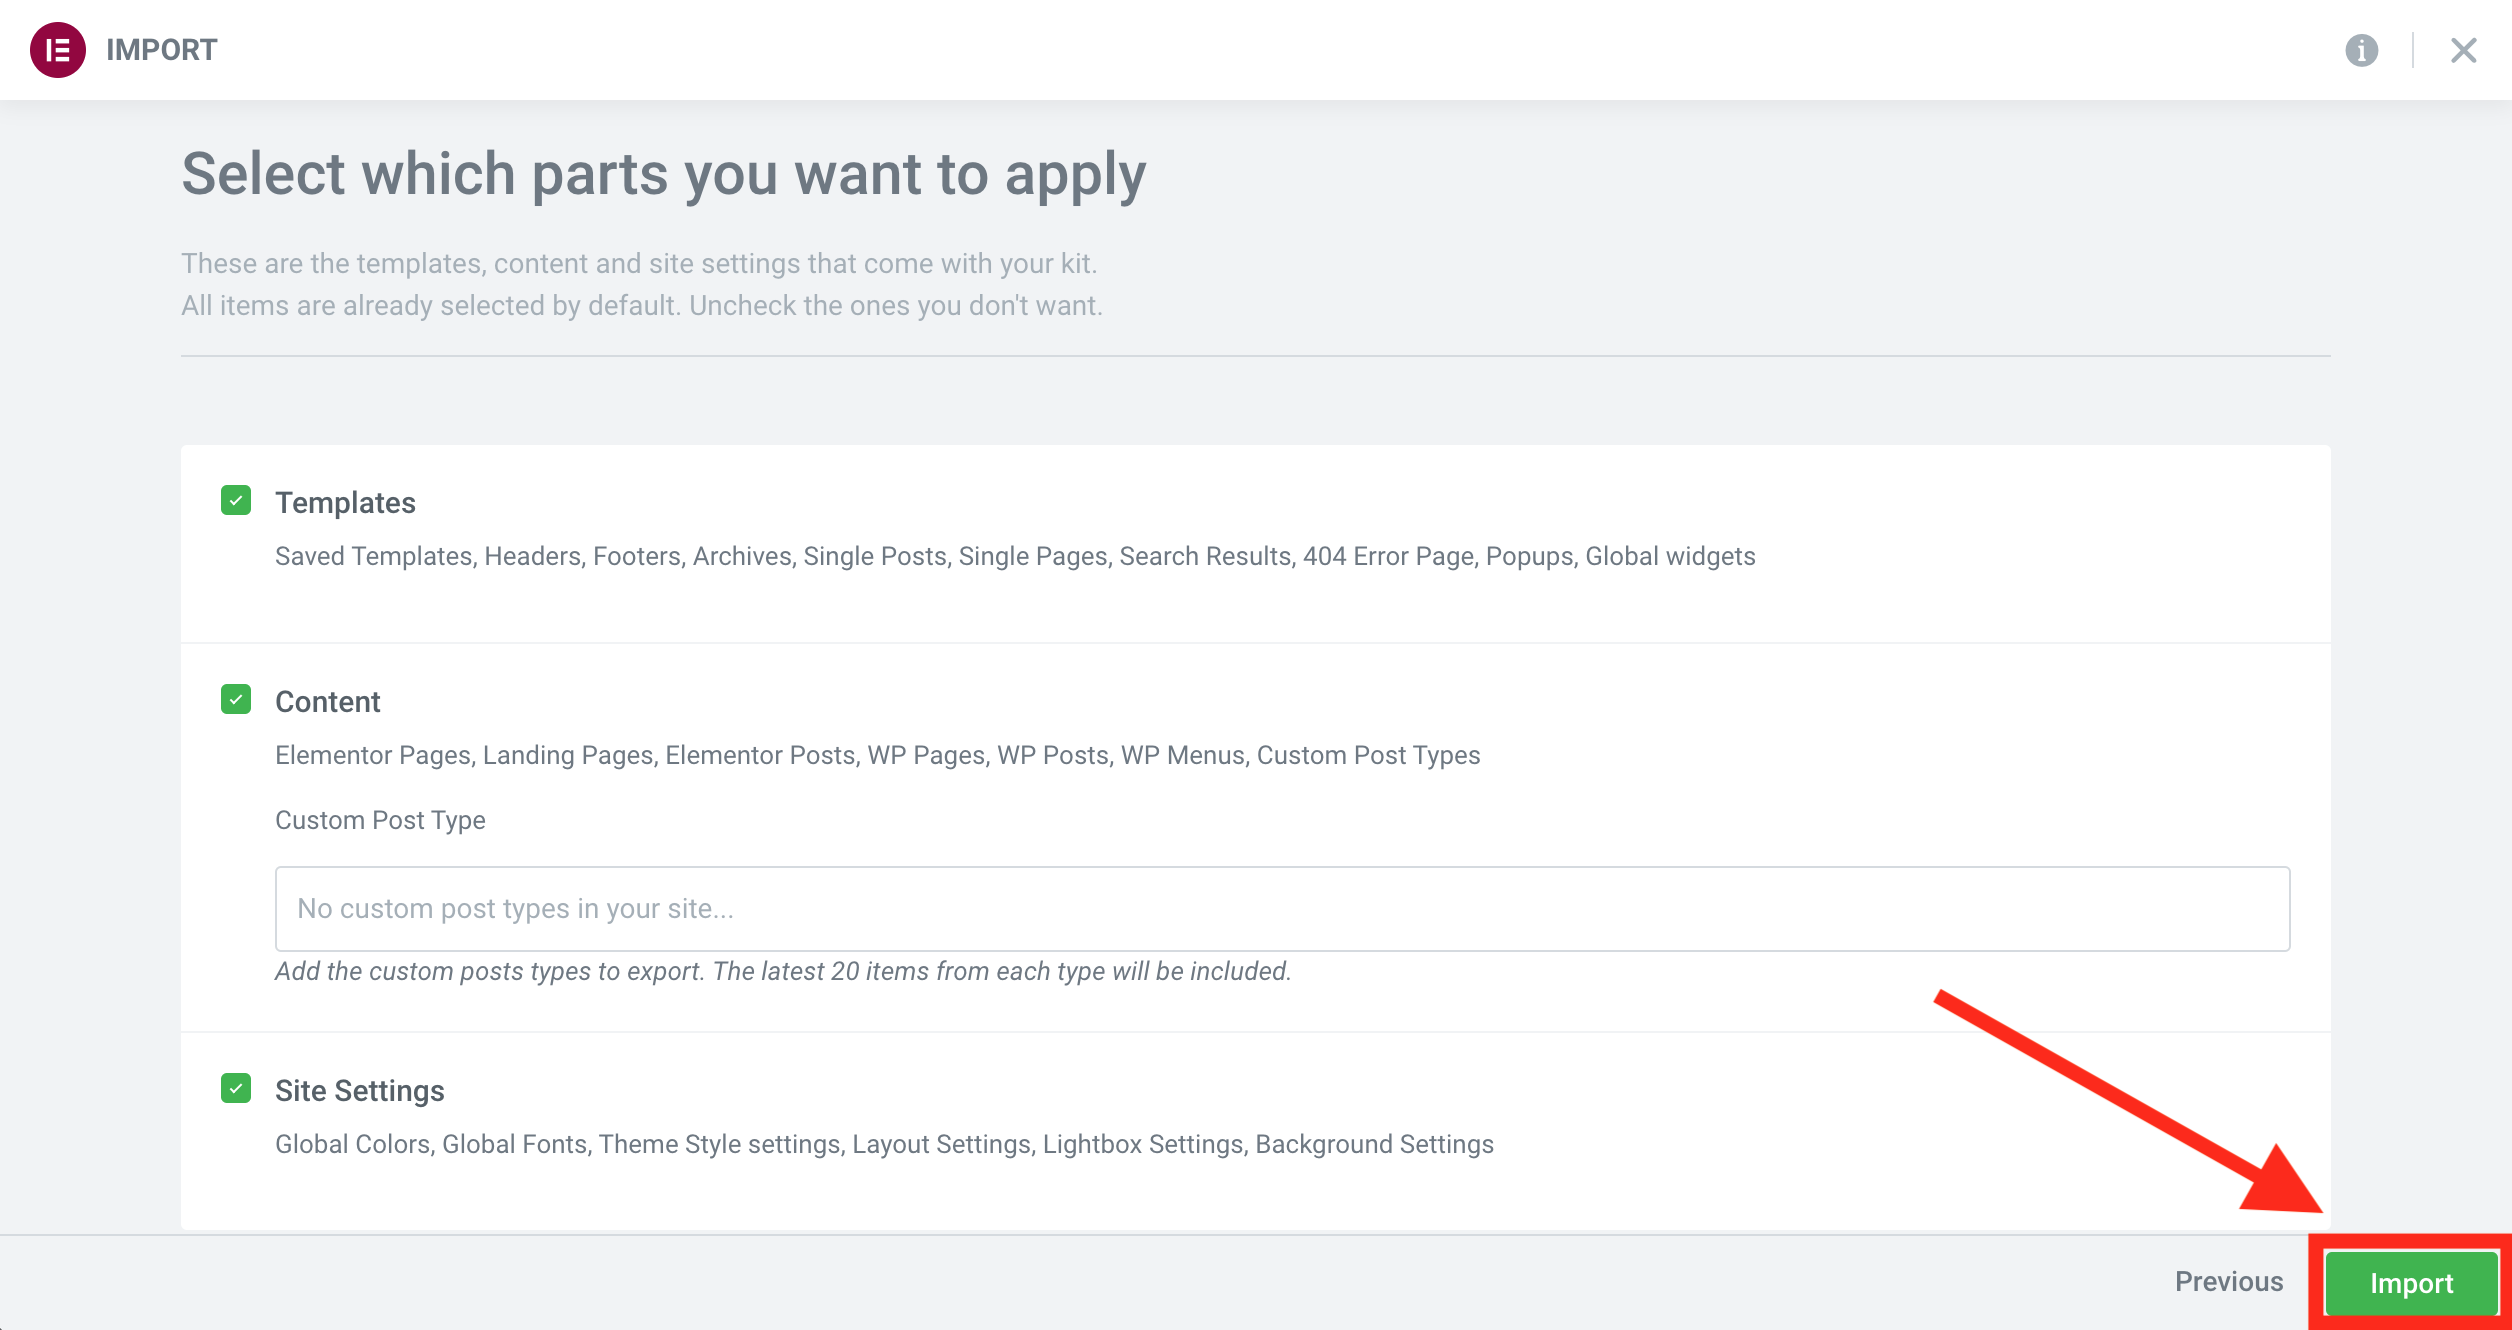
In the next tab, you’ll have to choose which parts of the theme kit you want to import. Make sure you all three elements are selected:
- Templates (this will contain the headers, footers, single page, etc. templates)
- Content (this will contain the prebuilt front page and lead magnet page)
- Site settings (this will contain the font size settings, color settings, etc.)
If all three are ticked, click Import:
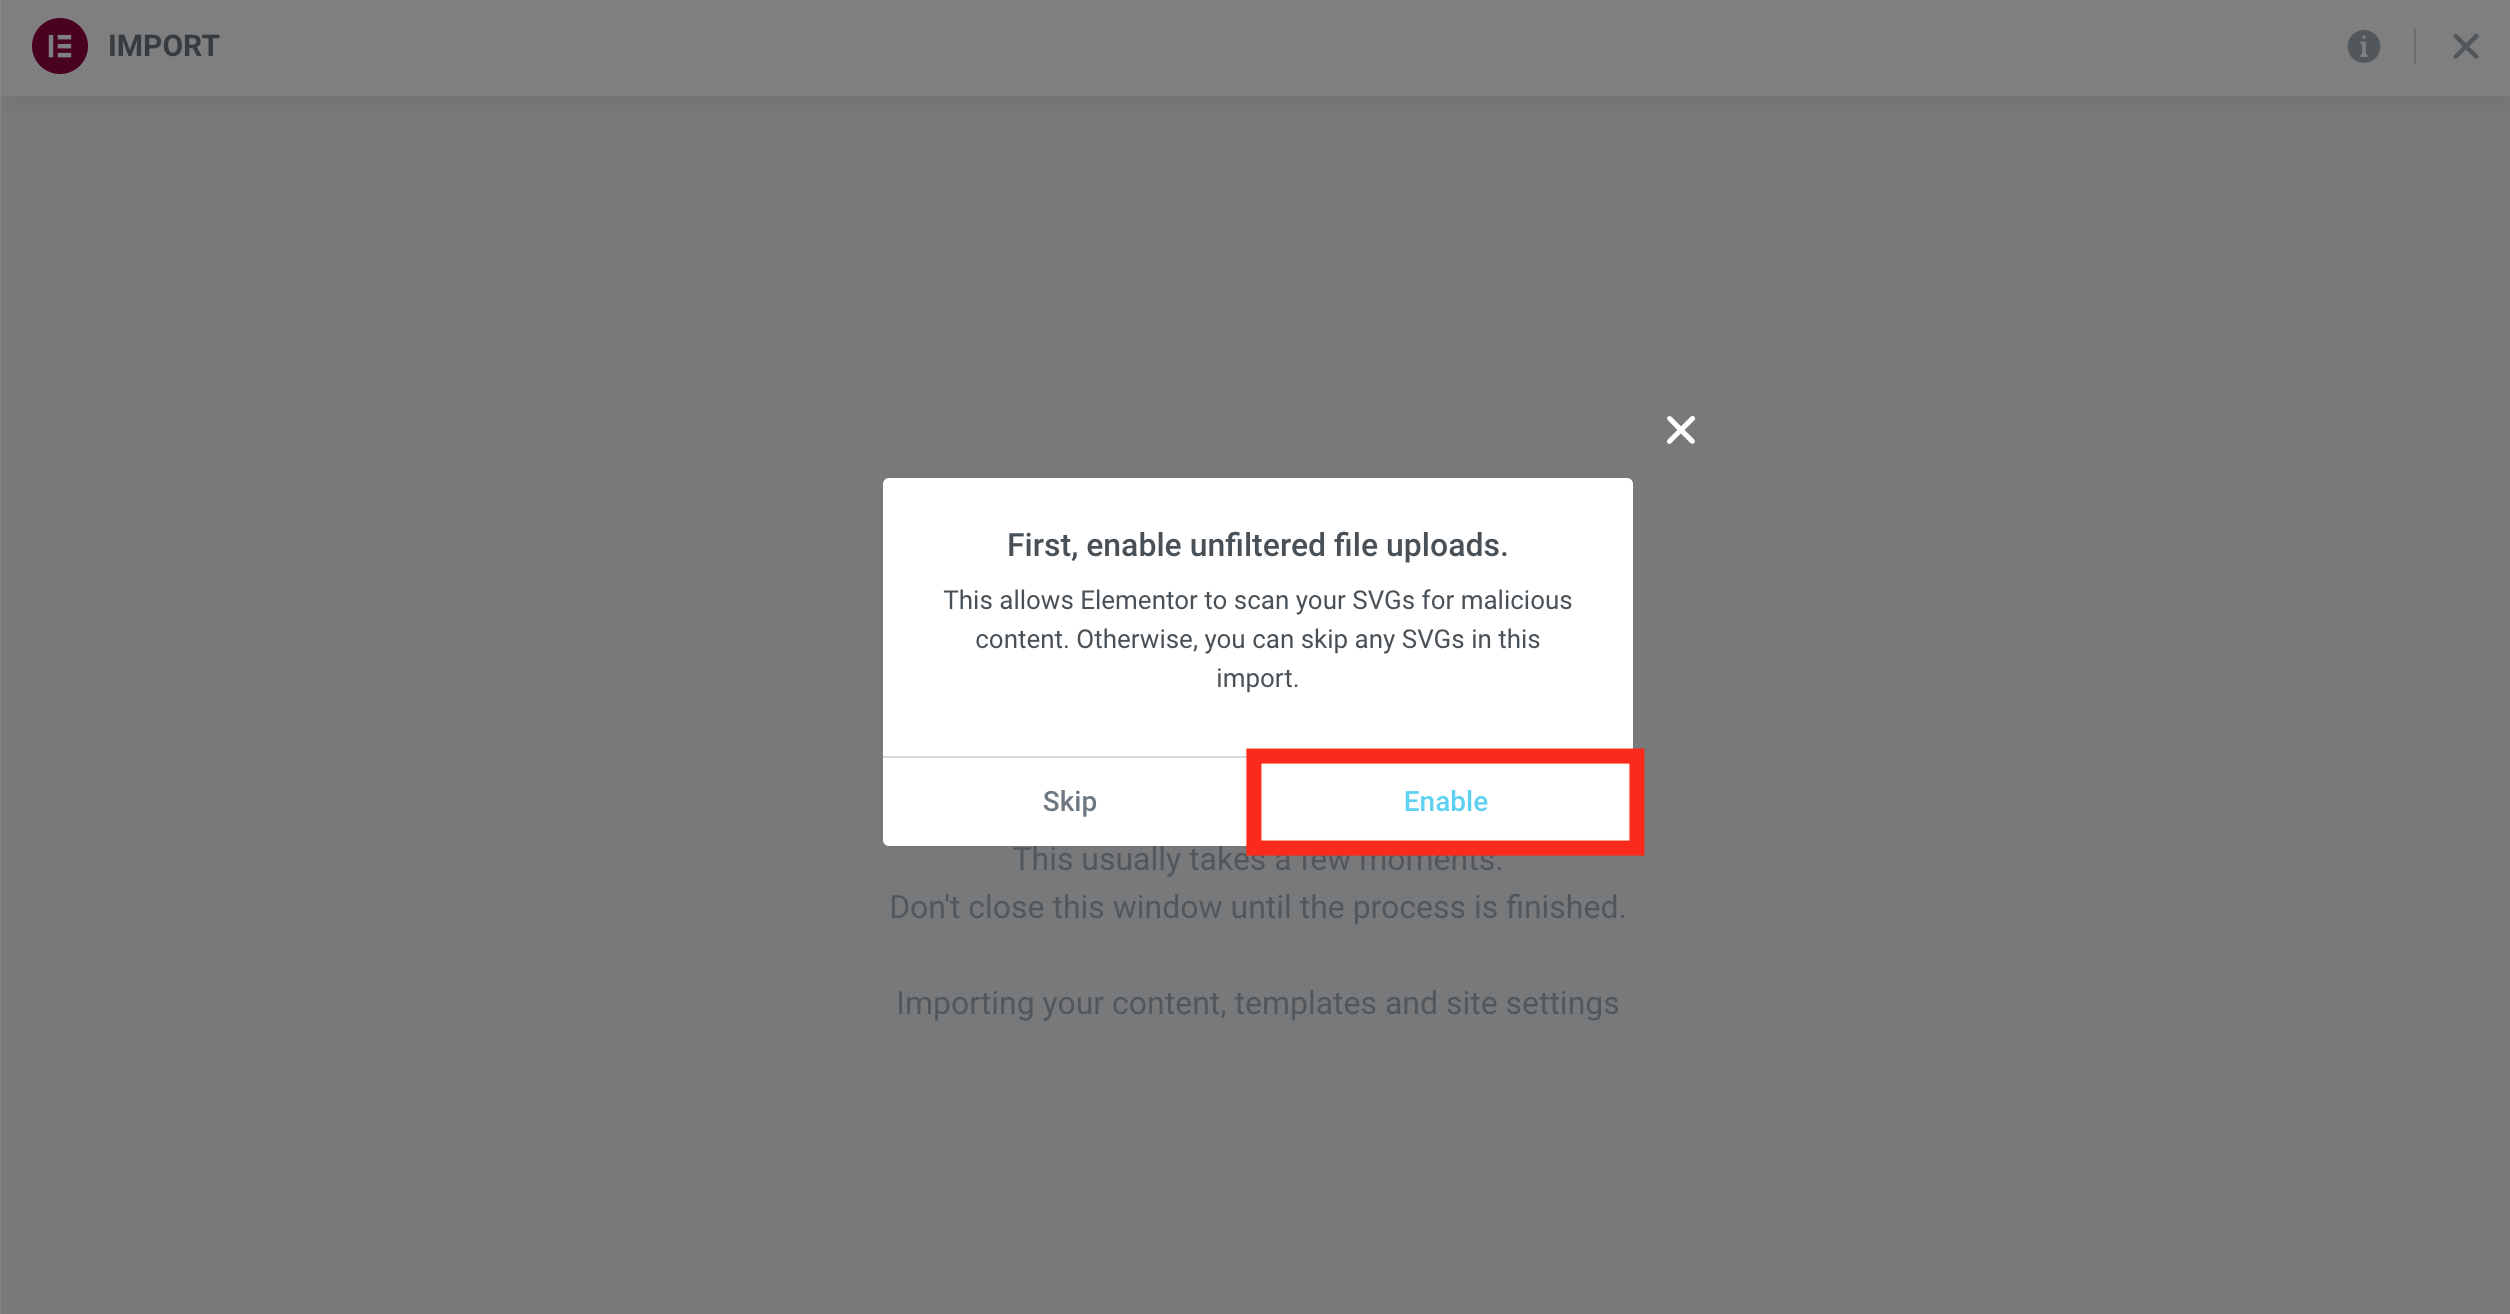
During the process you might get popups, warnings, error messages, etc. For example I got this “enable unfiltered file uploads svg elementor import error message.” Always consider the message and Enable or Skip. (This time I enabled the file uploads.) Sometimes, it will ask you to contact your hosting service provider — if you have used Elementor’s WEBSITE BUILDER + HOSTING offer, this won’t be an issue. In other cases, if you encounter this problem, do as they ask: create a screenshot of the error message and ask your hosting service provider’s help.
Anyways: if you got through this part, then you will see this! Your new theme kit is live! Great times!

STEP #4: Activate the SEO for Elementor theme kit elements!
If you started the whole website setup from scratch and if you use the exact same version number of Elementor that I use in this artcicle, then you are in luck — you can skip this step and you’ll already see your brand new SEO-friendly theme activated. Just check the frontend:
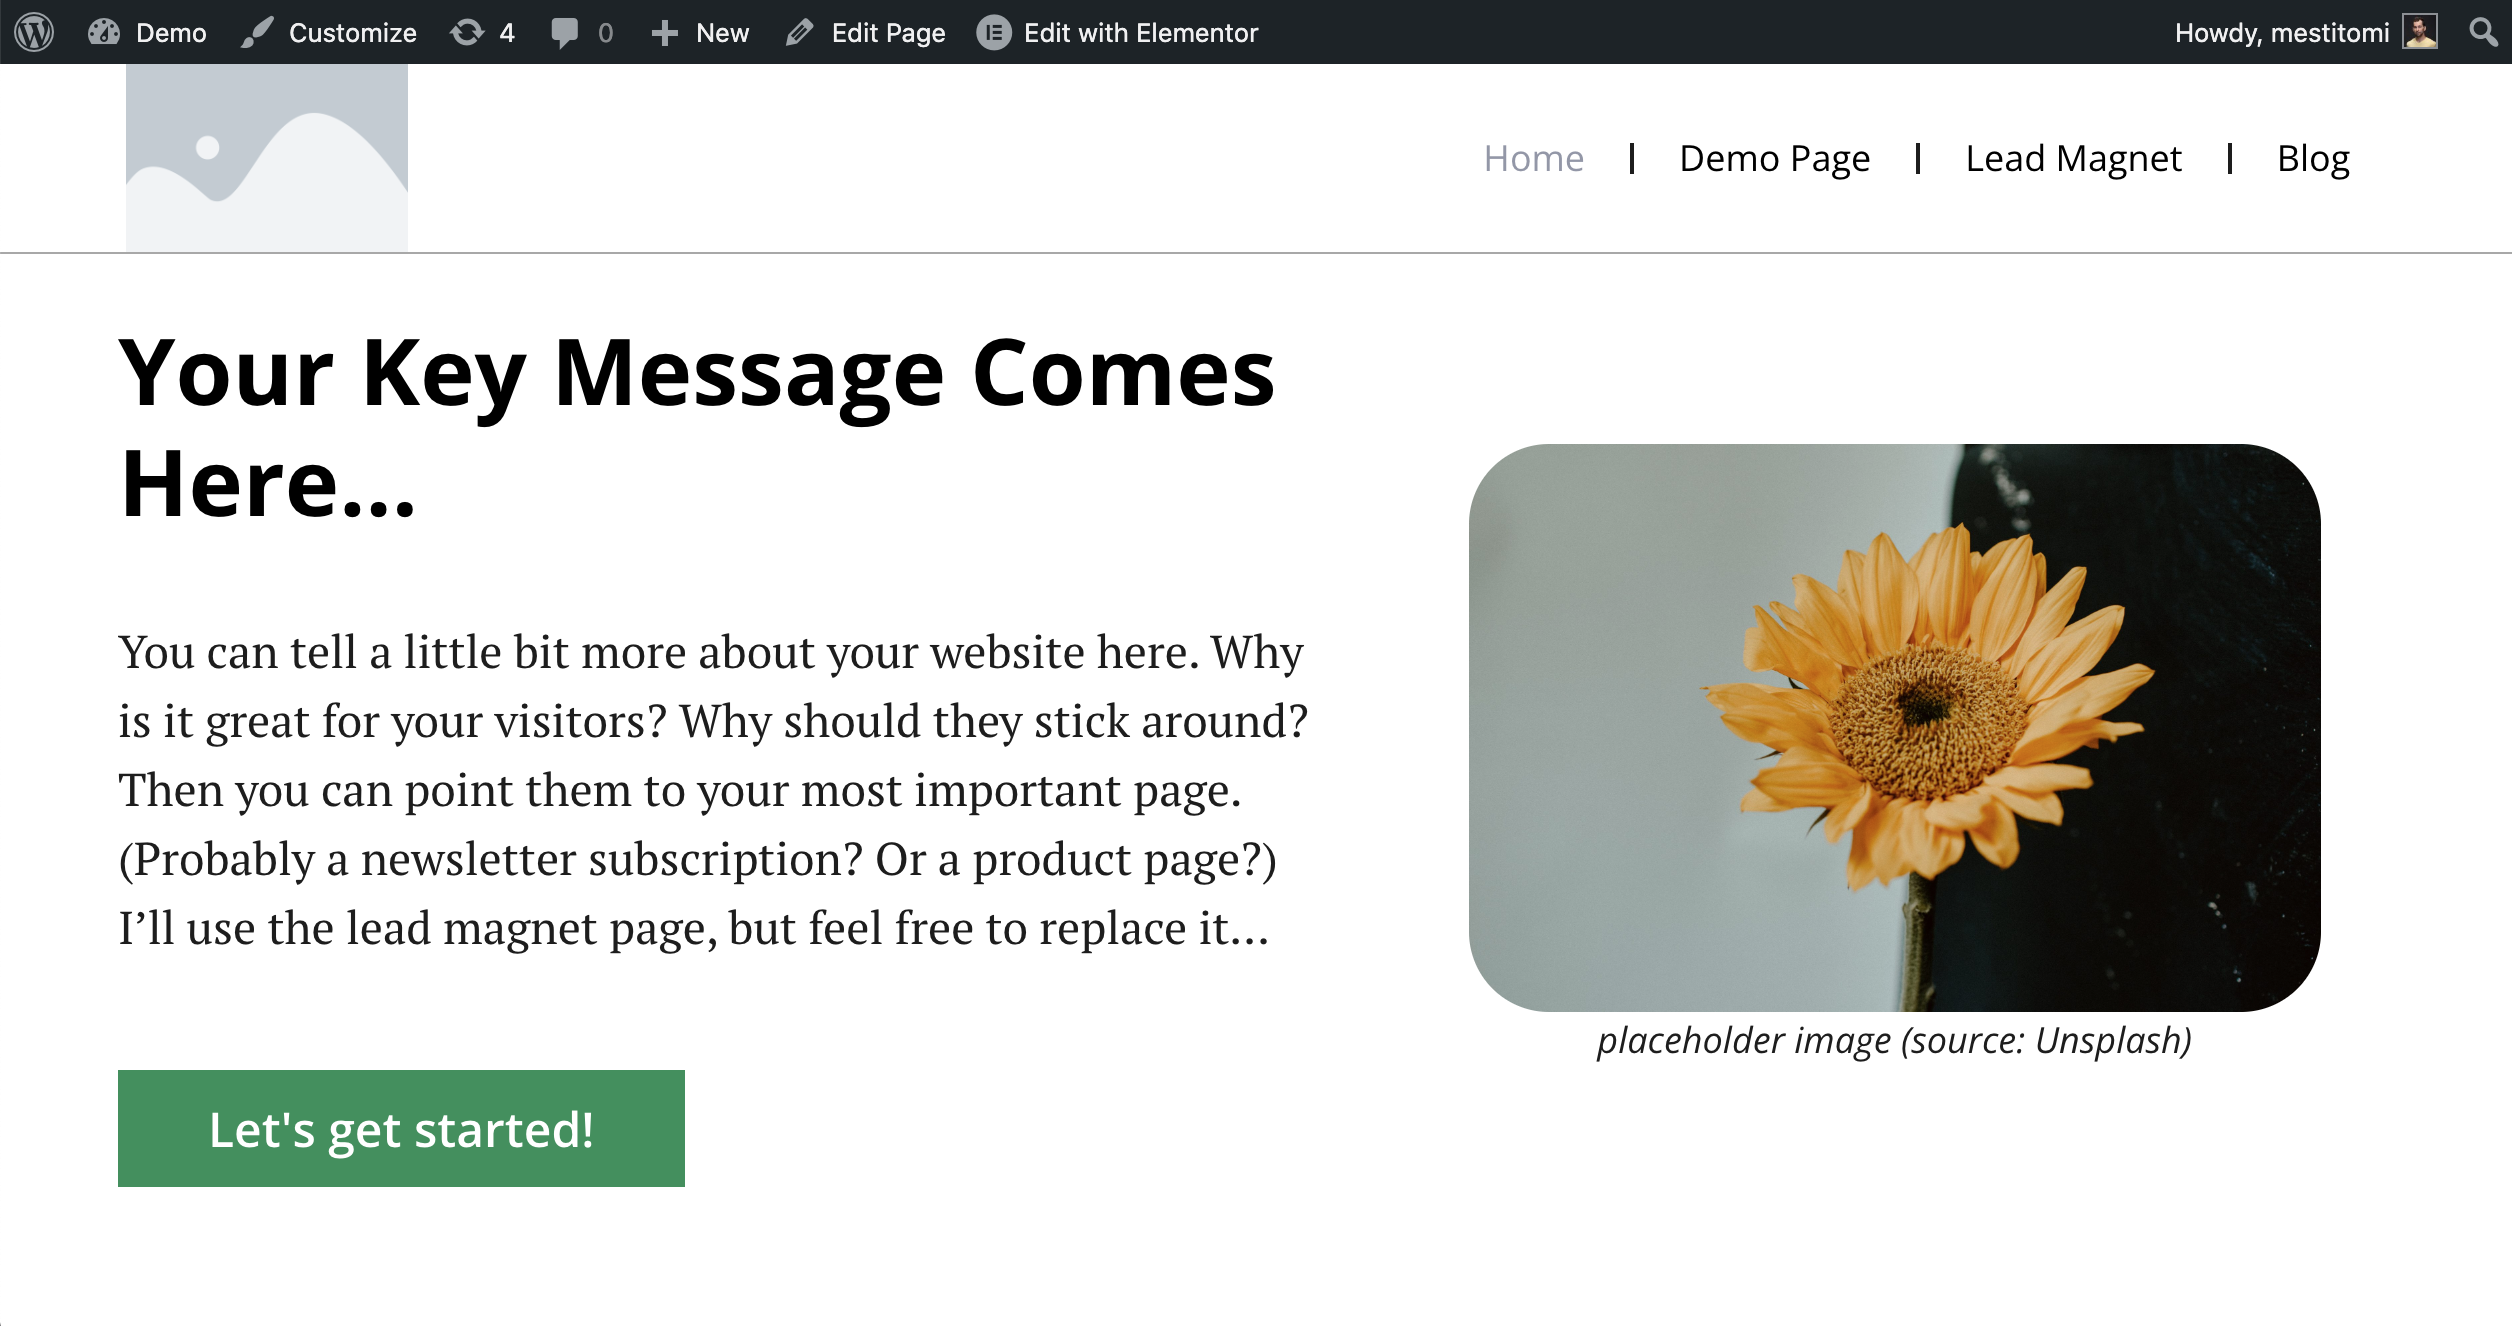
Sweet!
If you are less lucky, you’ll have to take an extra step and activate the theme kit elements first.
Just follow my lead:
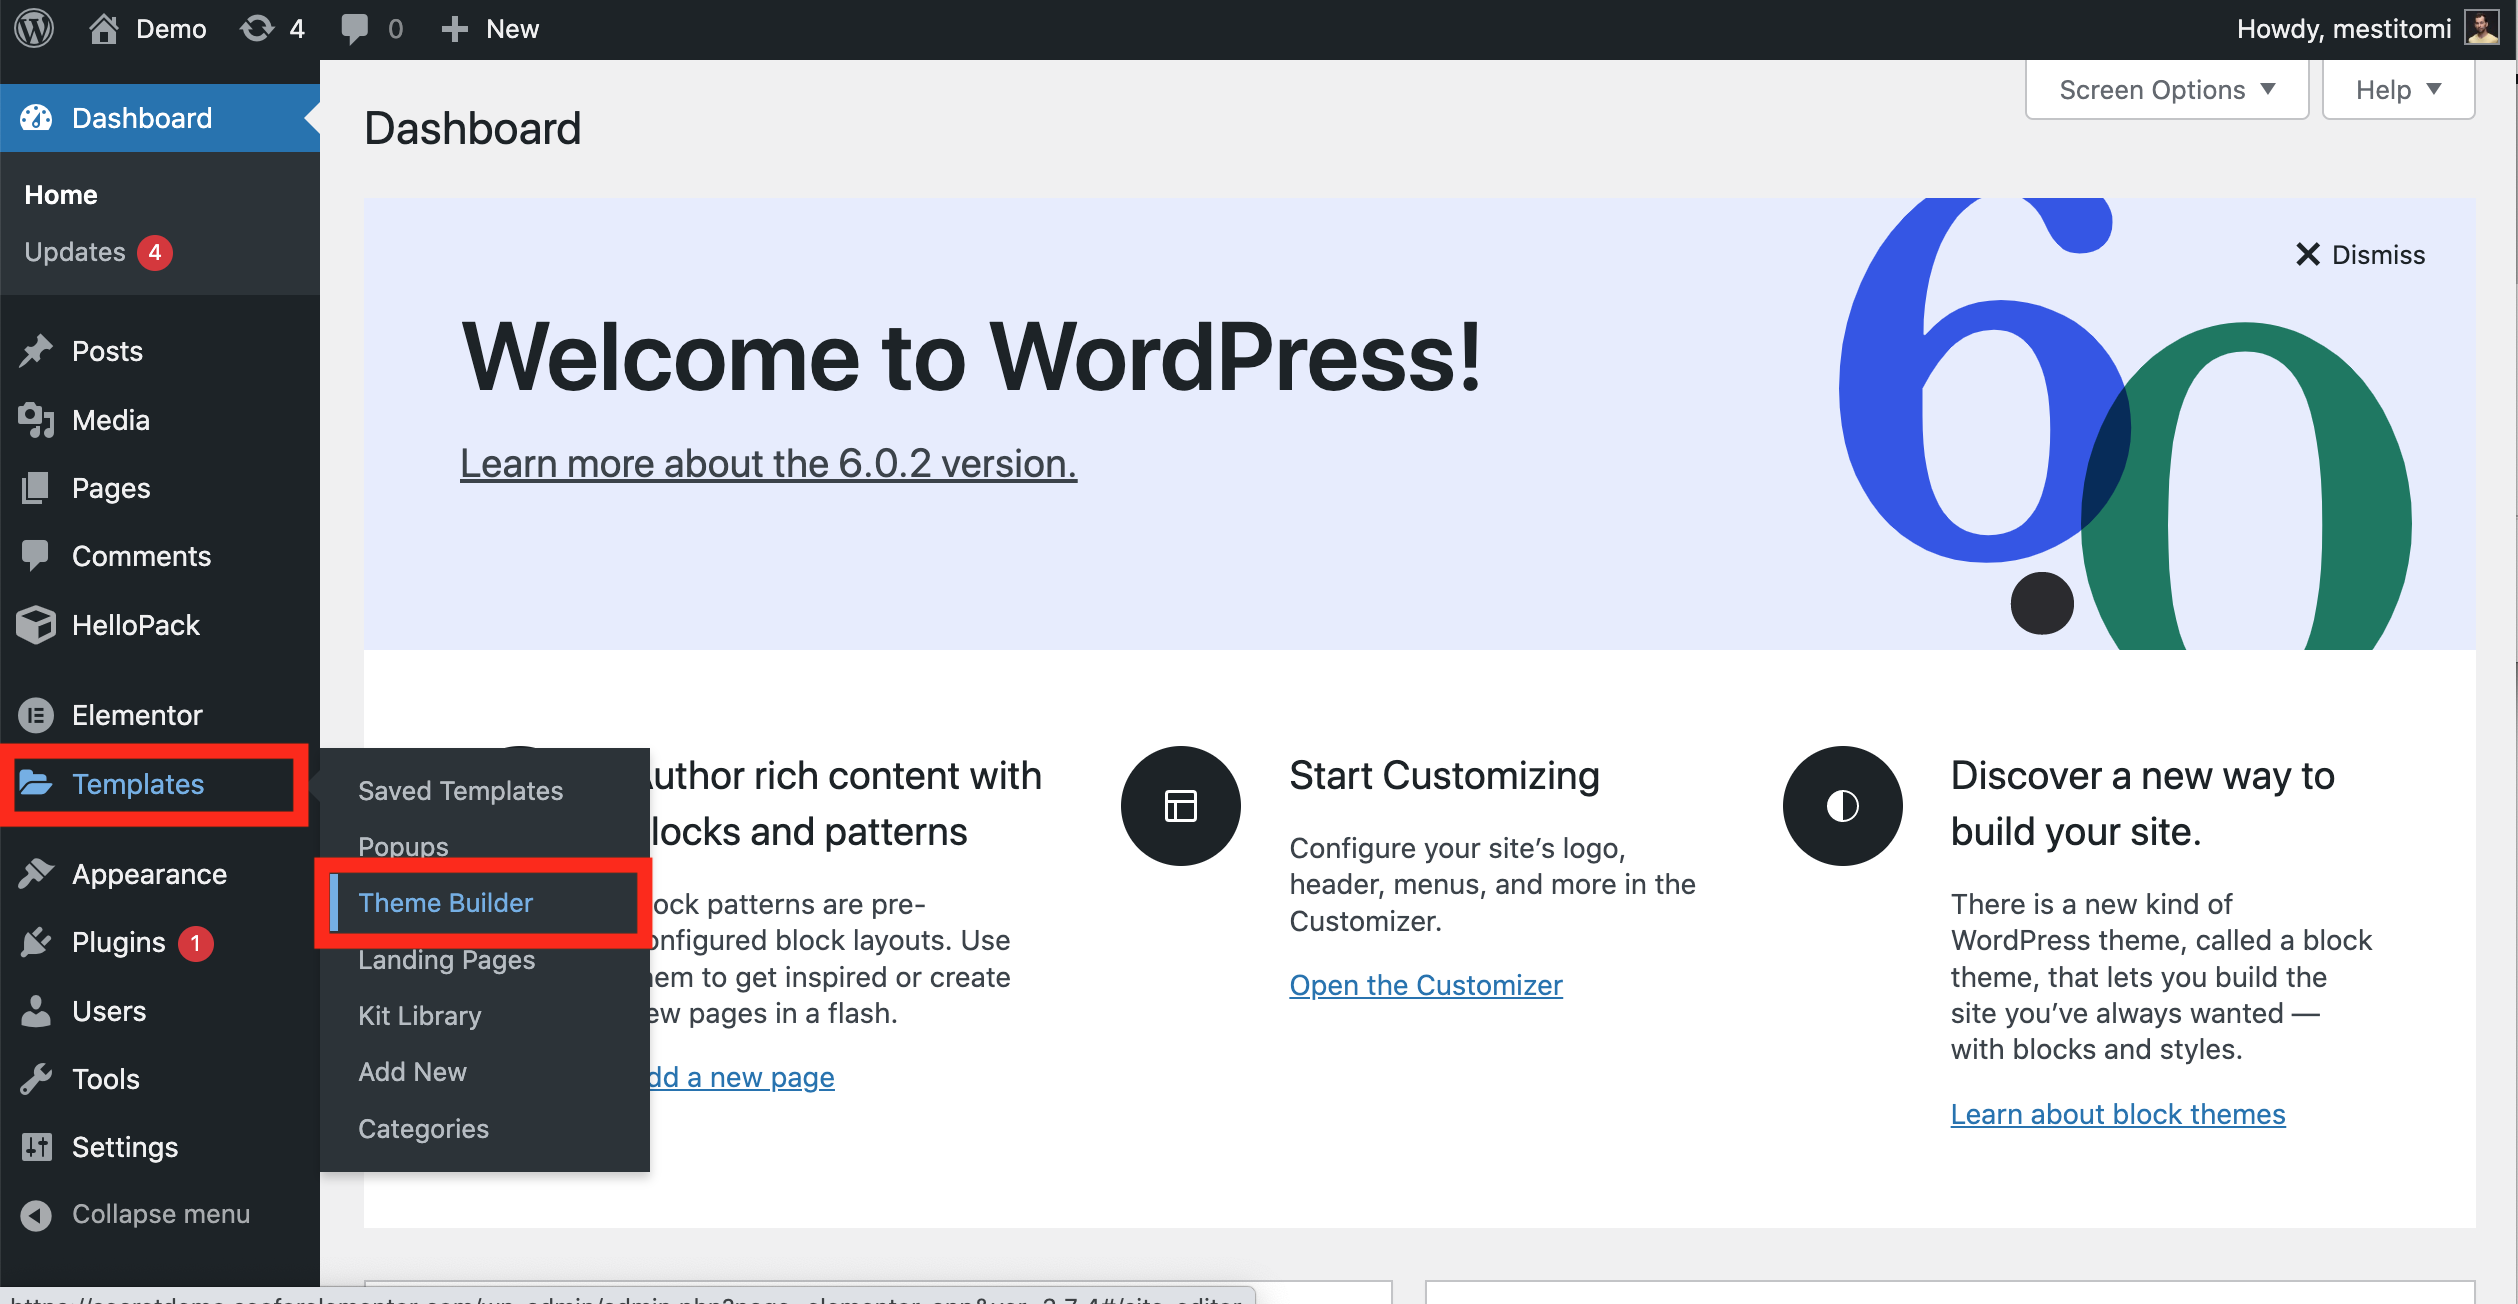
STEP #4.1: Open the Theme Builder
Just go back to your admin surface and click Templates >> Theme Builder.
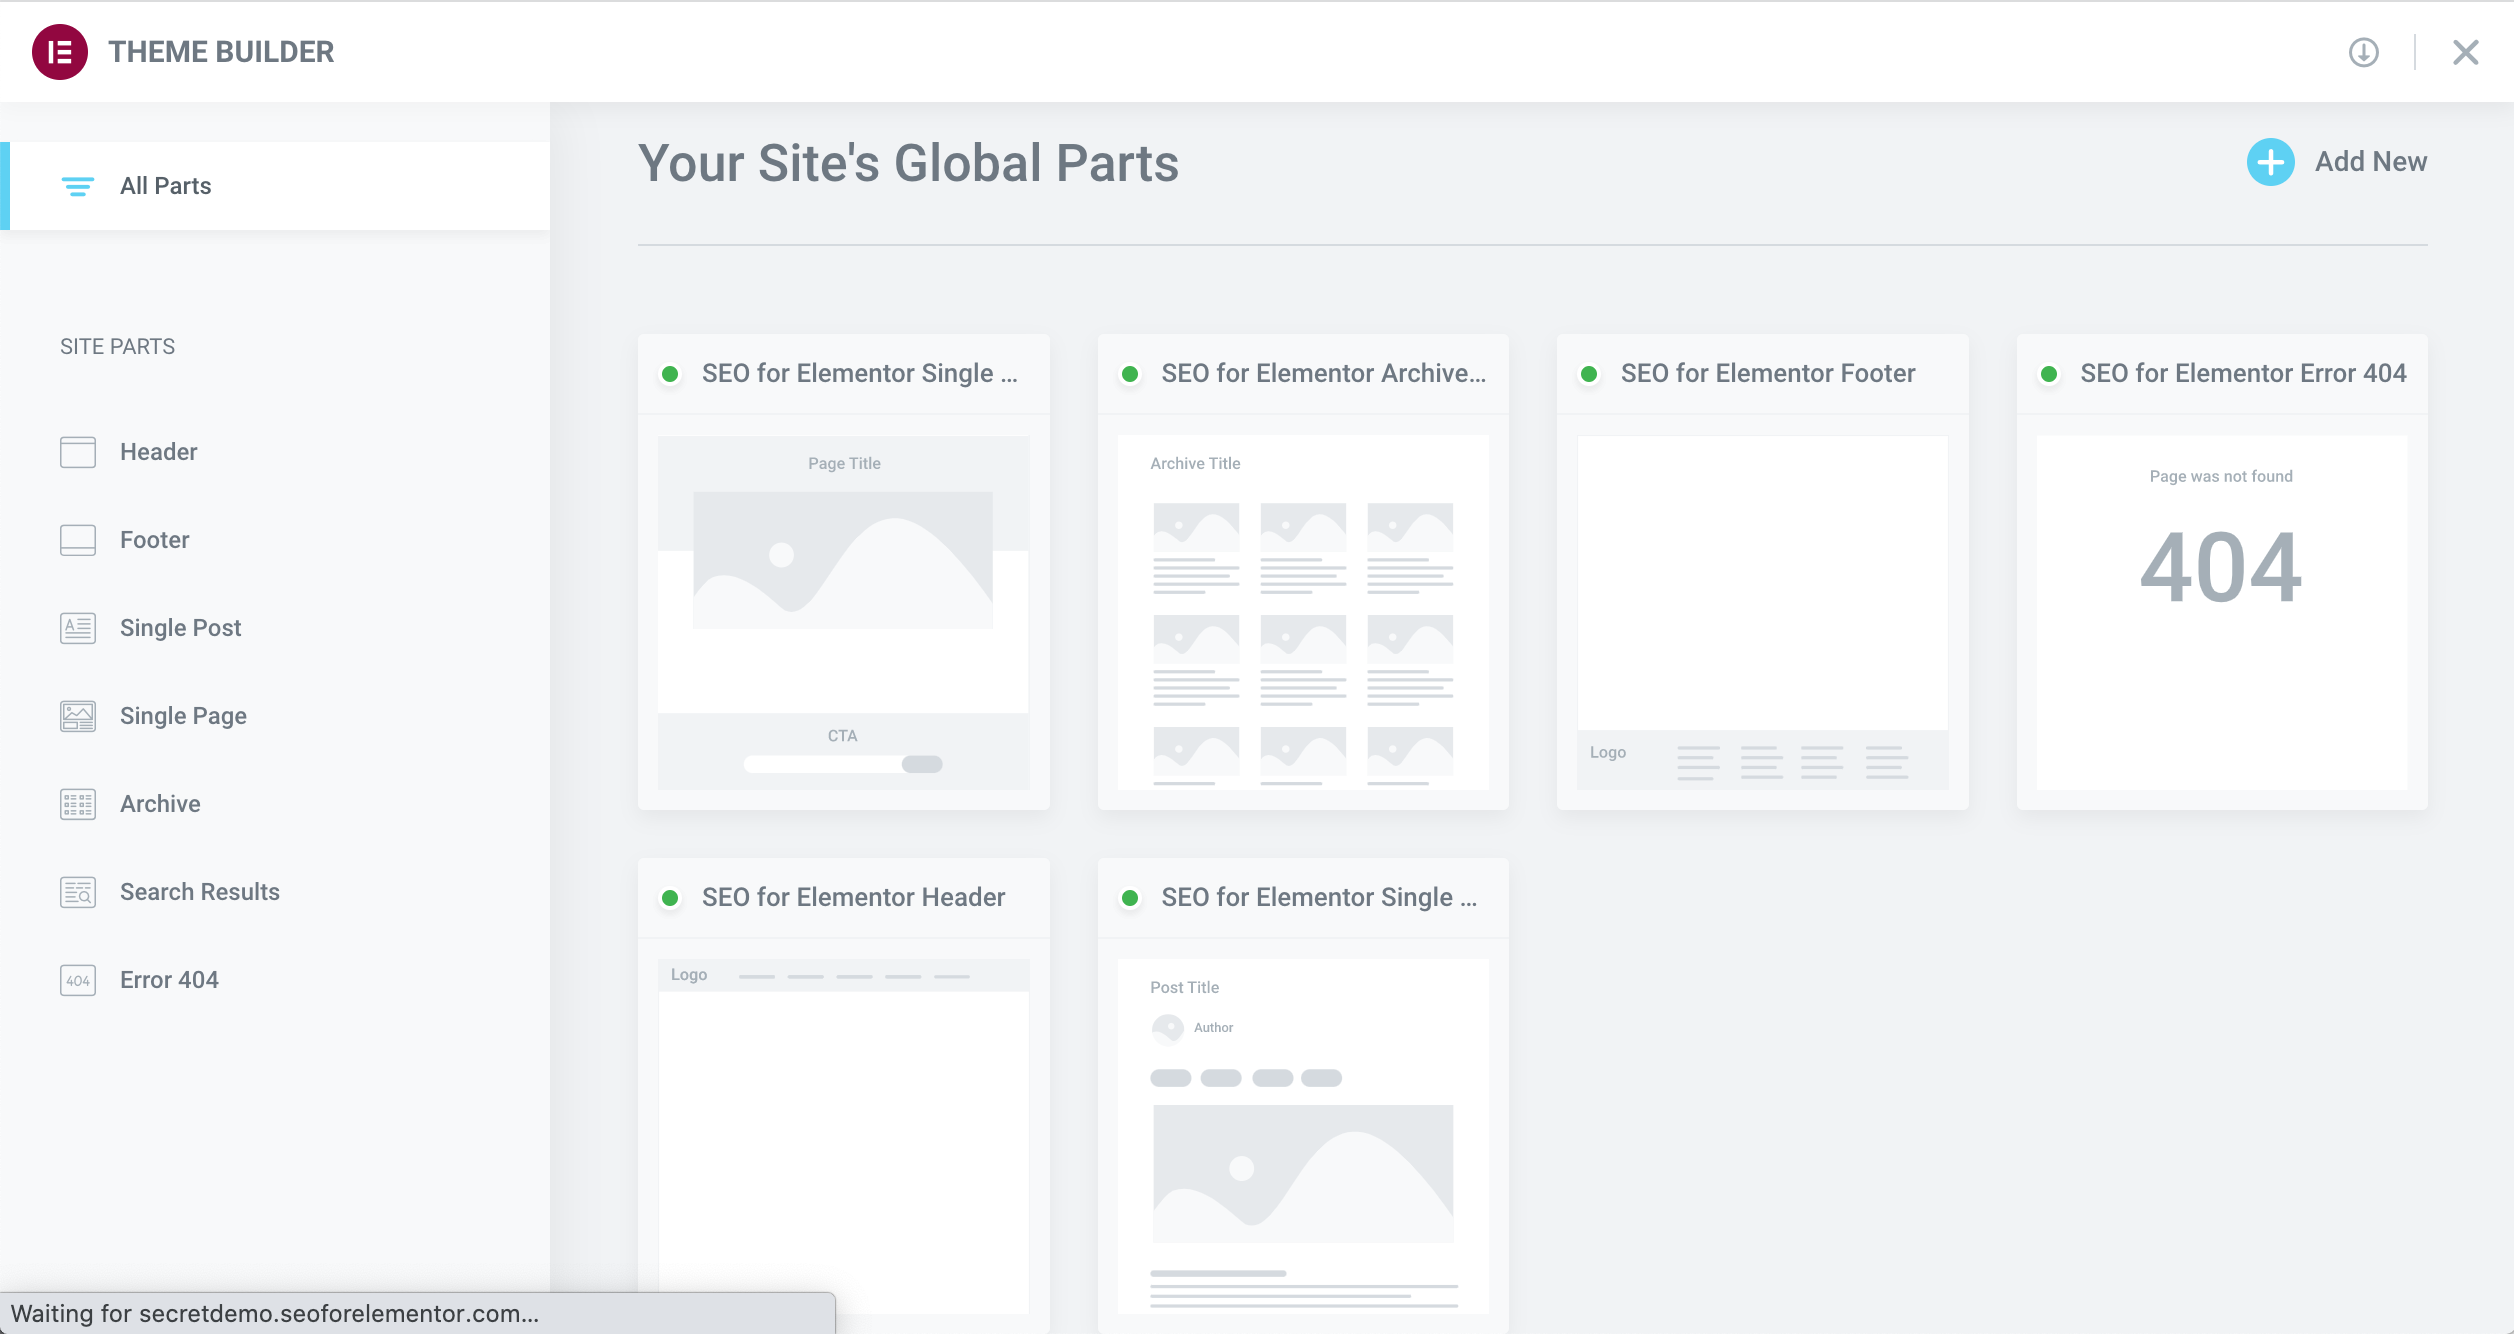
This will land you here — it’s called the “New Theme Builder“. (If you don’t see this, you’ll see a popup instead that says “Meet the New Theme Builder: More Intuitive and Visual Than Ever” — click that.)
STEP #4.2: Find the SEO for Elementor templates…
Here you are looking for the templates that names start with “SEO for Elementor”.
If you see green dots next to them, you are good and you can skip to STEP #5.
If you see grey dots, you’ll still need to activate the templates. (In that case, probably you’ll see other templates here that have green dots next to their name. If so, it means that you already have an active theme kit on your Elementor-based website. We need to replace this in order to use this new theme kit.)
STEP #4.3: Set the display conditions to one of the SEO for Elementor templates…
If you see grey dots next to the “SEO for Elementor…” templates, click any of them. For the sake of demonstration, I’ll click the “SEO for Elementor Single Page” one.
You’ll see this window below:
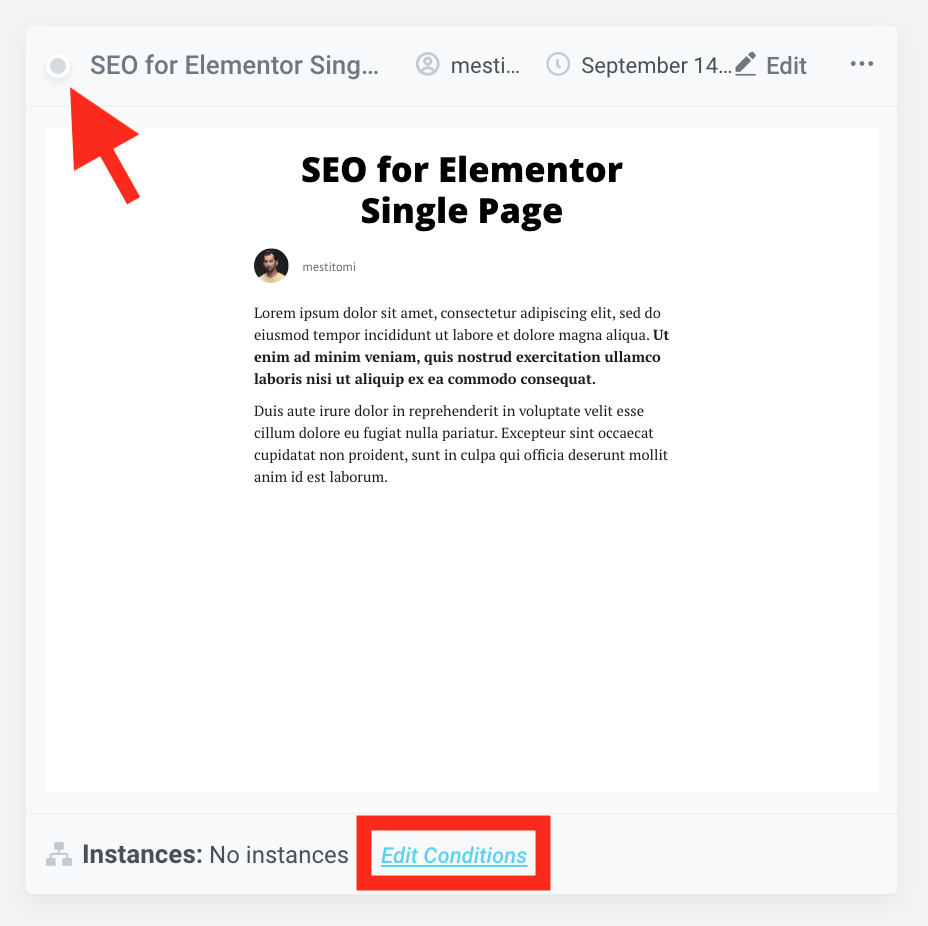
To turn our grey dot into green, we’ll have to activate this template and for that you’ll have to click Edit Conditions.
The coming part is very intuitive again. You’ll have to add a condition that tells Elementor and WordPress that on which part of your website do you want to use this template… Click ADD CONDITION:
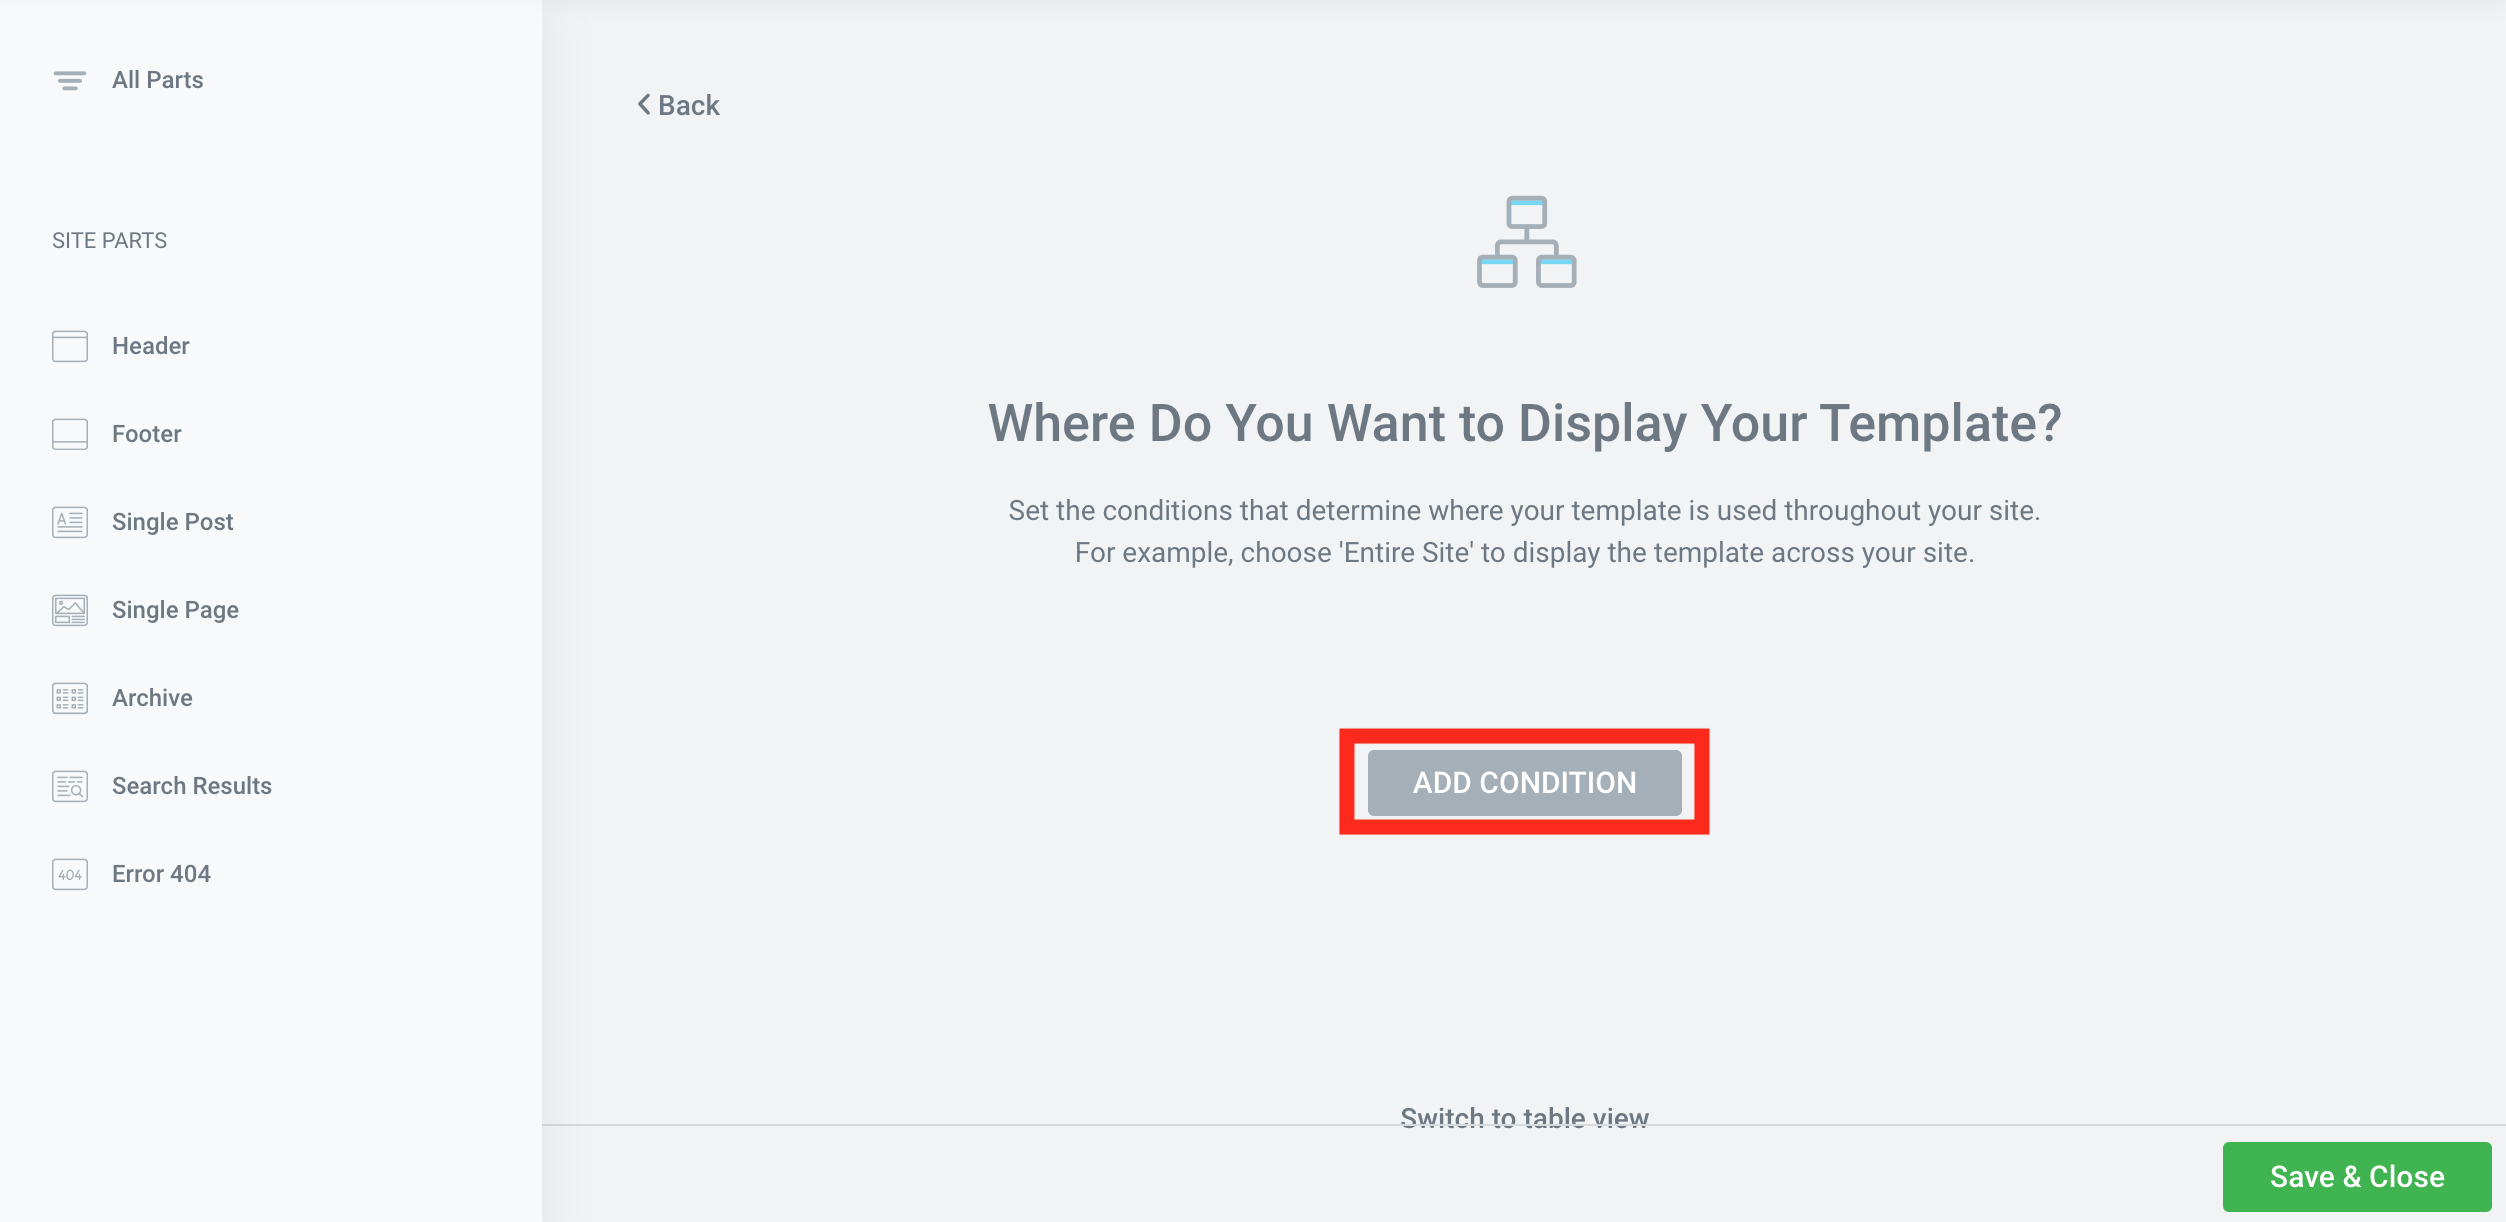
Since this is the SEO for Elementor *Single Page* template, I’ll set my condition to INCLUDE >> Pages. Which effectively means that this template will be used on all pages.
Note: in wordpress lingo our webpages can be posts and pages and there’s a difference between them. Don’t mix theme up! For pages set pages, for posts set posts.
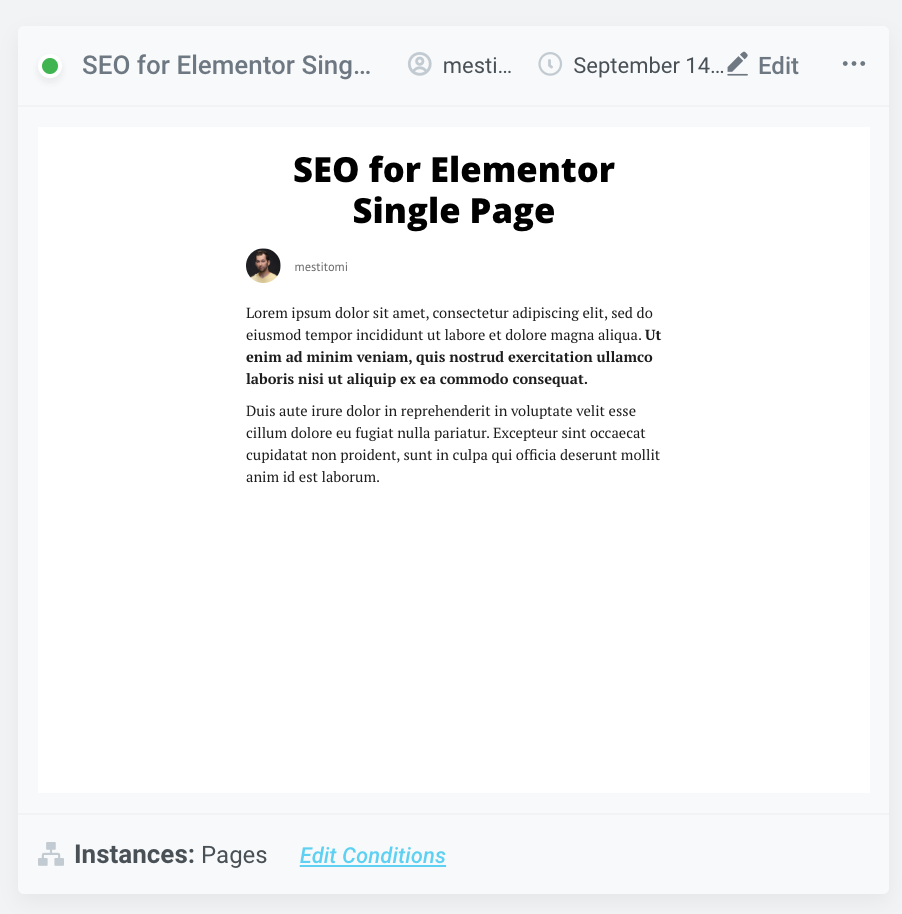
Once done, click Save & Close.

Your template is now activated — and it’ll have the green dot in the top left corner:
STEP #4.4: Set the display conditions to all of the SEO for Elementor templates…
Do this for all six templates that you have downloaded:
- SEO for Elementor Single Page (INCLUDE: Pages)
- SEO for Elementor Archive Page (INCLUDE: All Archives)
- SEO for Elementor Footer (INCLUDE: Entire Site)
- SEO for Elementor Error 404 (INCLUDE: 404 Page)
- SEO for Elementor Header (INCLUDE: Entire Site)
- SEO for Elementor Single Post (INCLUDE: Posts)
Follow common sense with the conditions. (But I added the settings above between paratheses.)
If all done correctly, you’ll see the green dots next to the right templates:
STEP #4.extra: Remove conflicting templates.
There’s a chance that you have already have a theme kit setup and you have conflicting conditions. In theory, Elementor should overwrite the old conditions with the new ones. But if it doesn’t, you’ll have to deactivate the old templates first. To do so, follow the same process as we have done above for activations — only this time remove the conditions. Then go back to STEP 4.1…
STEP #5: Fix the top menu
At this point, you really should see the SEO for Elementor templates activated and your website should look really similar to what you have seen on demo.seoforelementor.com.
If you don’t, go back to the previous steps and see whether you missed something.
Now, you’ll see some issues that you want to fix. More precisely some parts of the website that you want to customize.
Let’s start with the top menu!
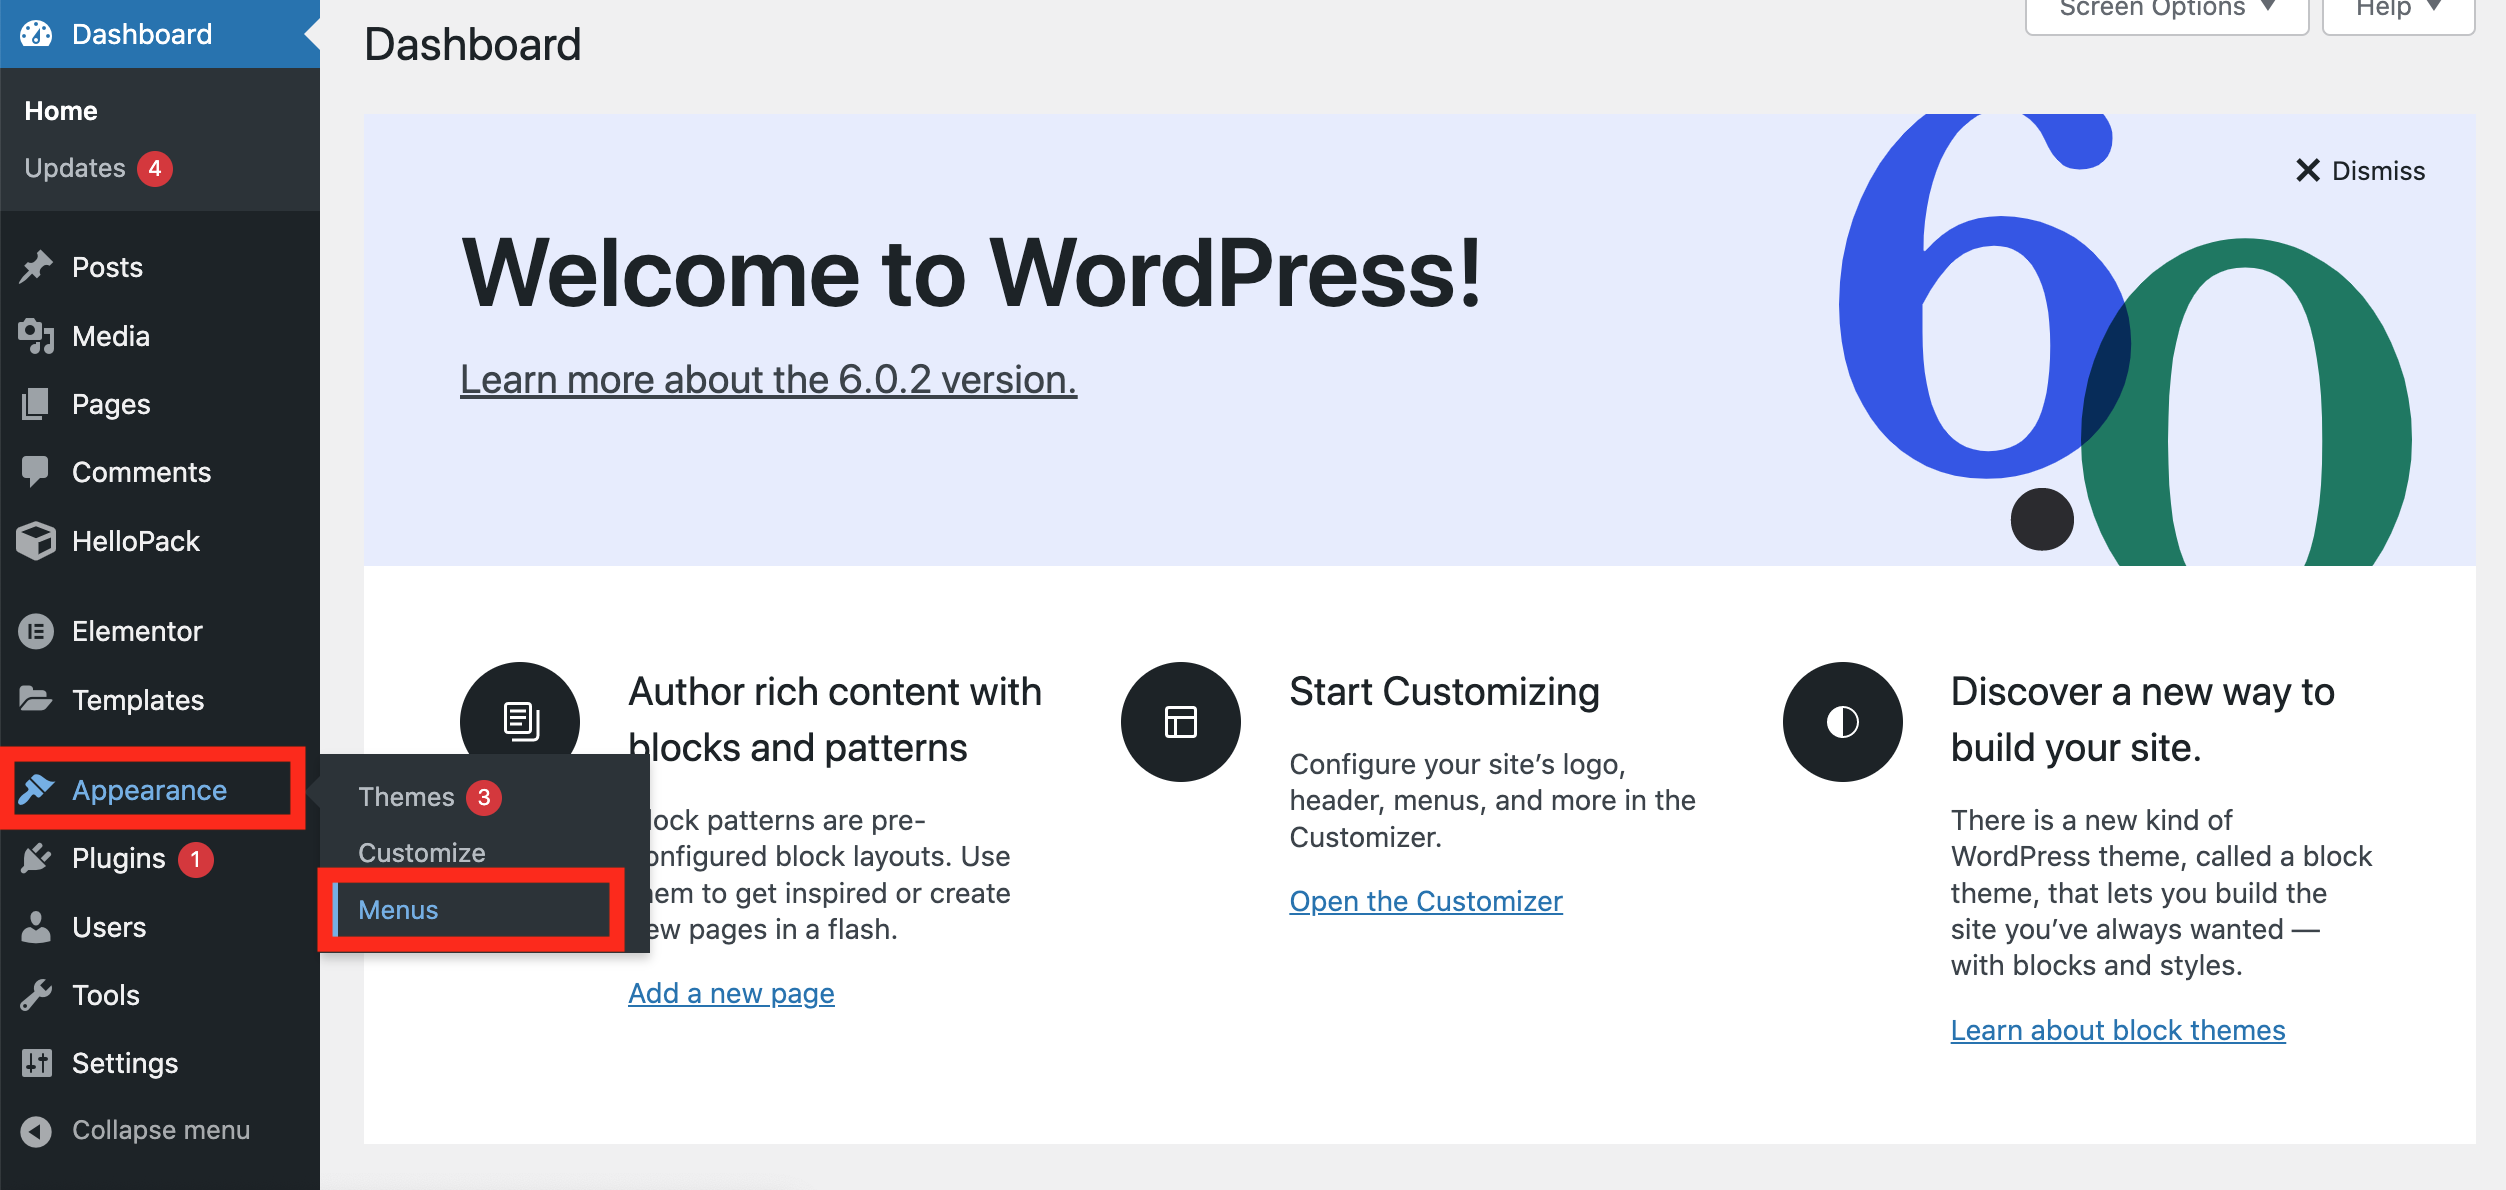
Go back to the admin surface and click Appearance >> Menus:
This will lead you to WordPress’ standard menu editor. It’s a nice and intuitive drag-and-drop surface, so I trust that you’ll be able to navigate your way around it. Once you are done with the setup, don’t forget to click Save Menu.
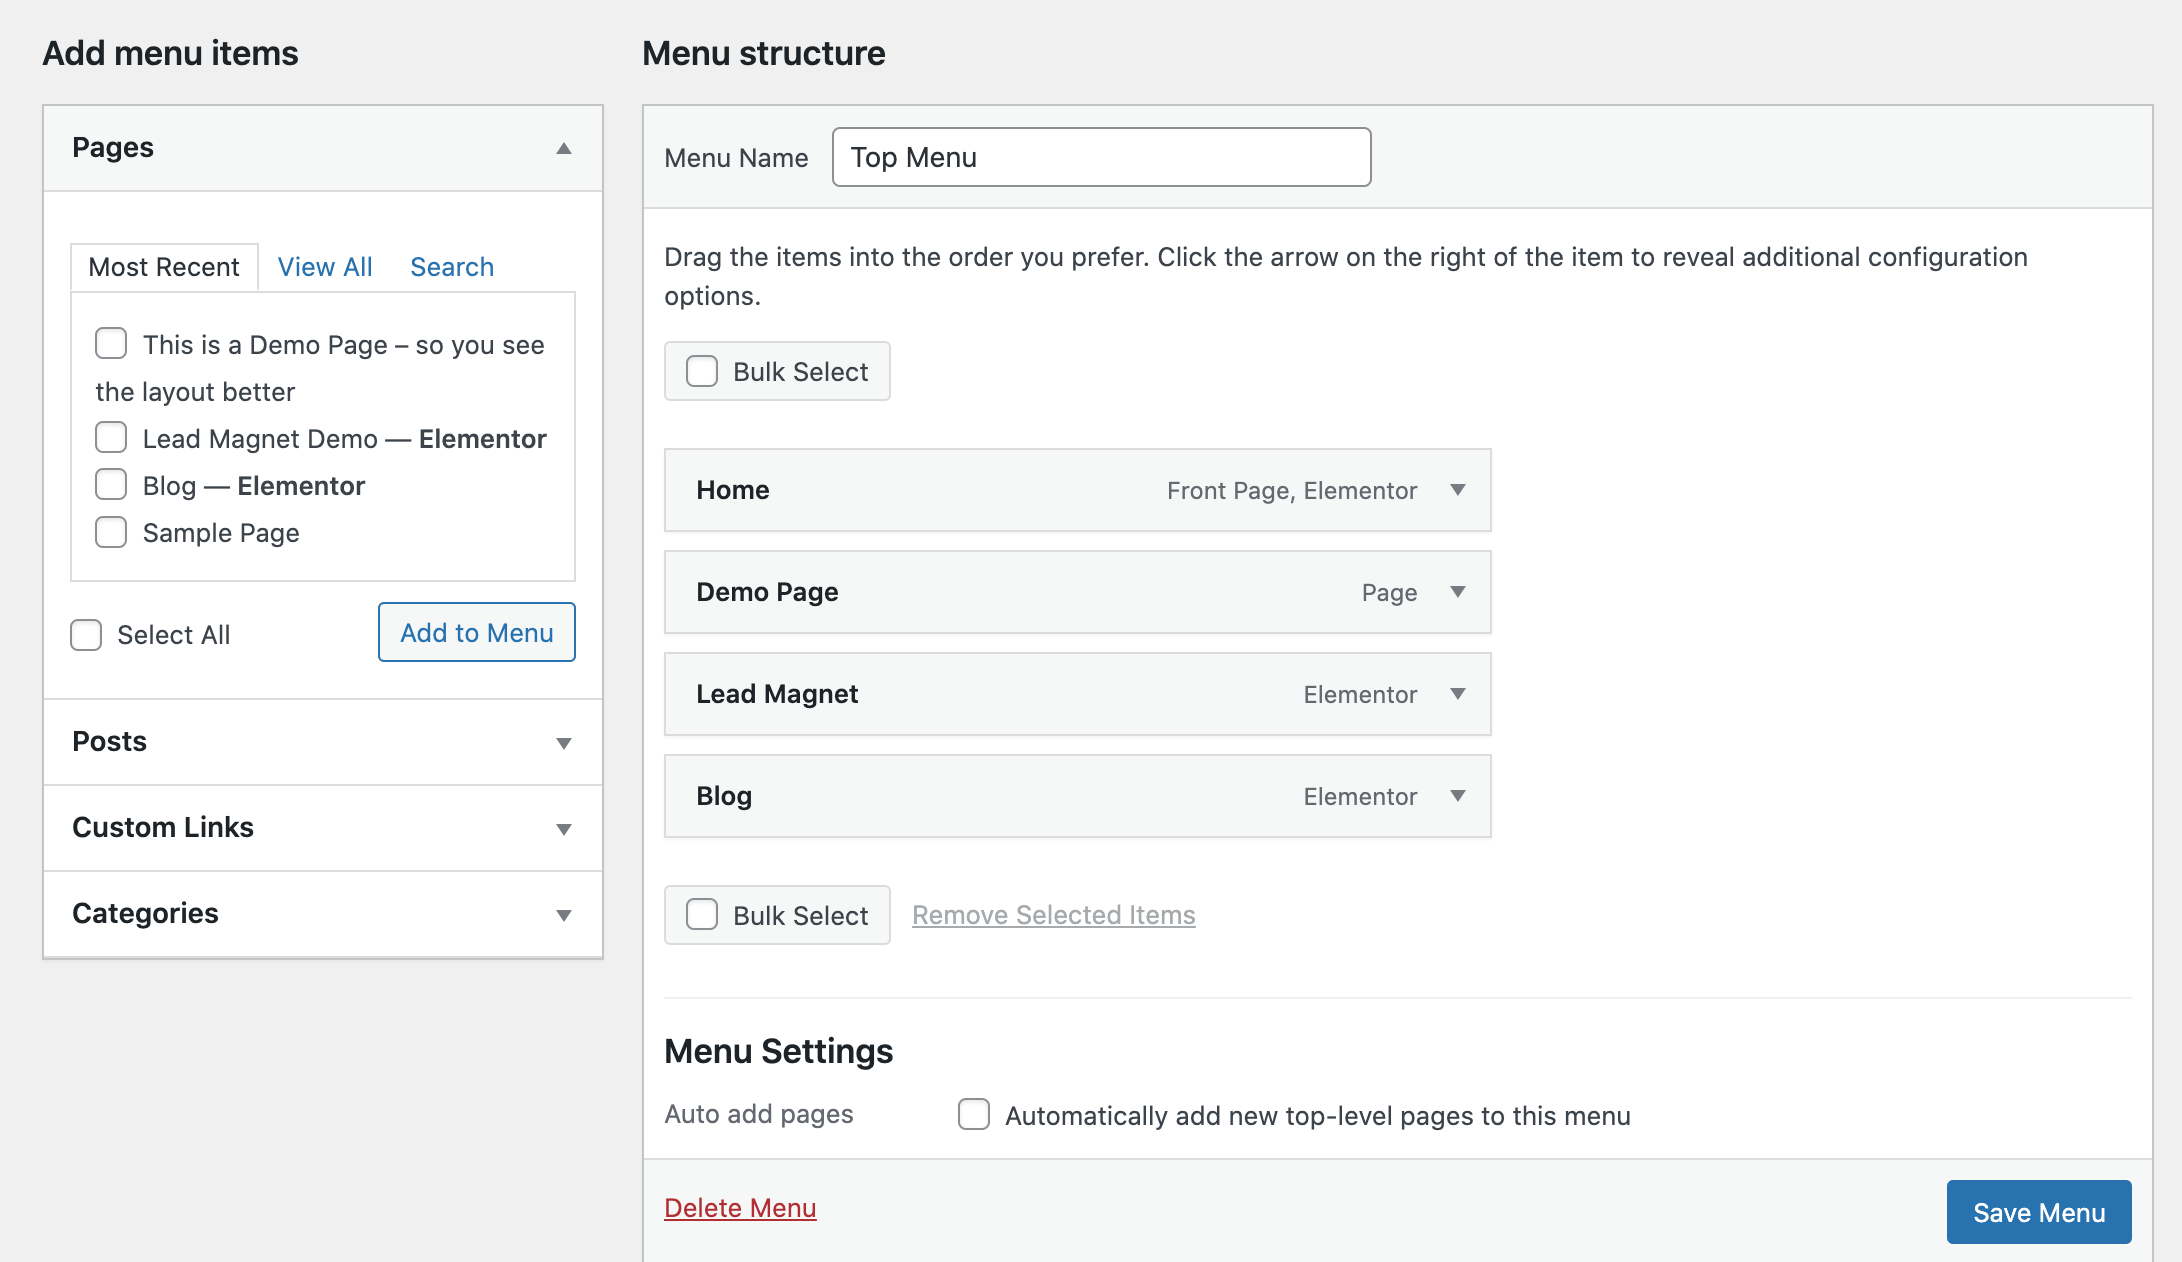
Once it’s done, your new top menu will appear on the front end.
STEP #6: Elementor Site Settings – Customize colors, logo, favicon, etc.
I bet you hate the greens I use on my website. And I’m also sure that you want to add your own logo in the top right corner. All these can be done in Elementor’s Site Settings menu.
You can find this menu if you go to your website’s frontend (you have to be logged in of course) and on the black top bar you select Edit with Elementor >> Site Settings.
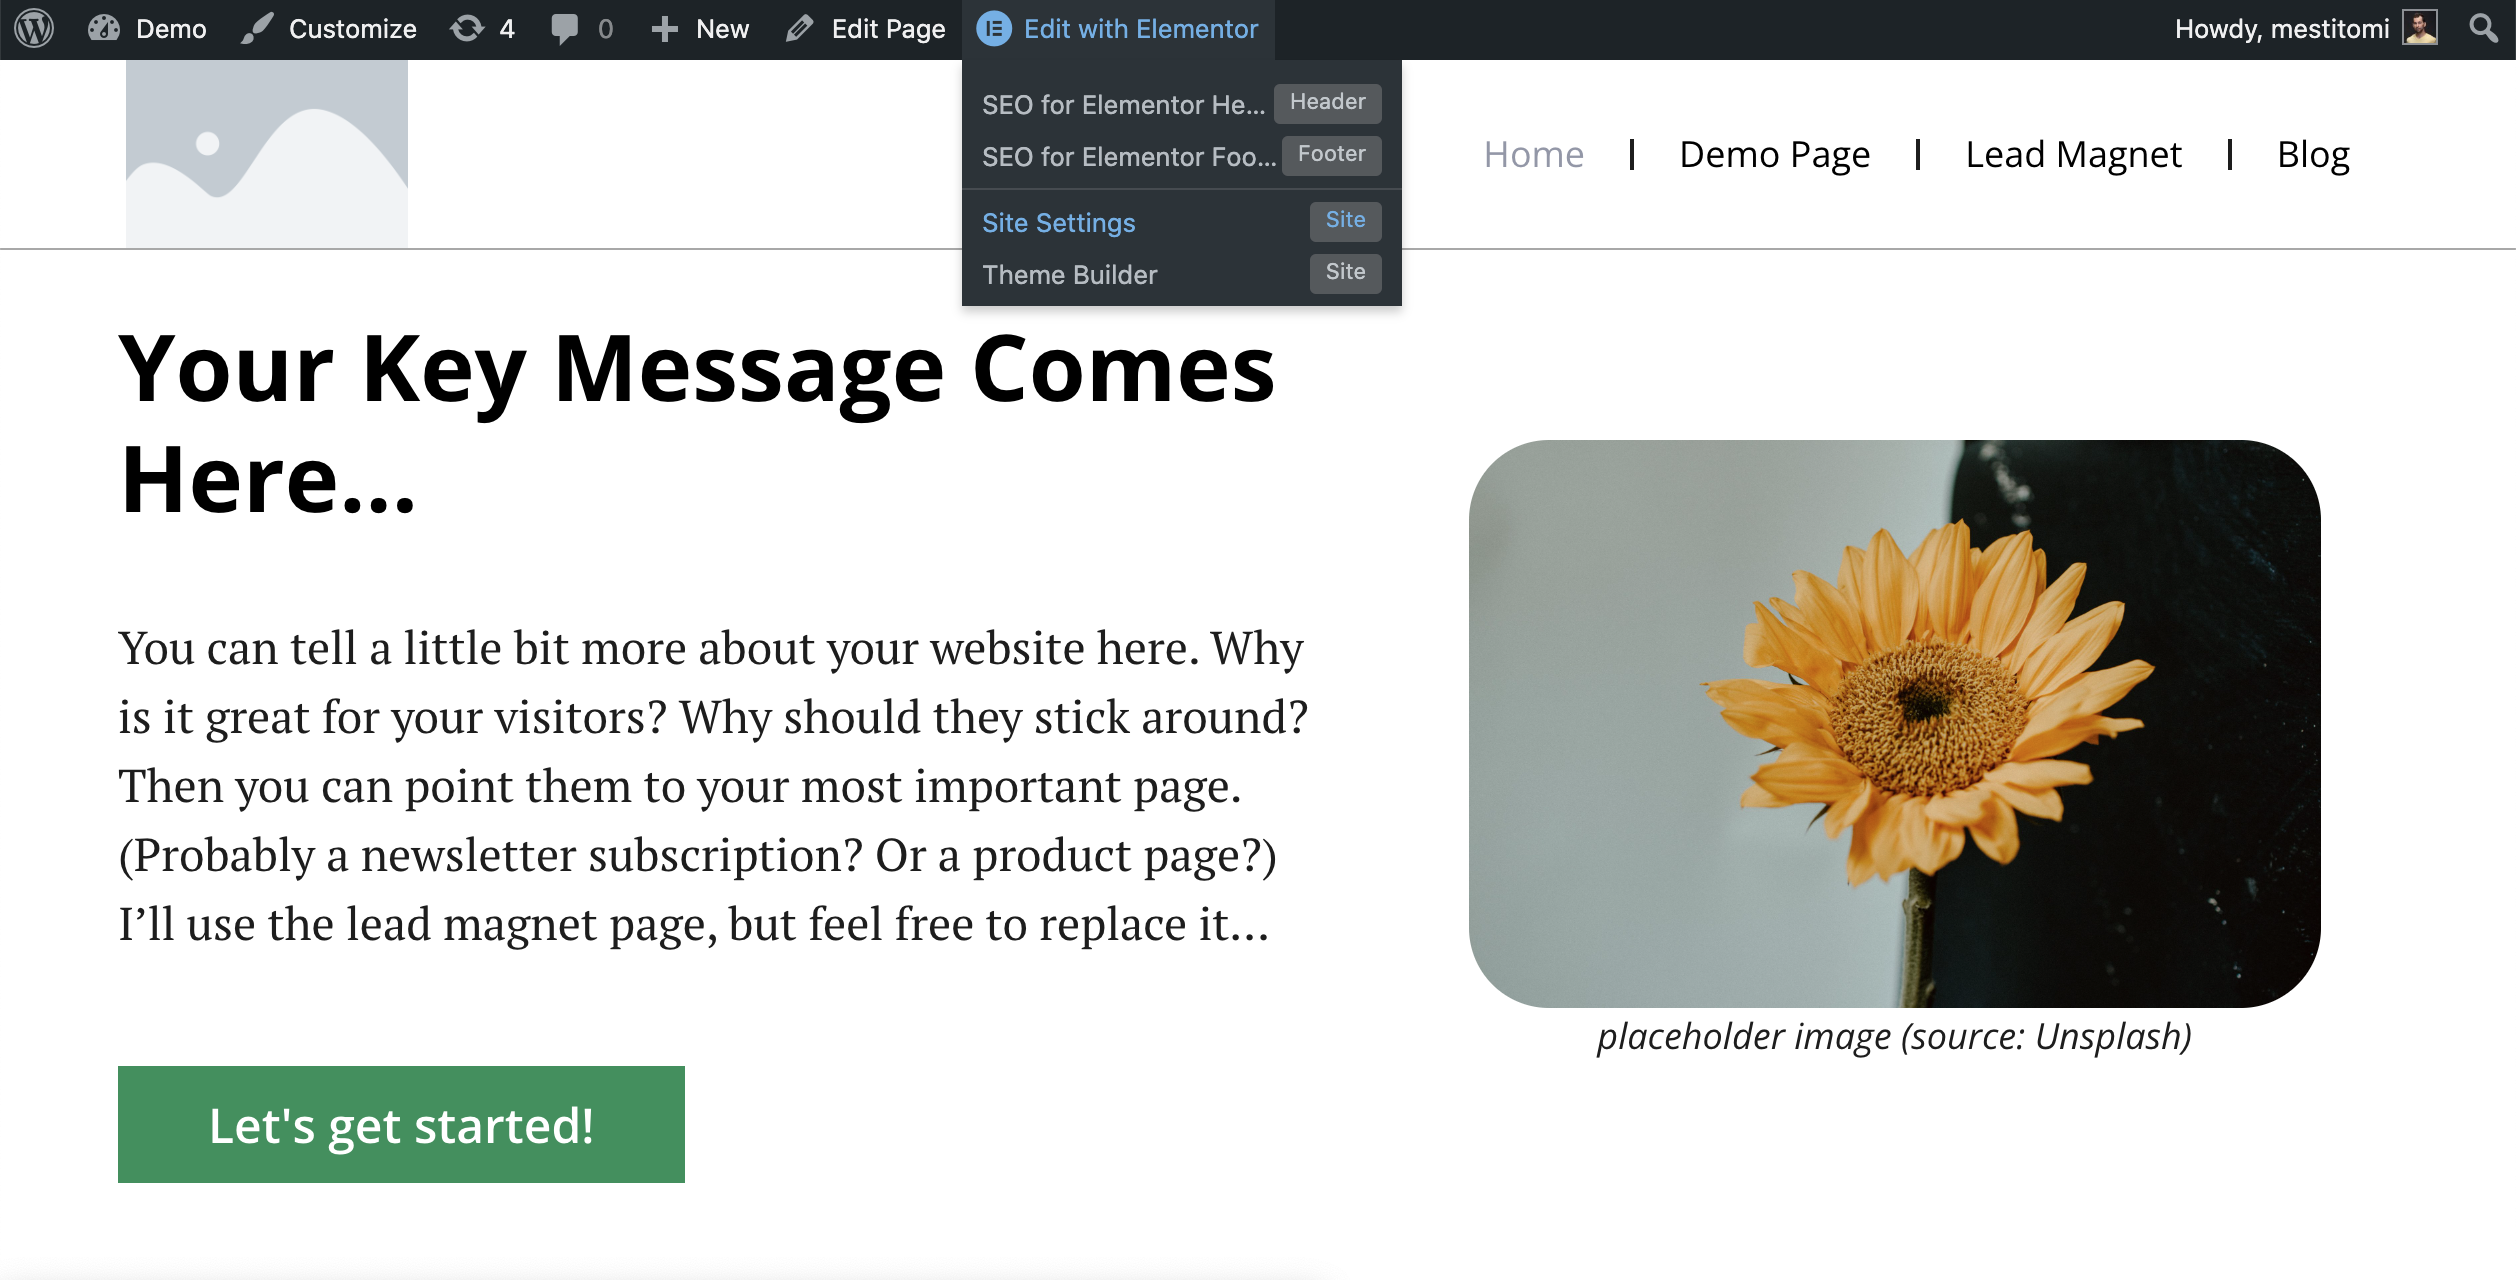
You’ll land here:
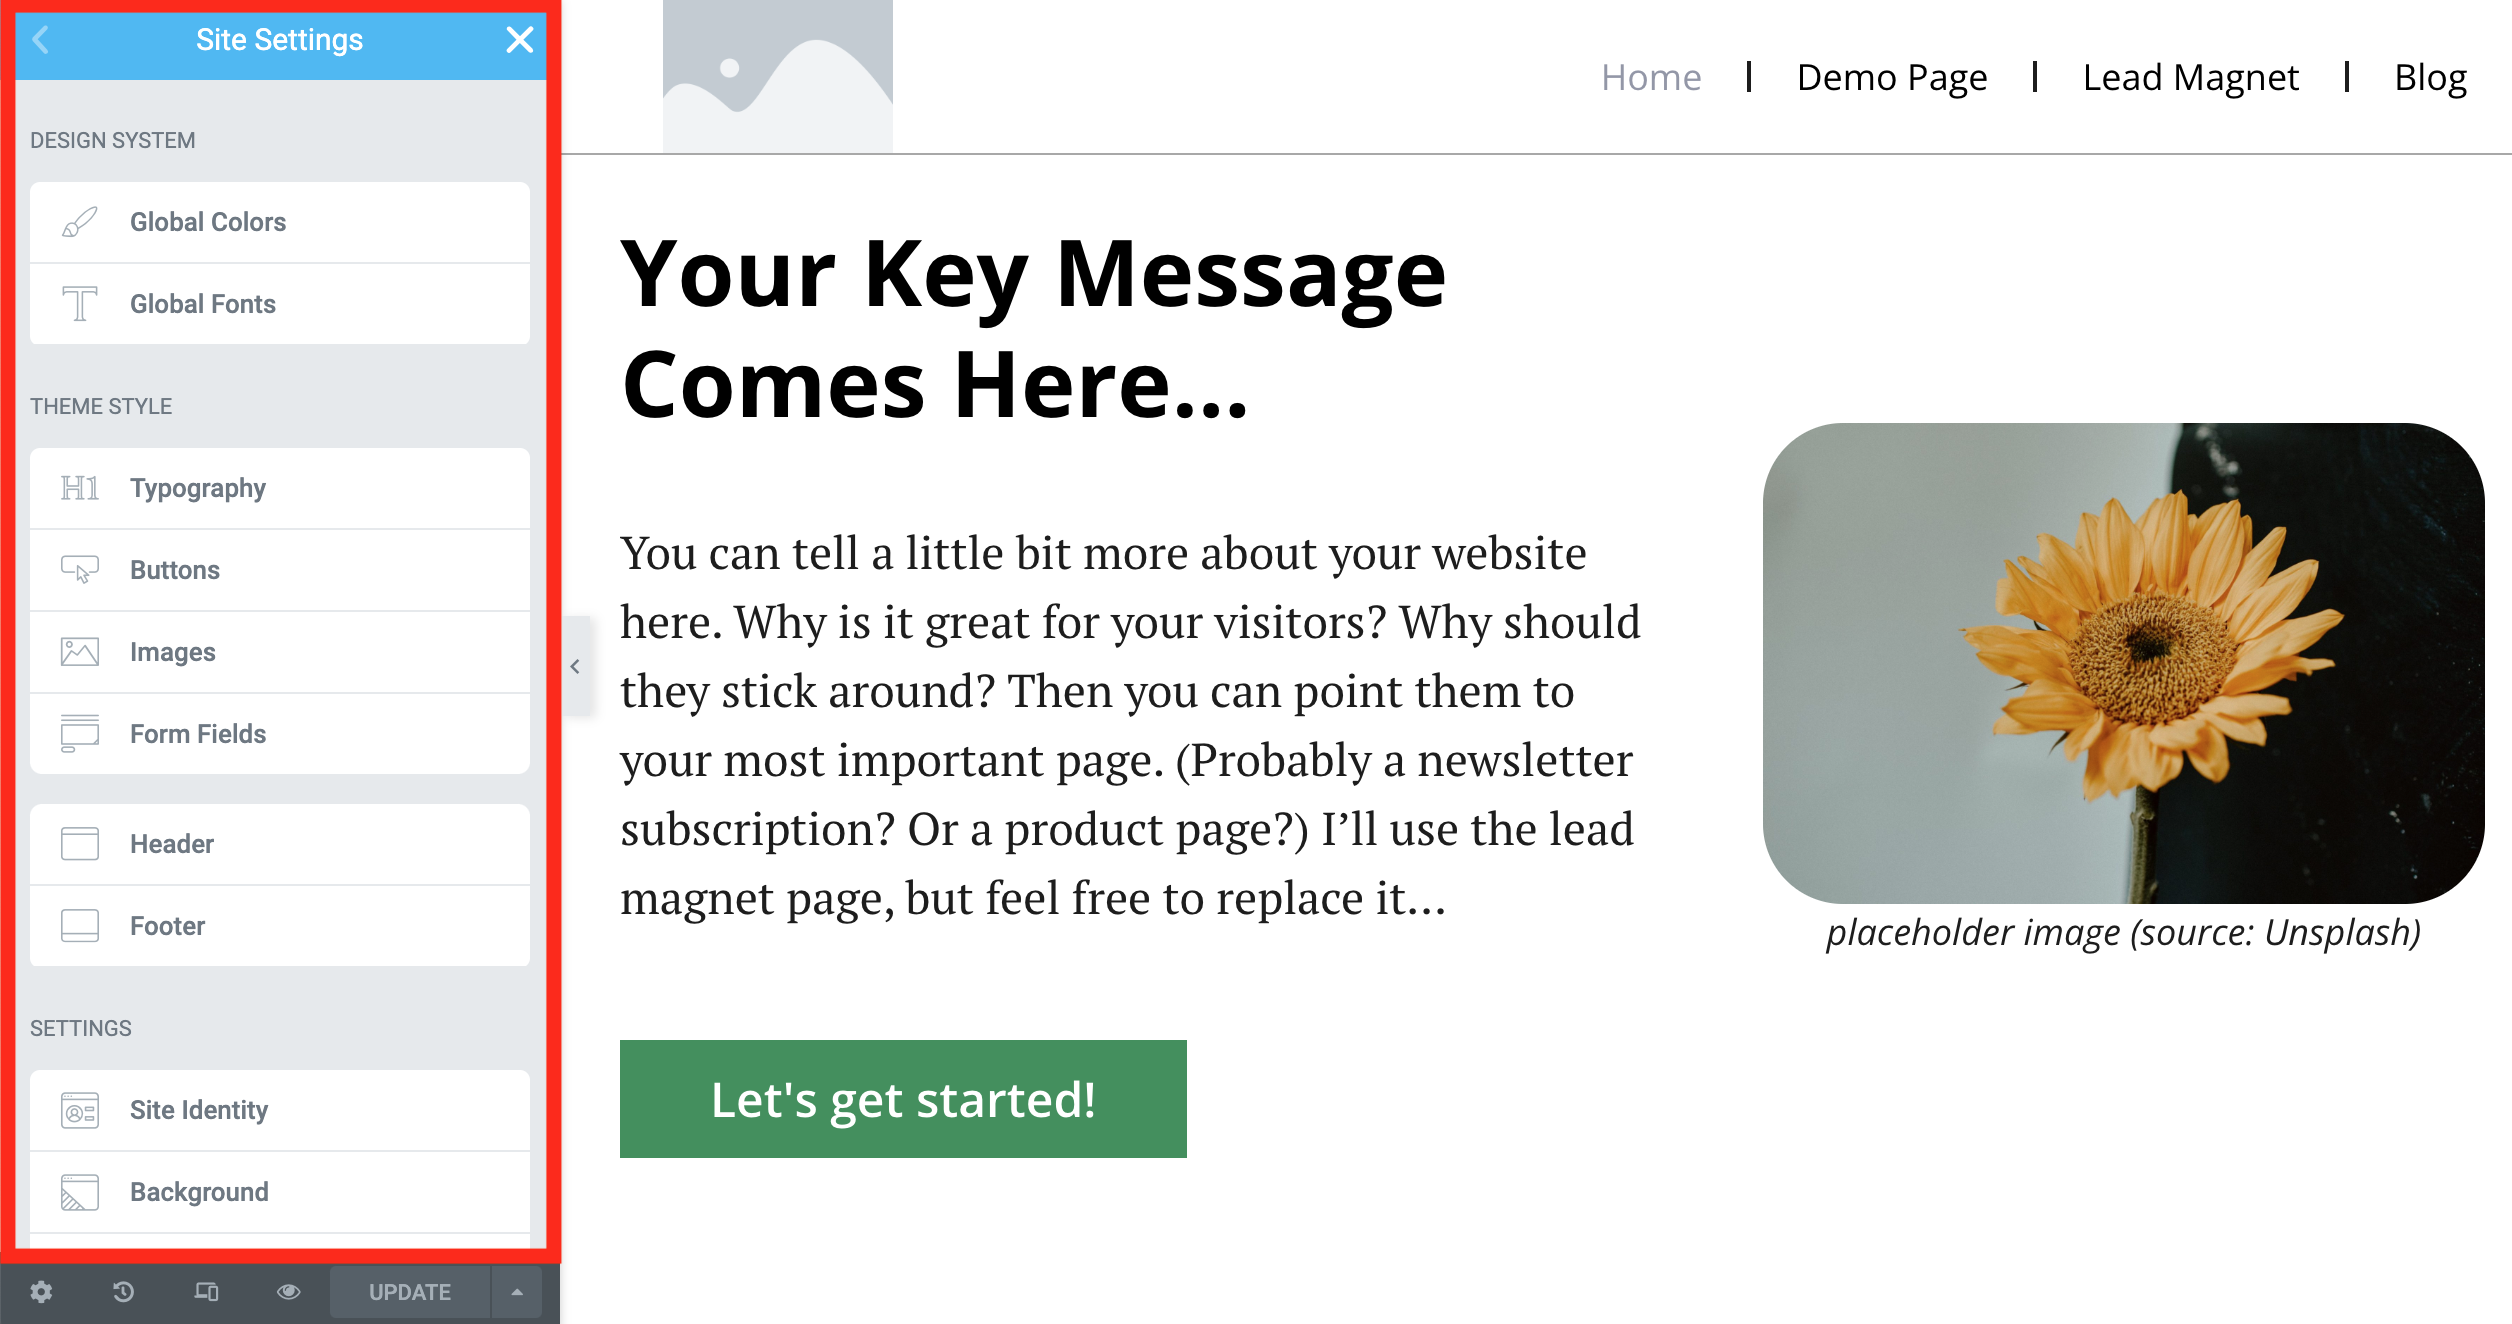
I recommend not changing the fonts! I’ve put a lot of energy into researching the right font-size (both on mobile and desktop) and the right font-type considering every aspect (site-speed, readability, etc). If you want, you can change it… but again, I recommend to leave it as is.
What I recommend to customize though is:
- the colors
- the logo
- and the favicon
STEP #6.1: Customizing the colors of your Elementor theme kit.
Noone likes the color of this theme. I do. But you can customize it as you like it! Just go back to your Site Settings window and click Global Colors:
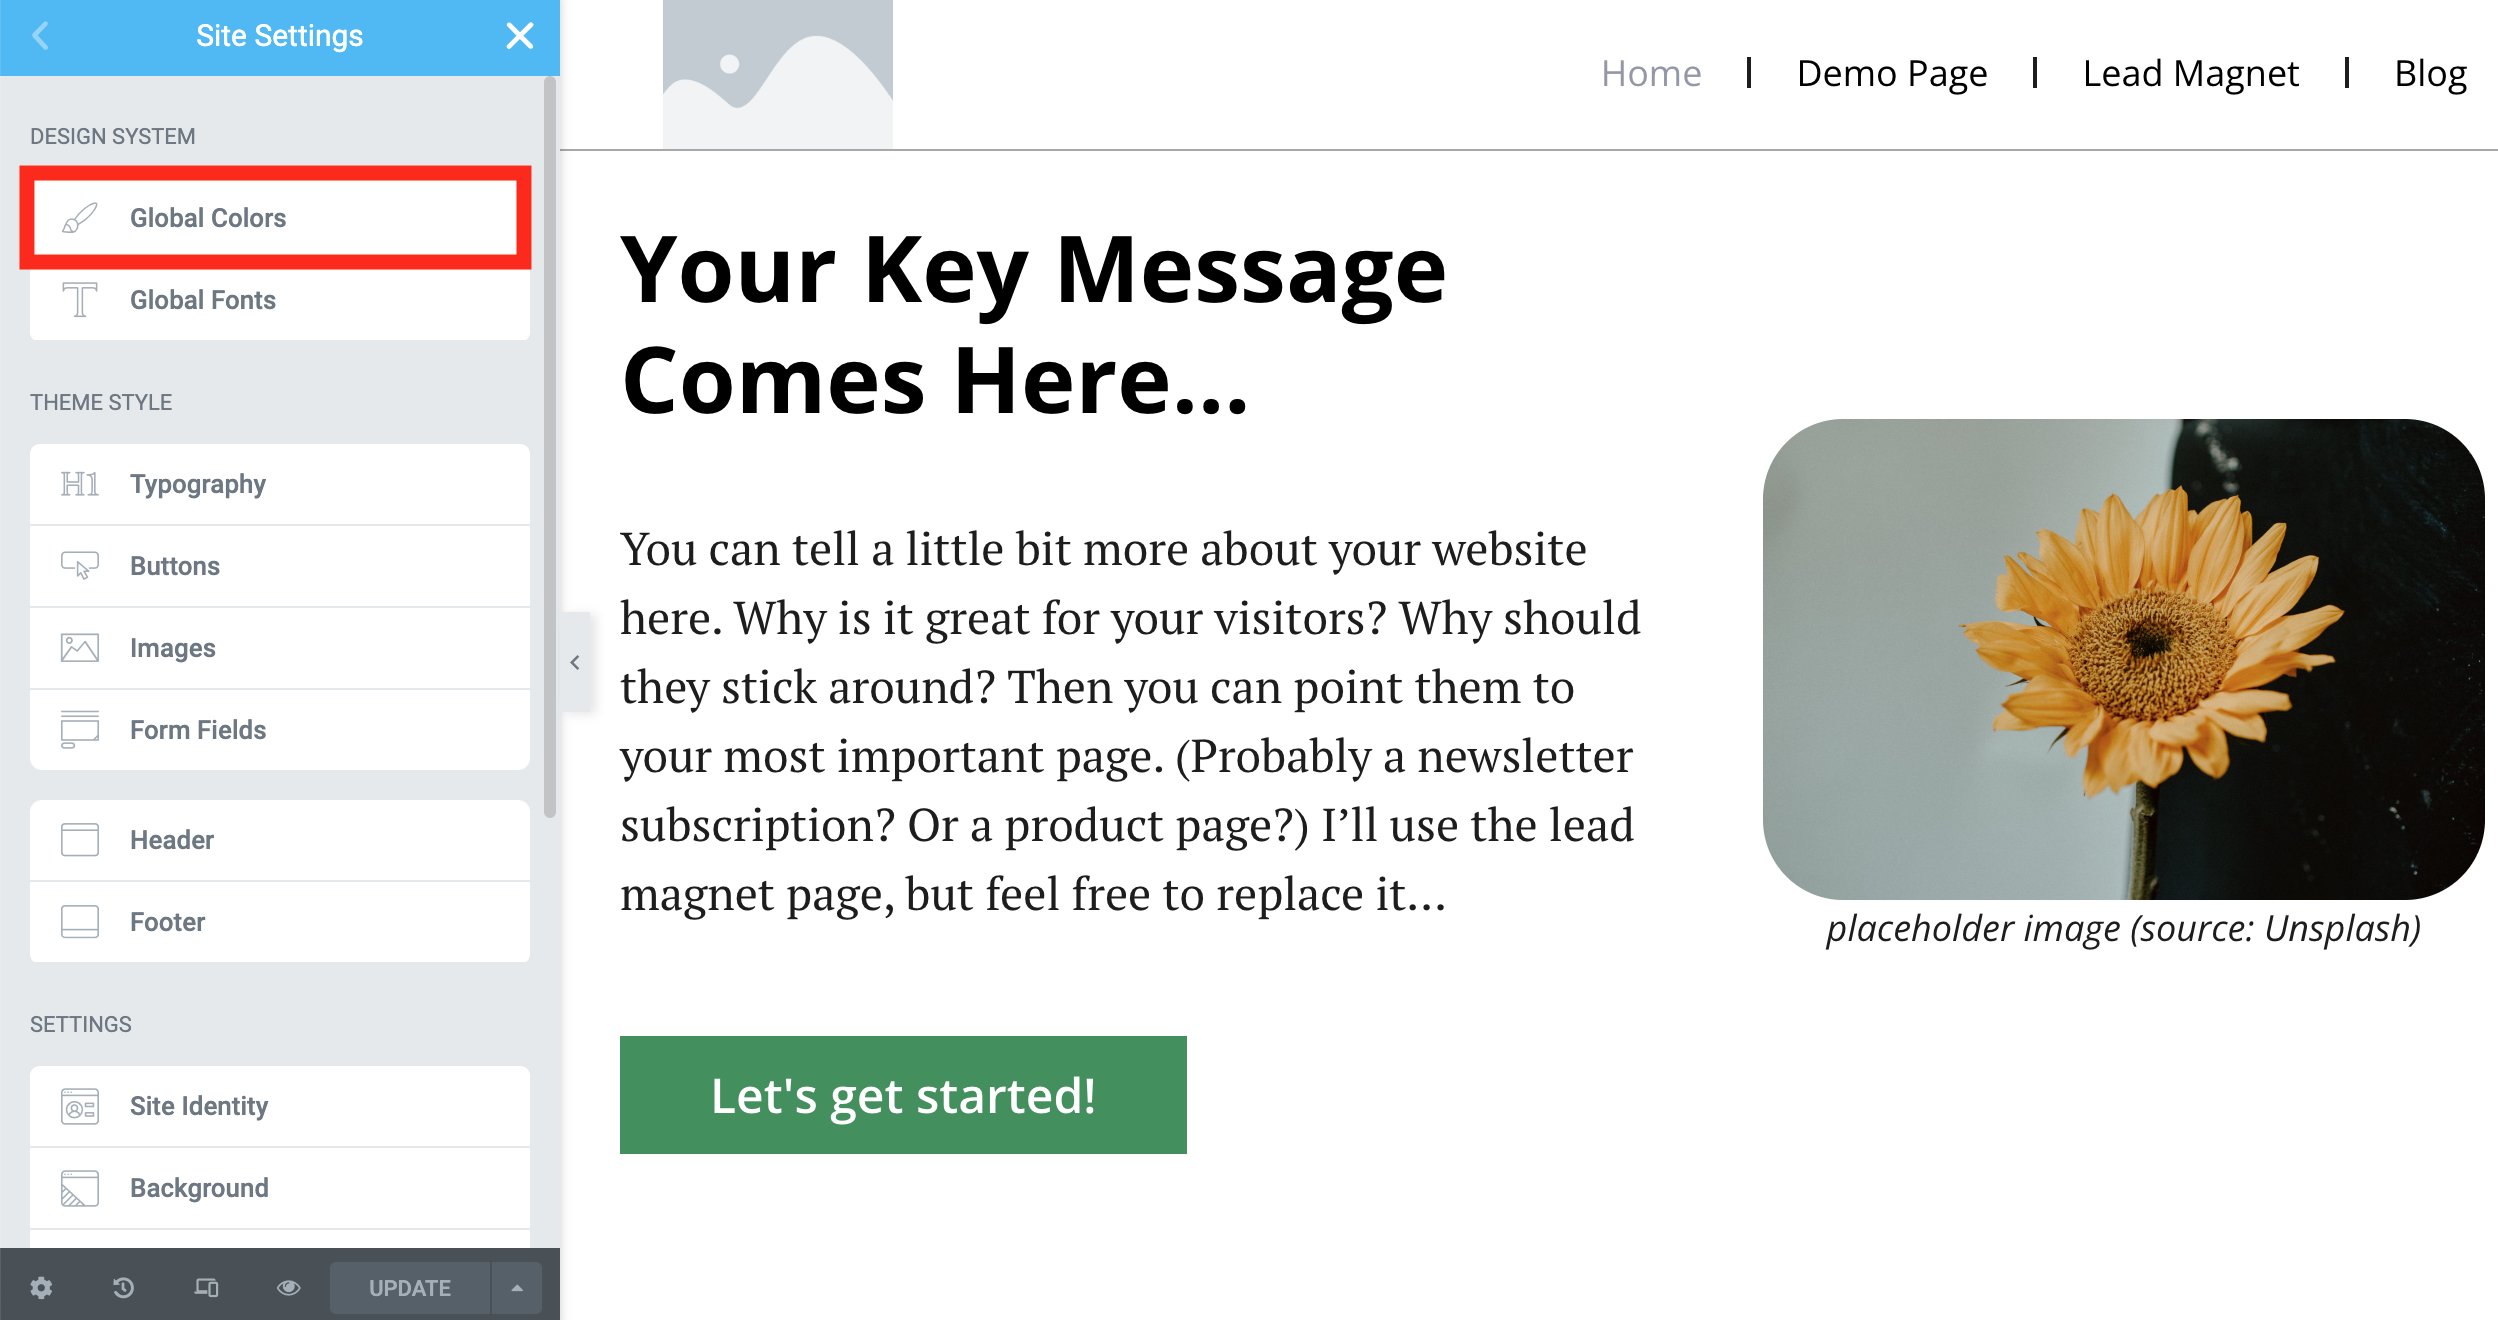
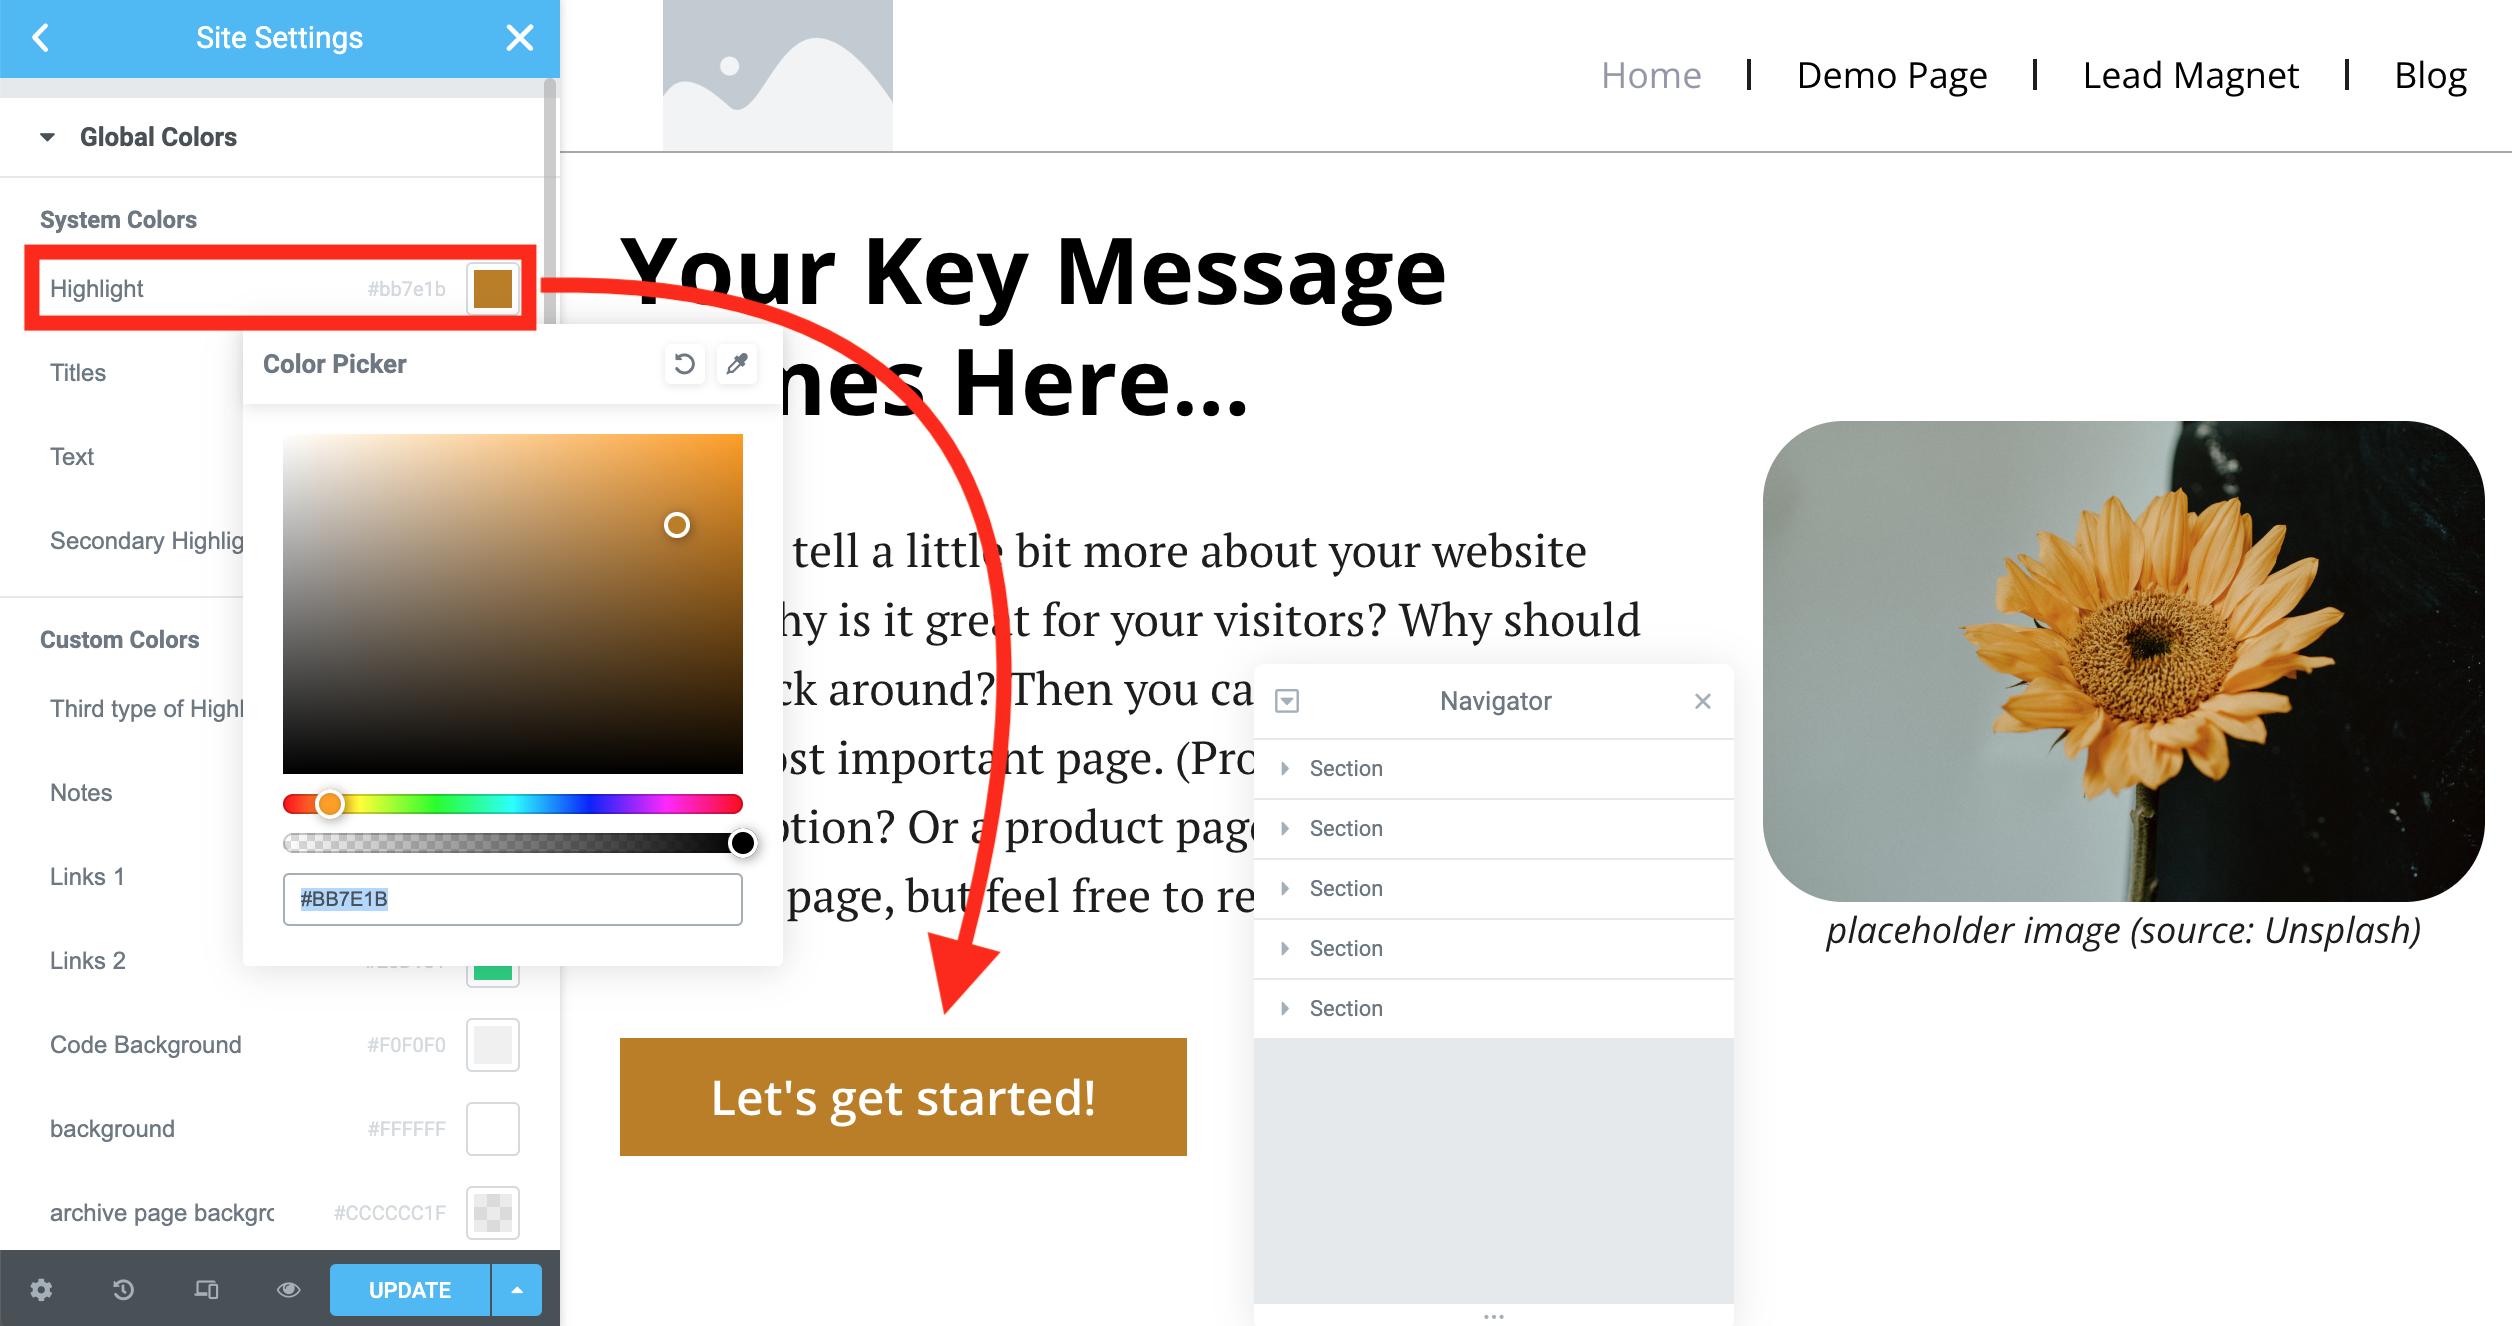
You’ll land on the color settings menu where you can just select your favorite color for each and every element. The naming convention is pretty straight-forward — besides the whole editor surface is drag-and-drop, so you’ll find your way around it:
STEP #6.2: Customizing the logo and favicon of your Elementor theme kit.
There’s one more obvious ugly part here. The logo and the favicon of the site. You can change these easily in the Site Settings >> Site Identity menu:
While you are there, you can also change the description of your website if you want to. I also recommend following the guidelines of Elementor and upload the logo and favicon as they suggest it:
- logo: 350 × 100 pixels (well for the logo actually you can go with 700 x 200 — it looks nicer on retina screens)
- favicon: 512 × 512 pixels
Don’t worry if you can’t see the changes real time… Just click the UPDATE button, refresh the site…
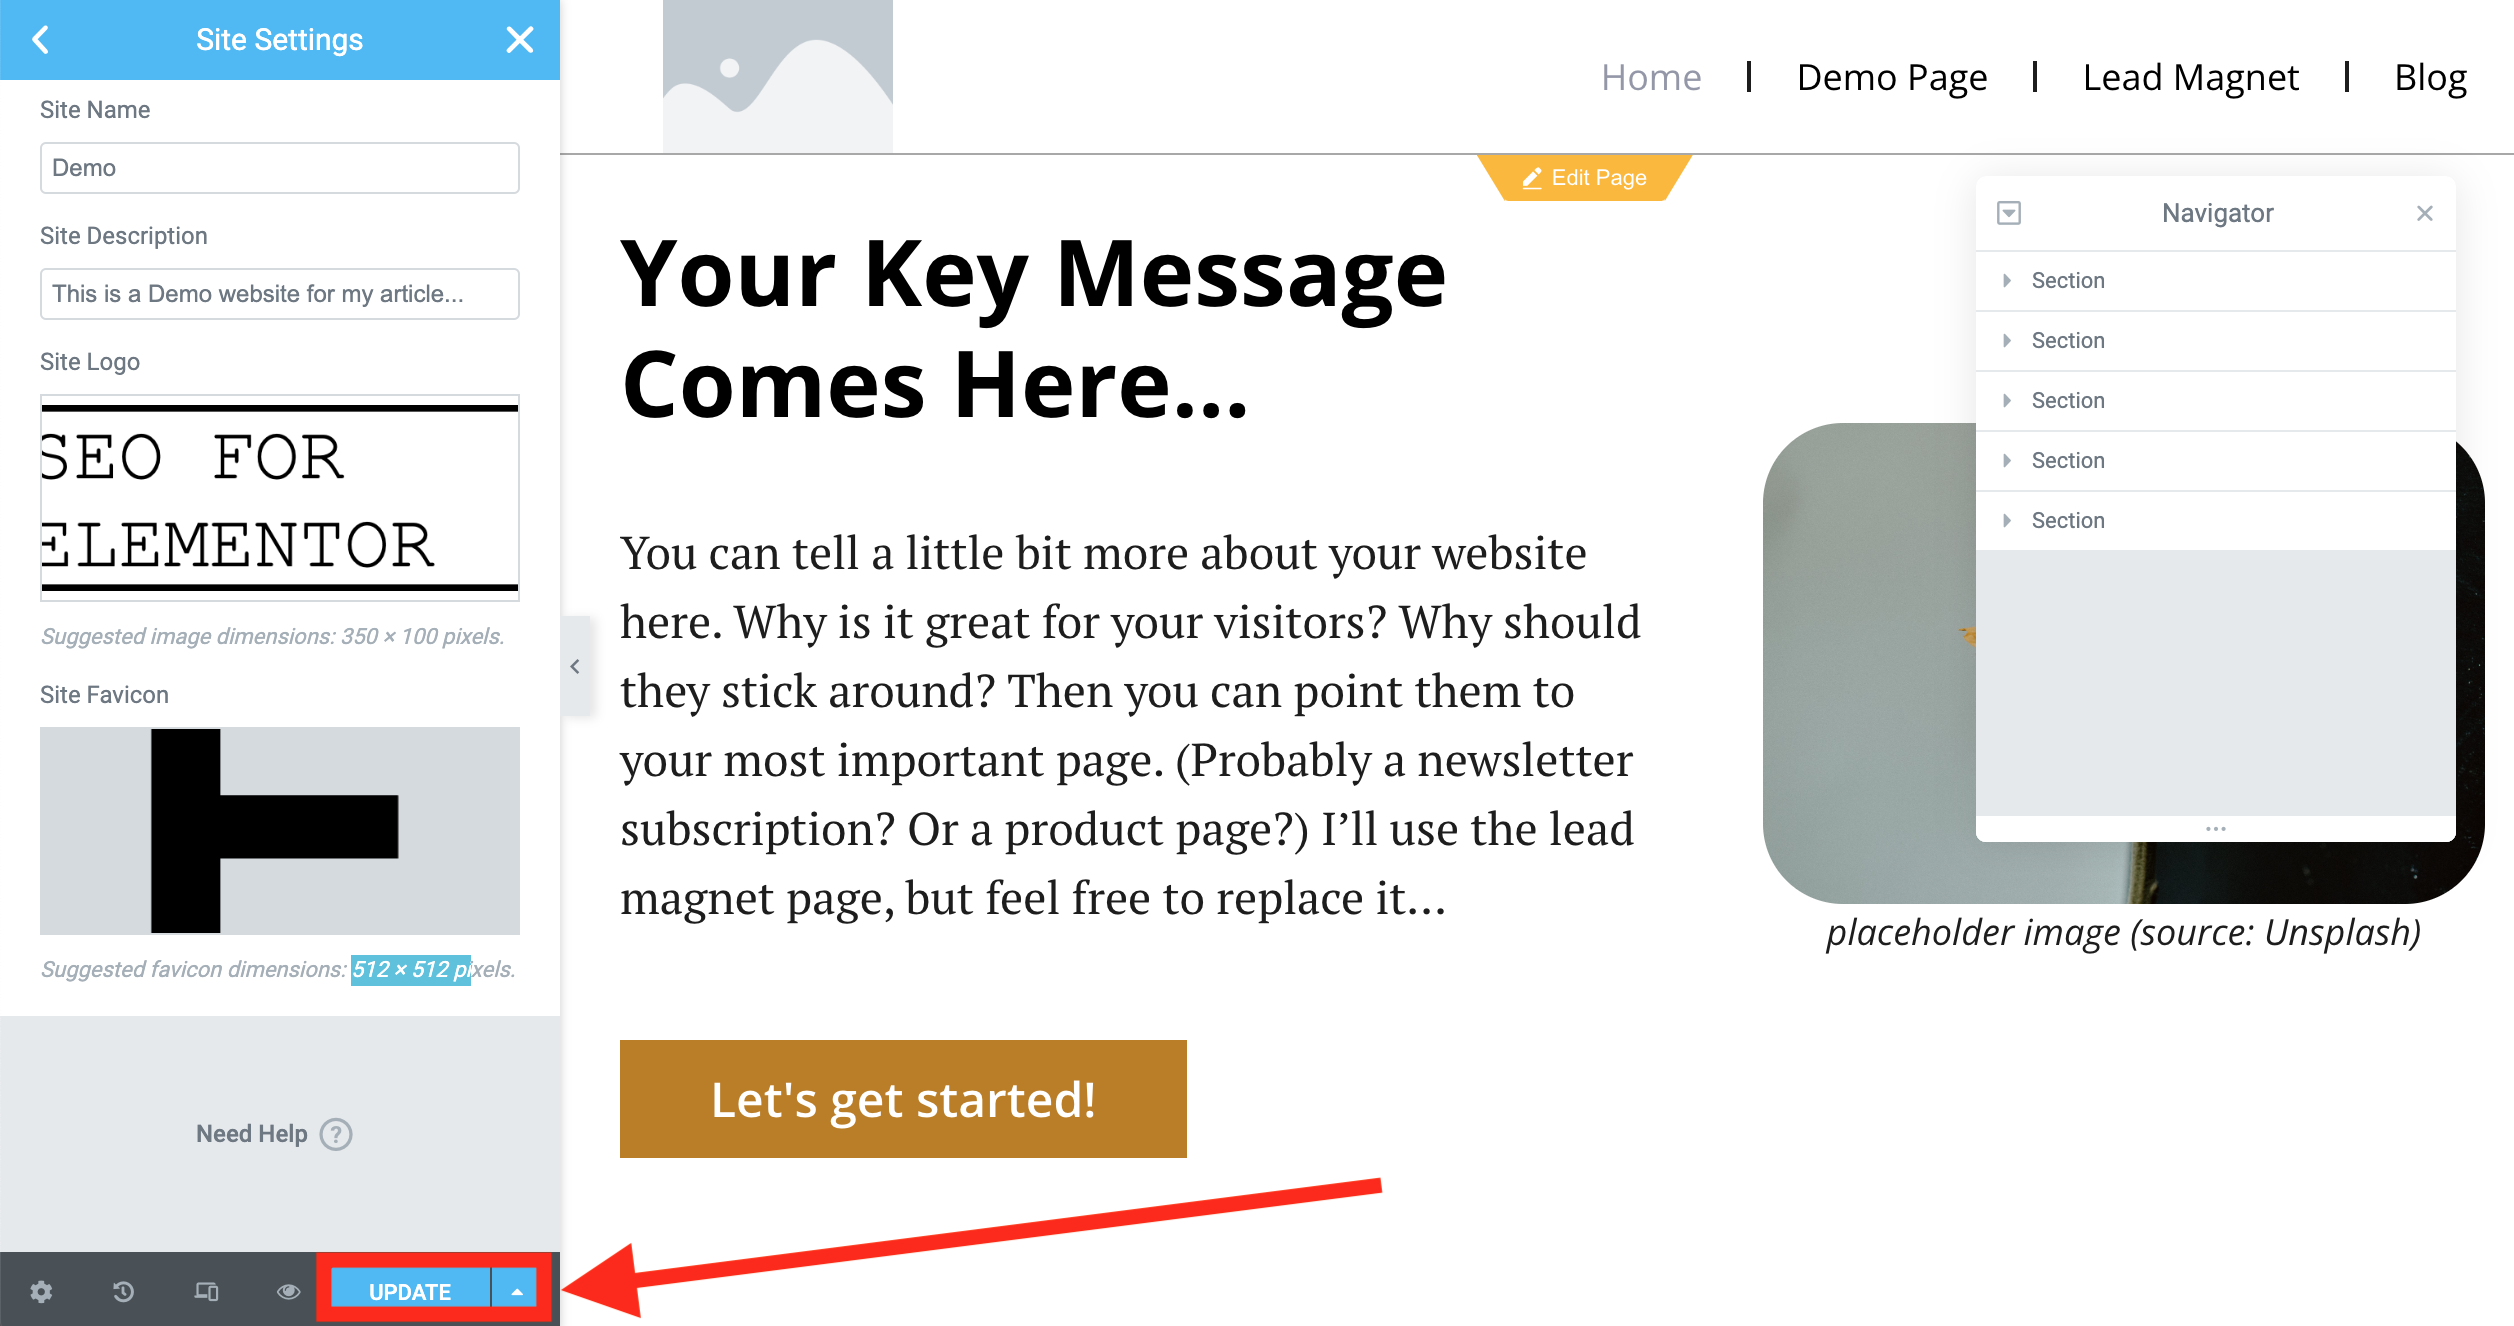
and on the frontend, you’ll see the changes.
Beautiful!
STEP #7: Editing pages, posts and landing pages
Okay, the setup is done!
It’s time to create content.
I’ll just highlight the 3 basic types you want to work with in the beginning.
- posts
- pages
- custom Elementor landing pages
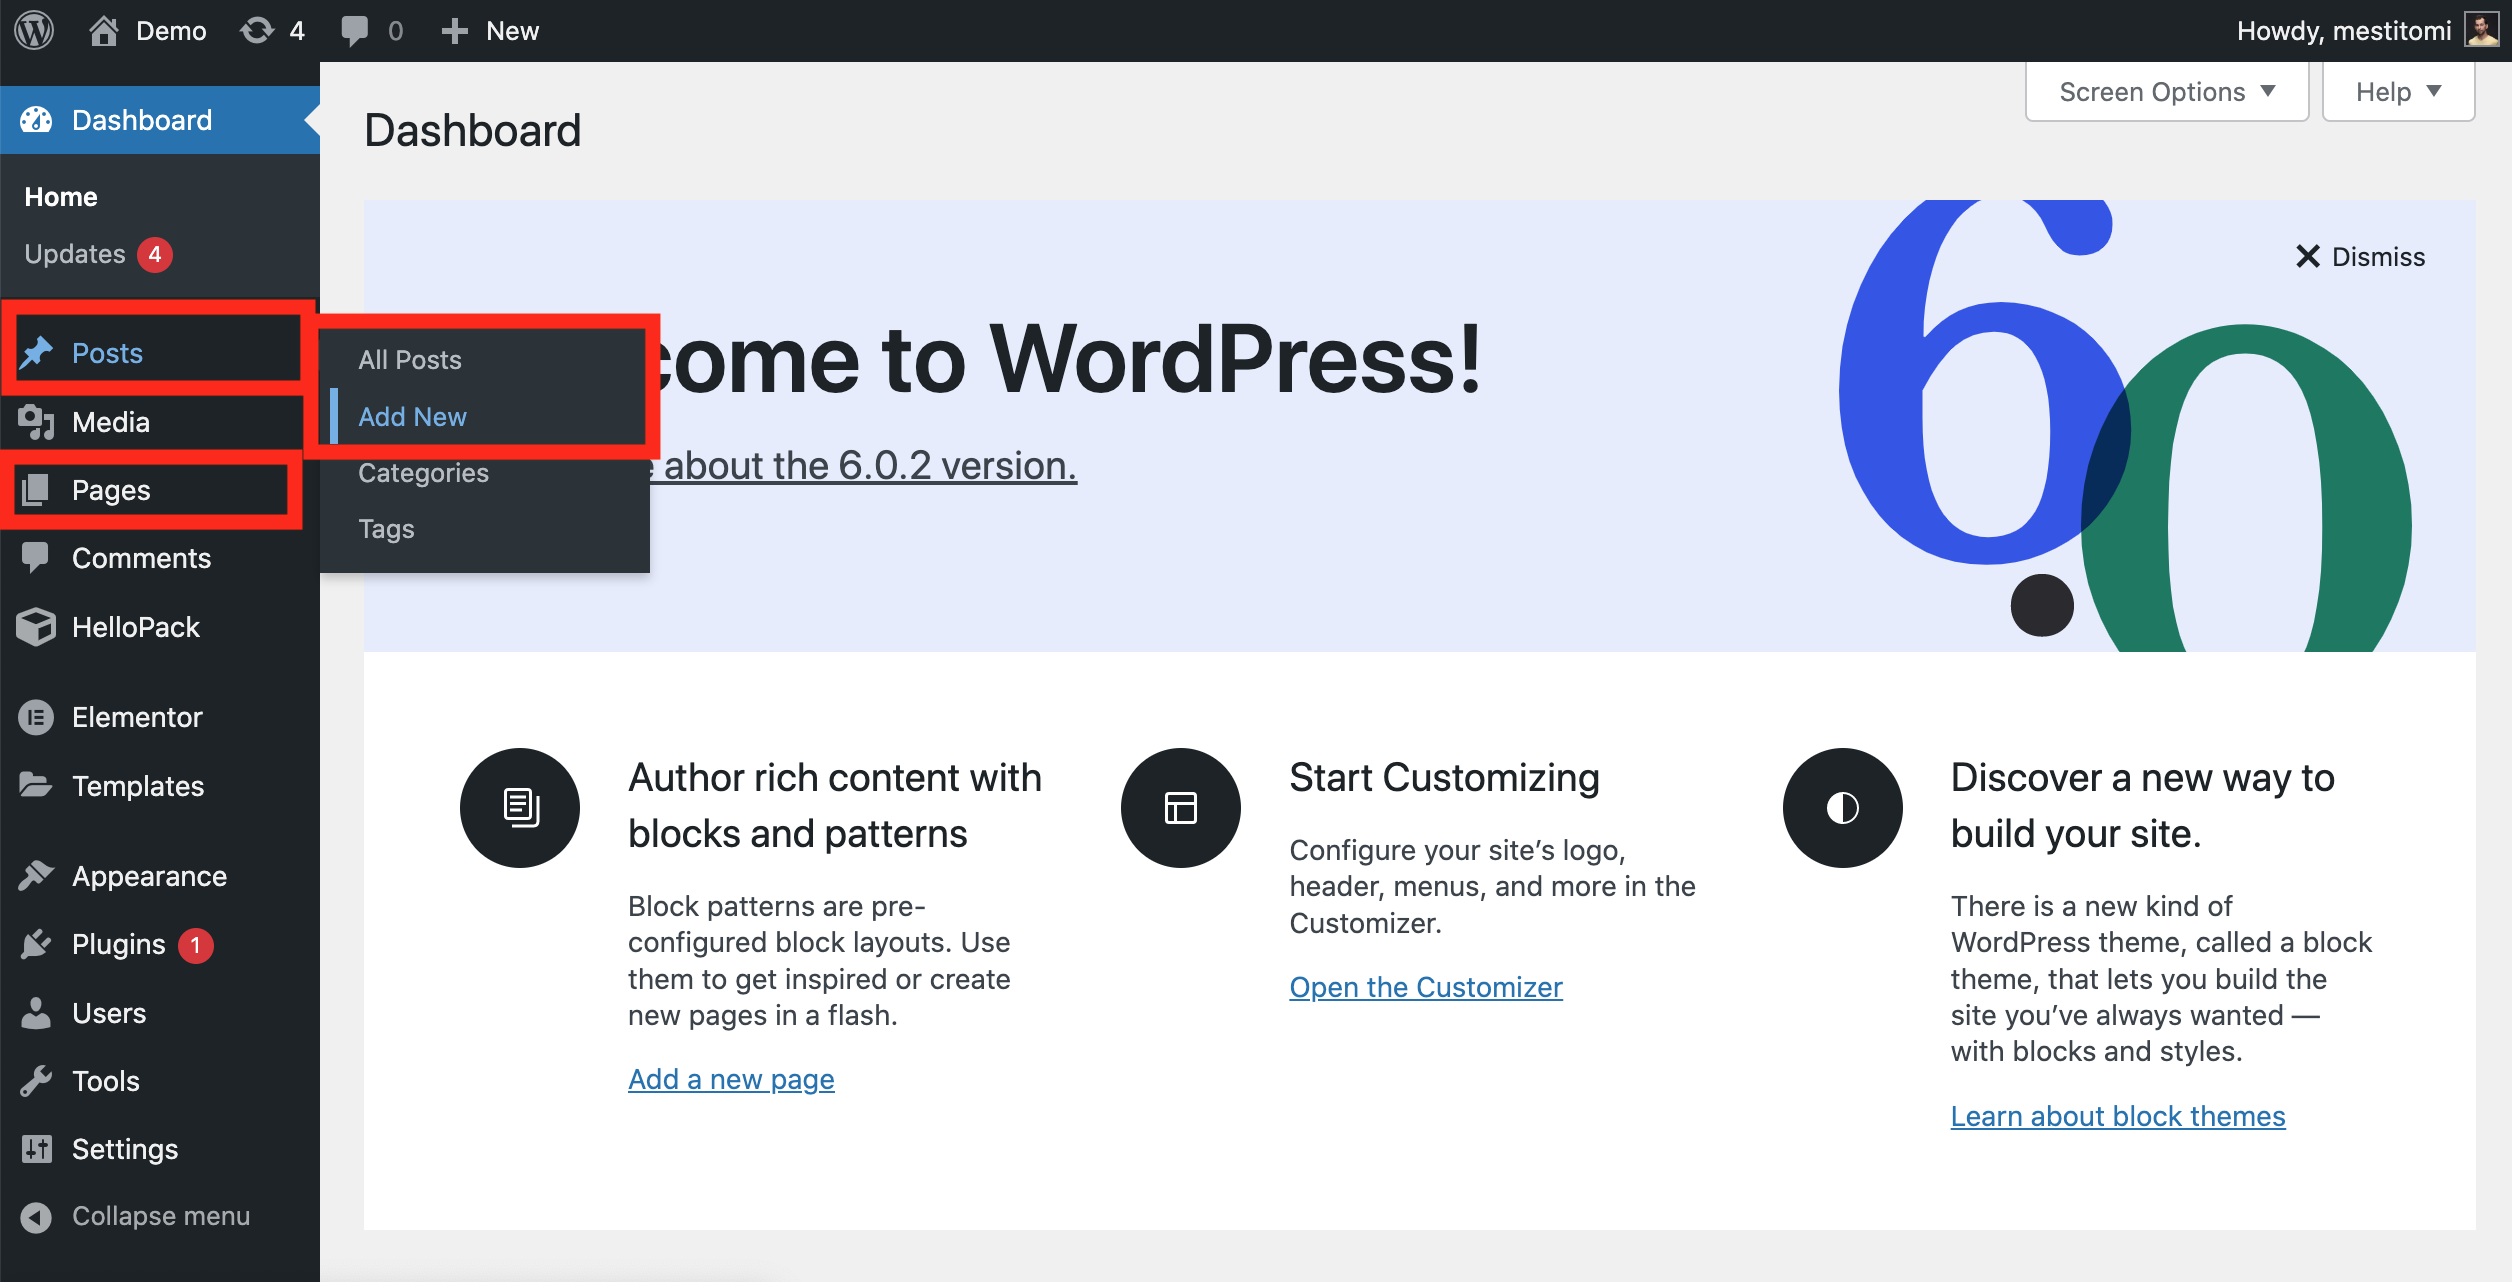
If you want to create new posts and/or pages — or edit the old ones, you’ll just have to go with the good old WordPress method. Go back to admin and click:
- Posts >> Add New
OR - Posts >> All Posts
OR - Pages >> Add New
OR - Pages >> All Pages
Depending on your needs.
The new posts will automatically show up in the SEO for Elementor theme formats — as we have set them in the previous steps.
If you want to add a custom landing page, you can simply go to Pages >> Add New and then instead of using the default wordpress editor, you can click Edit with Elementor:
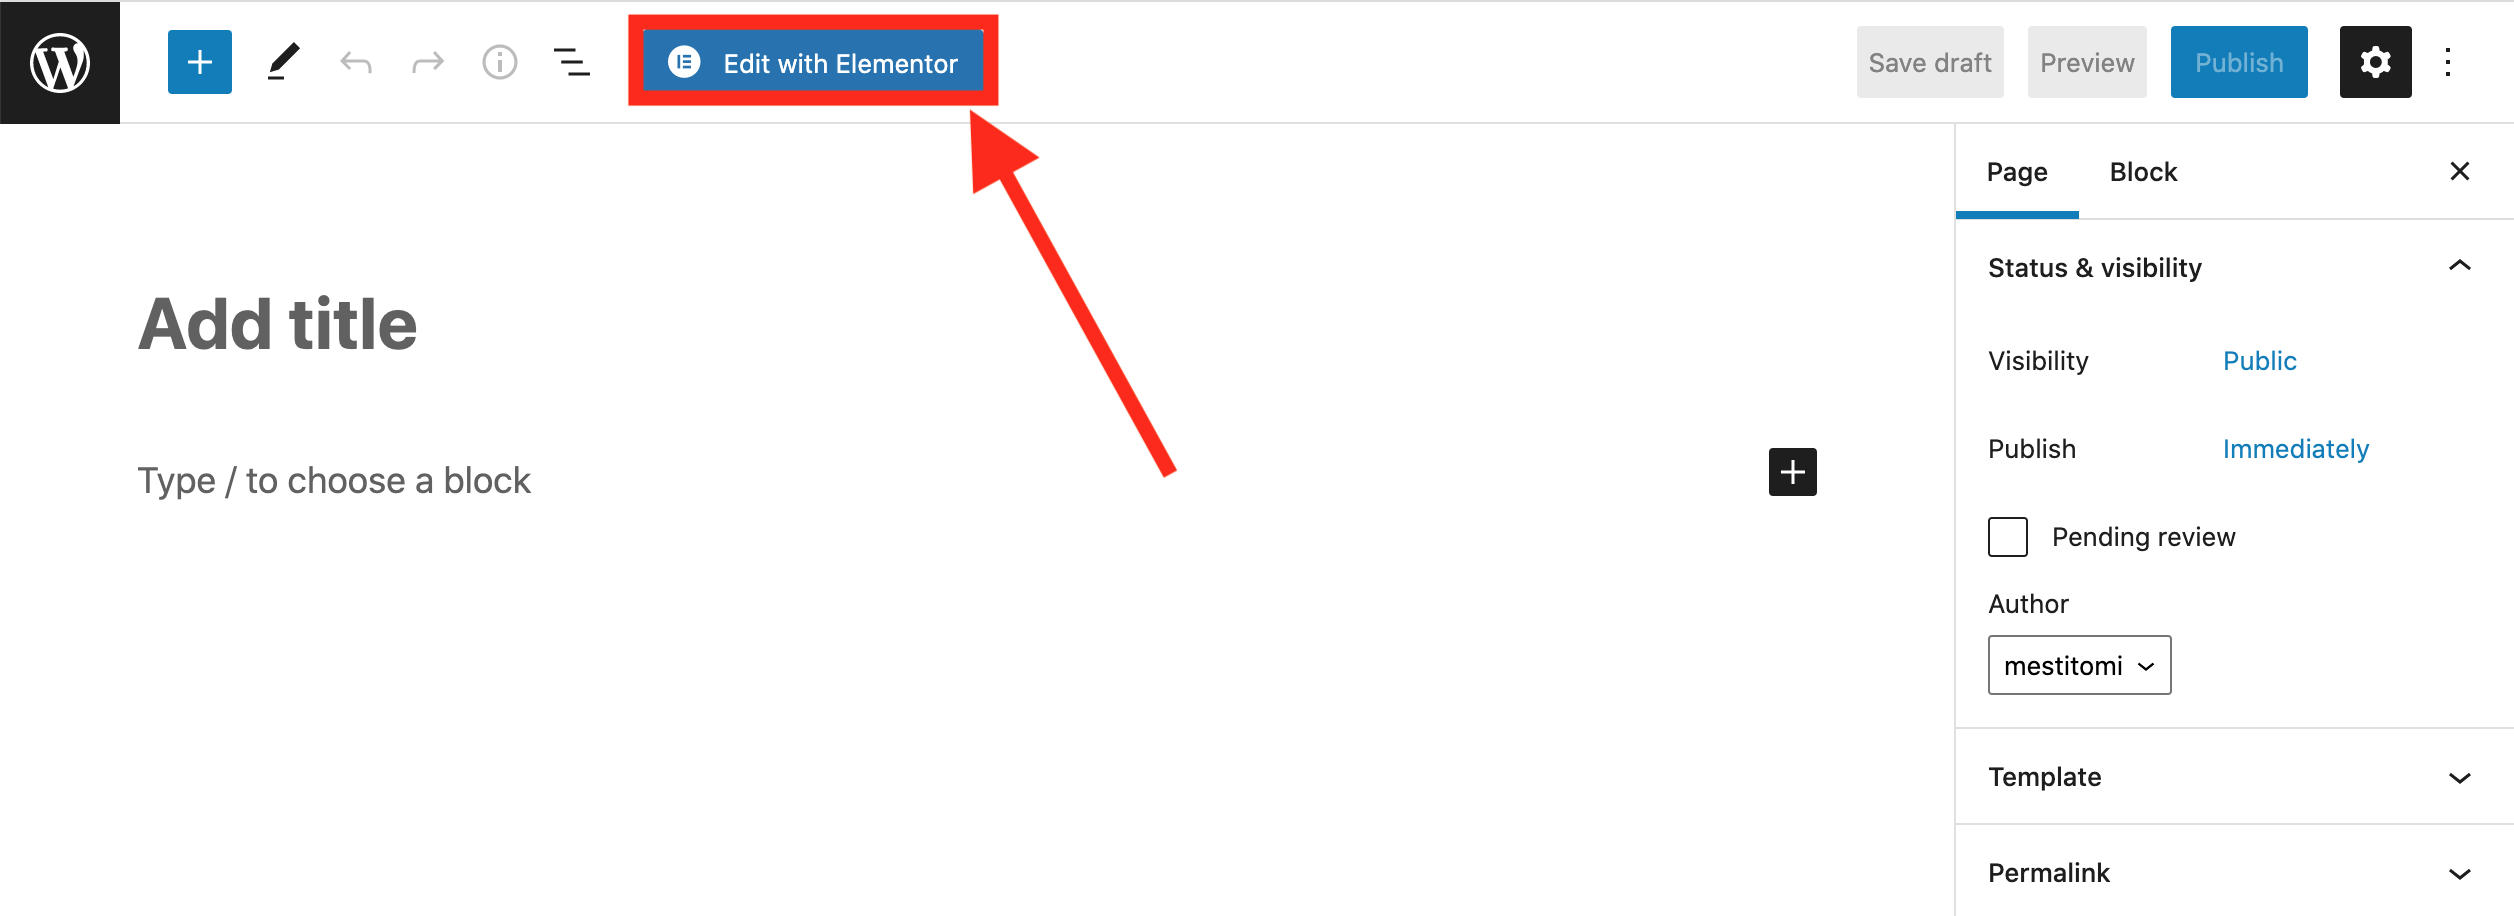
From this point on, you’ll use the Elementor editor… If you don’t know how to do that, just go to Elementor’s website, they have tons of awesome tutorials.
If you want to edit the Front Page or the Lead Magnet page of the recently set theme kit, you can go to Pages >> All Pages and hover your cursor above the given pages, then click Edit with Elementor:
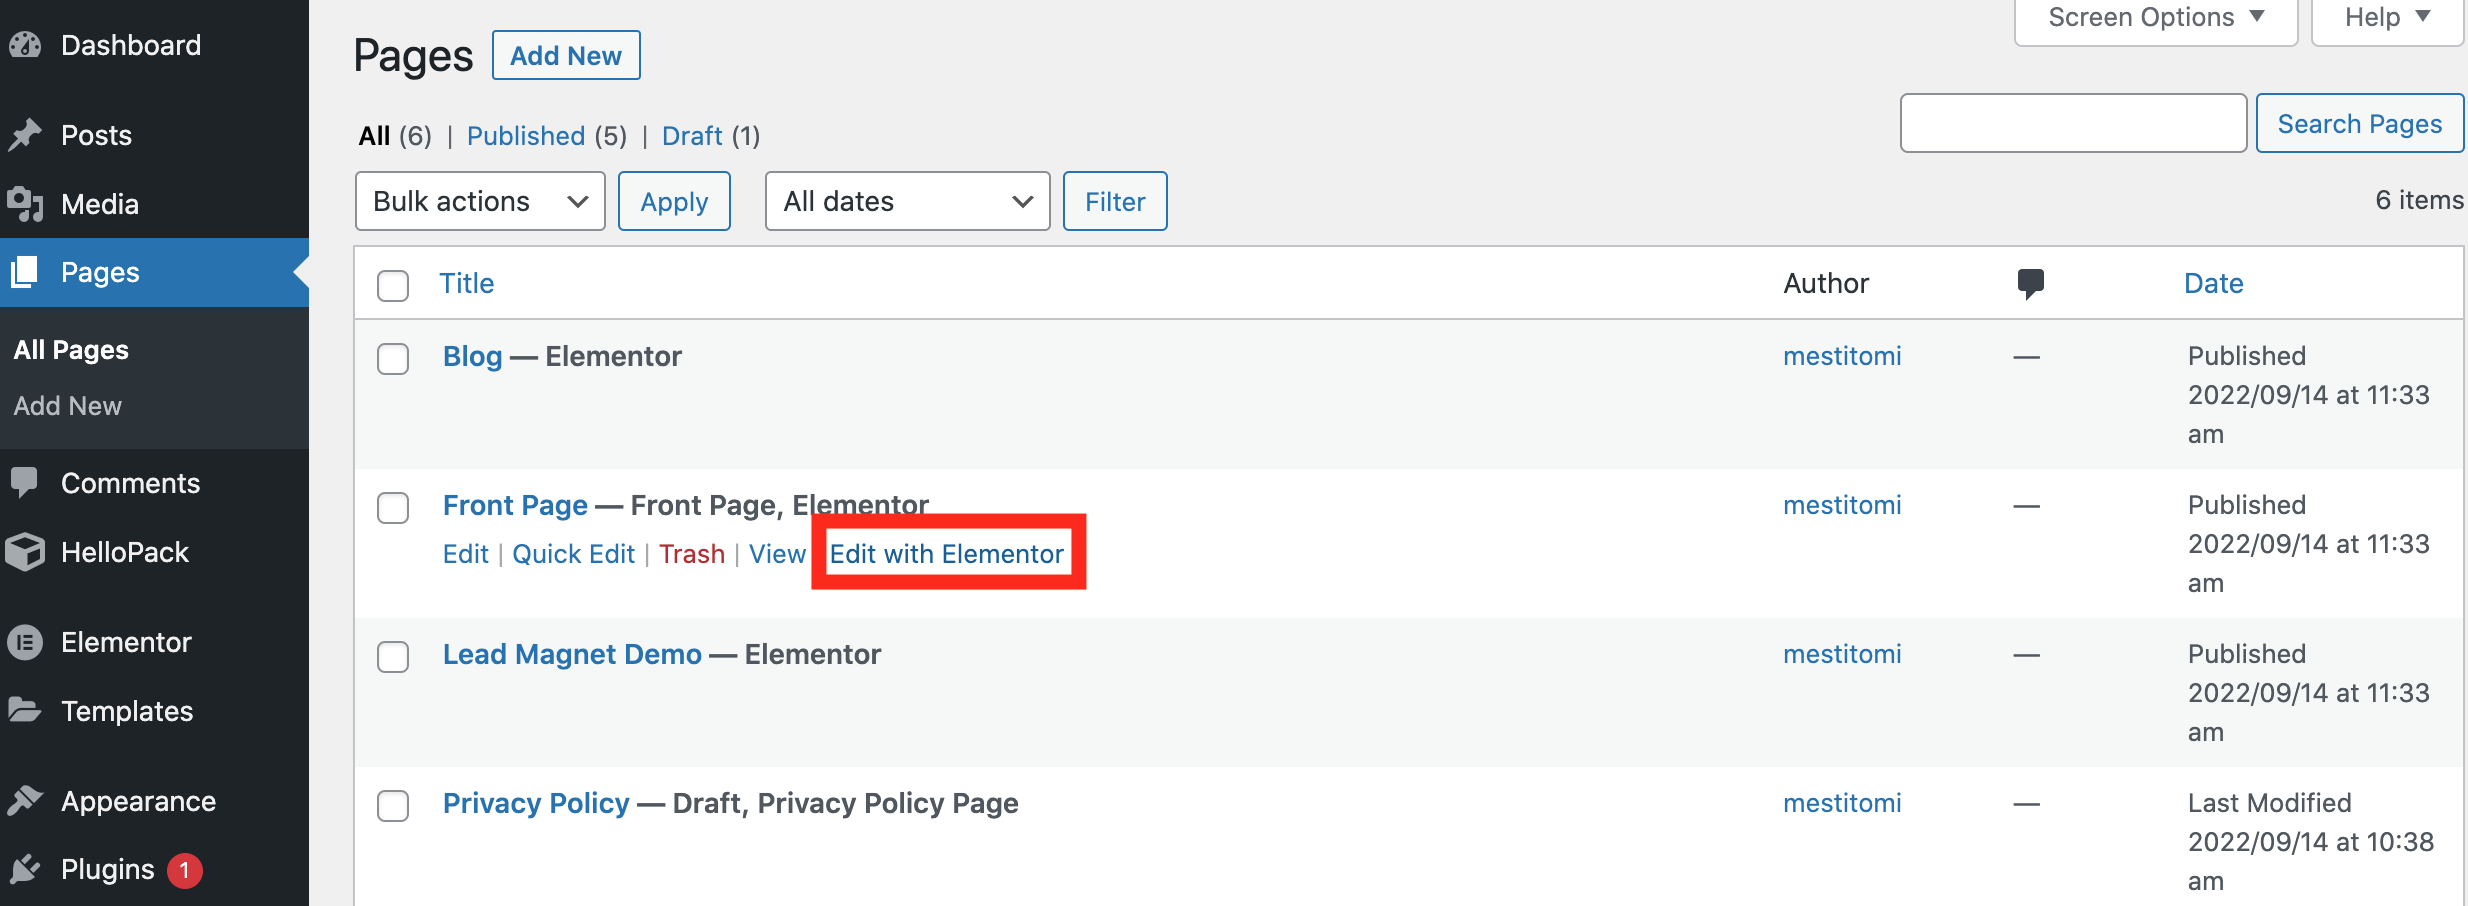
Here, you’ll be able to customize the pages with the Elementor builder as you wish. Again, if you haven’t used Elementor’s drag&drop editor, you might want to go to their website and check out their tutorials!
STEP #8: Enjoy… and optimize further!
Great news! We are done with the basic setup!
Your website should work, the new theme kit is set and everything’s in place. (If something is missing or off, go back to the steps above and see whether you missed something.)
…
But there’s still work to do. There are 3 extra steps, you want to take to make your website even better:
- Add extra plugins for better page speed — and ultimately better SEO results!
- Add a mid-article subscription form for better conversion!
- Set the post URL formats for better SEO results.
- Add en extra plugin for better security!
I’ll guide you through these one by one!
STEP #9: Extra plugins for better technical SEO, page speed and SEO traffic.
If you check your websites page speed with Google’s official PageSpeed Insights tool, you’ll find that despite all our efforts, we still haven’t maxed it out…
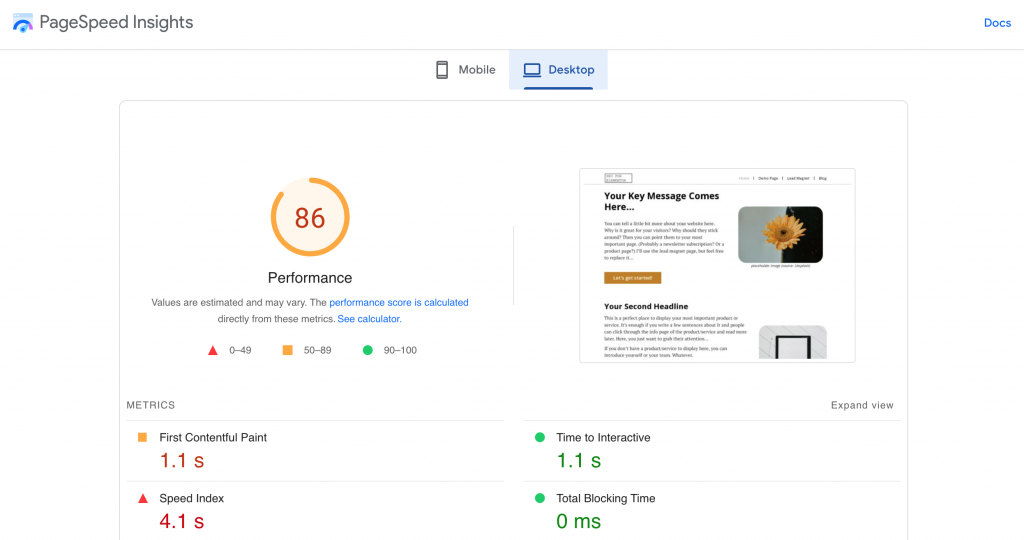
86 out of 100 is not bad but this is as far as we could have gotten with this SEO-focused, clean code theme kit.
We can take this further with two more plugins:
- WP Rocket (affiliate link)
- WebP Converter for Media (free plugin)
A quick but important comment — if you see that your website is slow because of your server response time, you might want to consider one more time to buy Elementor’s WEBSITE BUILDER + HOSTING (affiliate link) package… It’ll solve all your server issues.
Once the backend issues (server issues) are solved, you can focus on delivering your content in the most efficient way on the frontend. Again, you’ll need only two plugins for that:
- WP Rocket (affiliate link)
- Converter for Media (free plugin)
STEP #9.1: WP Rocket
WP Rocket defines itself as “The #1 WordPress Caching Plugin.” I don’t know whether it’s really the #1… But it’s a fact that I’ve tested many caching plugins and for me WP Rocket worked by far the best.
WP Rocket is a sort-of invisible plugin on your website… It works in the background and simply put, it optimizes your code and website delivery. It compresses your code, caches your website elements, removes unnecessary stuff, etc, etc. Your design won’t be changed — but your website’s page speed and core web vitals will be much-much-much better.
For a single website WP Rocket costs $49/year — which is very good value for money, again.
To install it, you’ll have to:
- go to WP Rocket’s website
- register
- buy a license
- download the .zip file of the premium plugin
- install it similarly to Elementor Pro
I’ll just detail this last step a bit more:
Once you have the .zip file, go to your wordpress website’s admin surface. Click Plugins >> then click Add new!
Here, just click: Upload Plugin.
And then upload your WP Rocket .zip file…
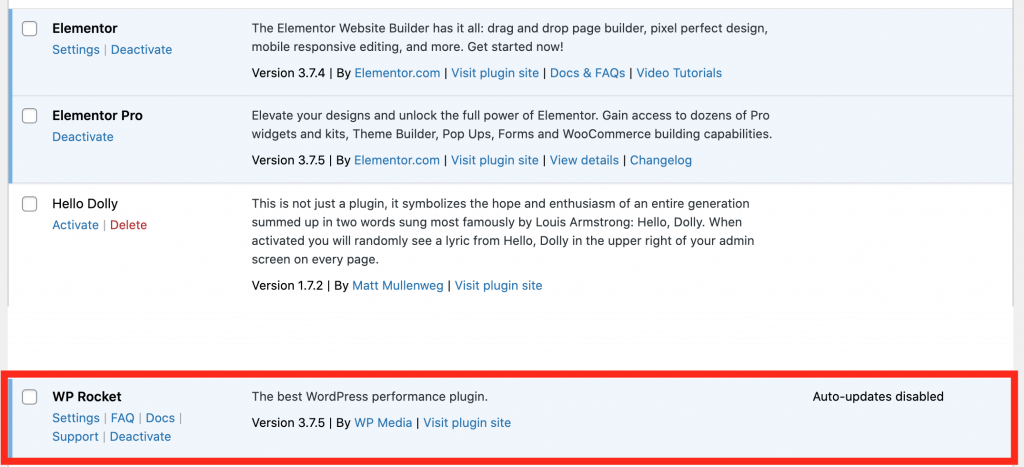
Then intuitively click Install Now >> Activate Plugin!
And you’ll see WP Rocket on your website:
When the installation is done, you’ll have to go through the settings part.
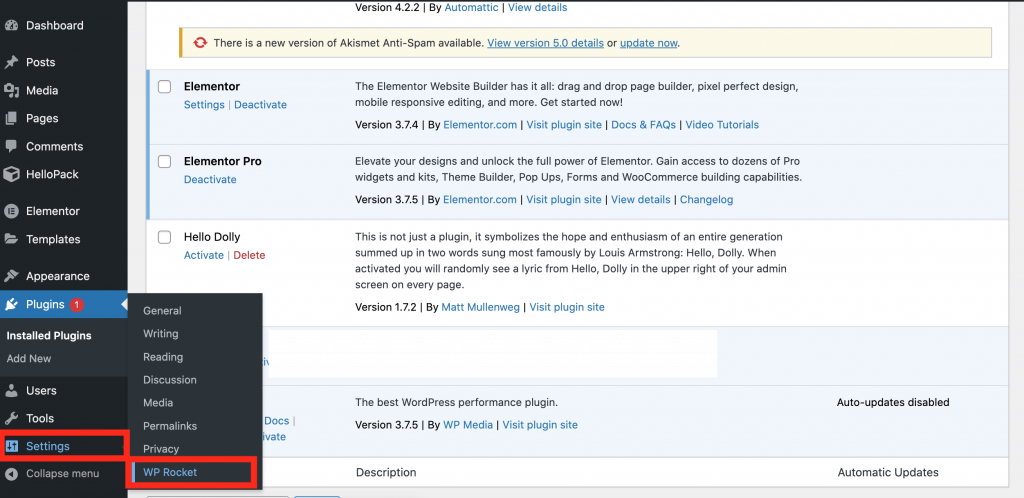
For that, go to Settings >> WP Rocket:
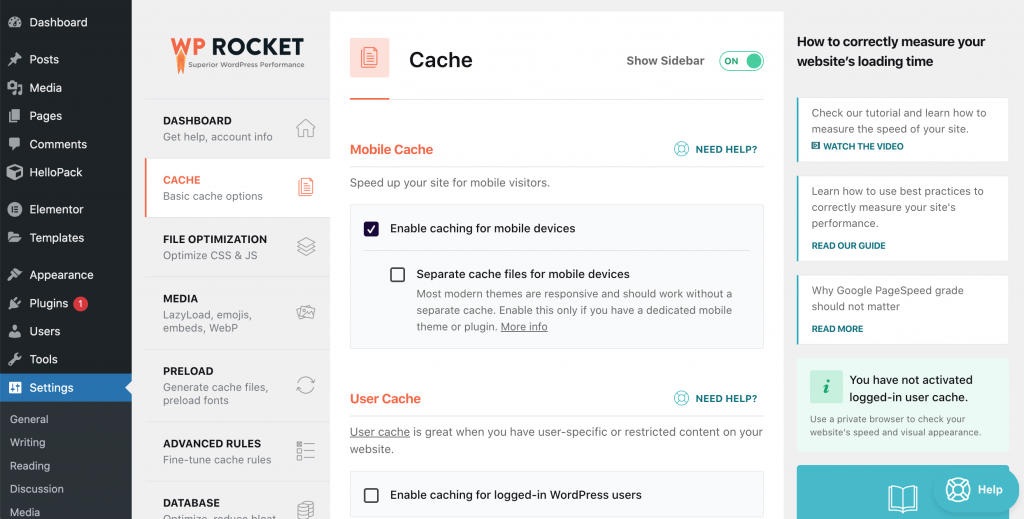
Once you are there, you want to go through the whole setting process.
WP Rocket, too has a lot of great tutorials on their website — so I won’t go into the details here. Go through their left-side menu one by one (Cache, File Optimization, Media, Preload, etc.) and read their tutorials for every settings.
Note: I strongly recommend to skip the parts where the pop the “This could break things!” message. The rest will probably be safe — but always check their descriptions, too.
Note: Skip their Image Optimization menu — we’ll use another plugin for that!
IMPORTANT! From the moment WP Rocket caching is on, you’ll have to clear cache if you change something on your website, so the changes are delivered optimally. This can be done easiest by clicking the top editor bar’s WP Rocket >> Clear Cache button.
Anyways — check PageSpeed now…
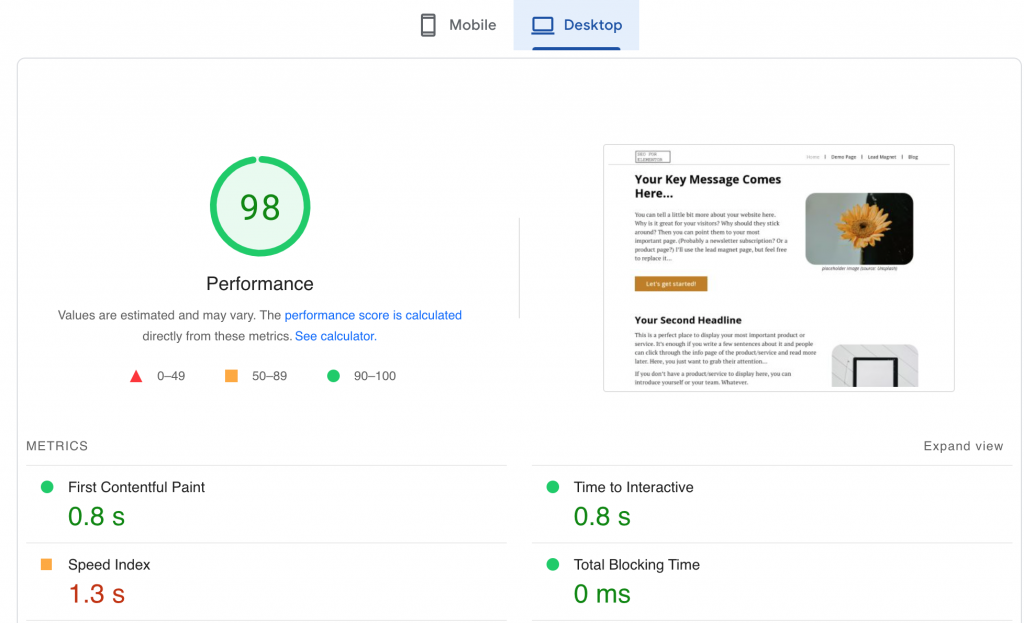
Getting there — desktop is 98 out of 100. (We’ll boost that to 99.) Mobile is only 80 out of 100, we’ll take this higher.
STEP #9.2: Converter for Media – One-click image optimization plugin (WebP conversion)
There are better formats for serving images on the internet than your usual .jpeg or .png. The one we’ll use here is WebP. And luckily, there’s a plugin that automatically turns all your images into WebP format. It’s free, too. And it’s called Converter for Media – One-click image optimization. (Kudos to Mateusz Gbiorczyk for creating it.)
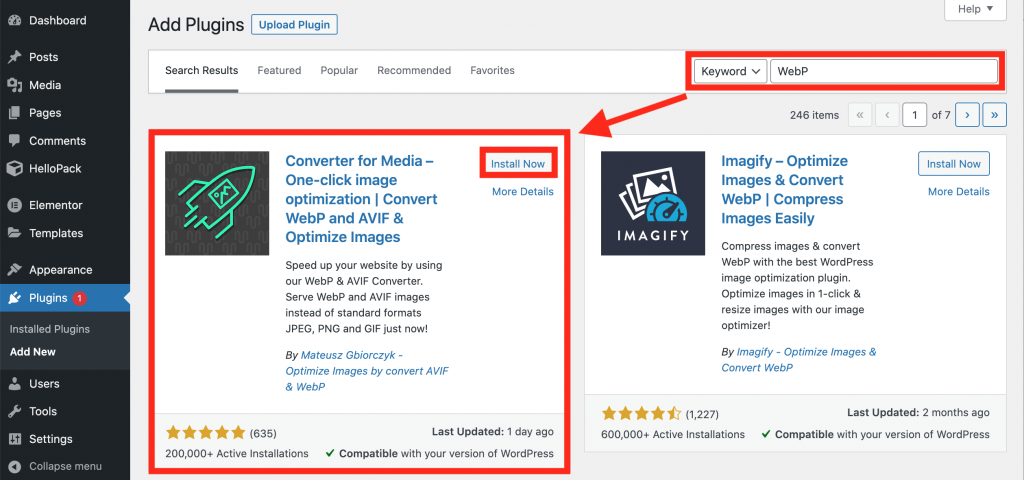
To get it, you’ll have to go back to Plugins >> Add new.
Only this time, you don’t have to upload anything, it’s enough if you search for the name of the plugin in the public wordpress plugin library. Once you are sure, you found the right plugin (see screenshot below), just click Install Now, then Activate.
Watch out for the WP Rocket notification that asks you to clear cache. I mentioned this above. Just click clear cache:
Then go to Settings >> Converter for Media:

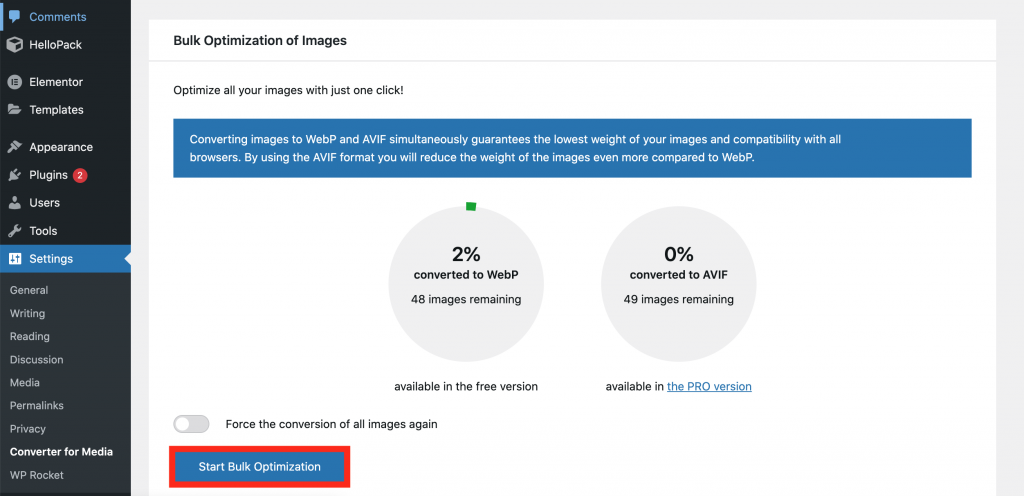
This will turn all your images into WebP format.
It’ll take a few minutes (depending on the number of your images) but when it’s done, it’s all set, you don’t have to do anything else.
After you see the success message..
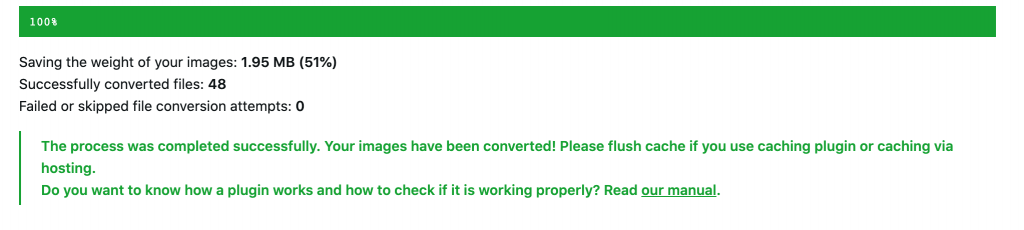
… wait a few minutes, then clear cache again with WP Rocket >> Clear Cache.
The Converter for Media plugin somehow doesn’t change the page speed immediately, but if you come back tomorrow, you’ll see that your images are in webp format and that your site’s performance is:
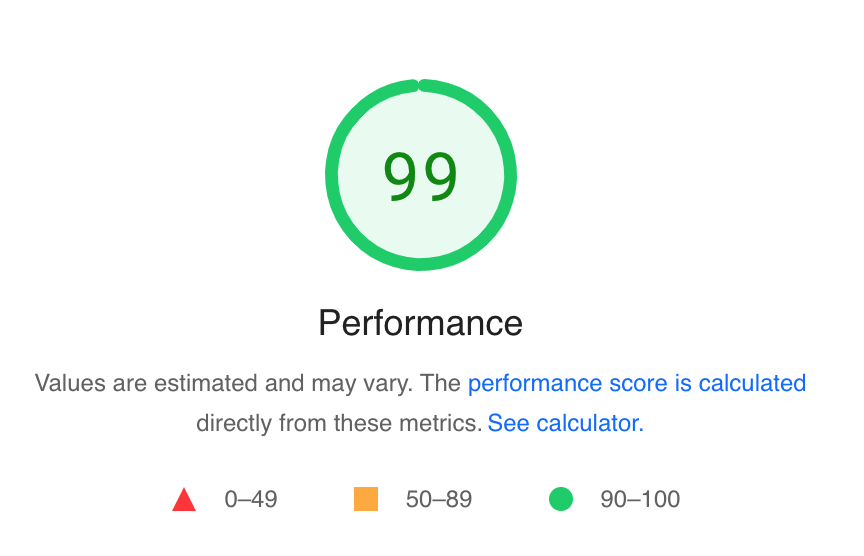
Great job!
Now optimize further!
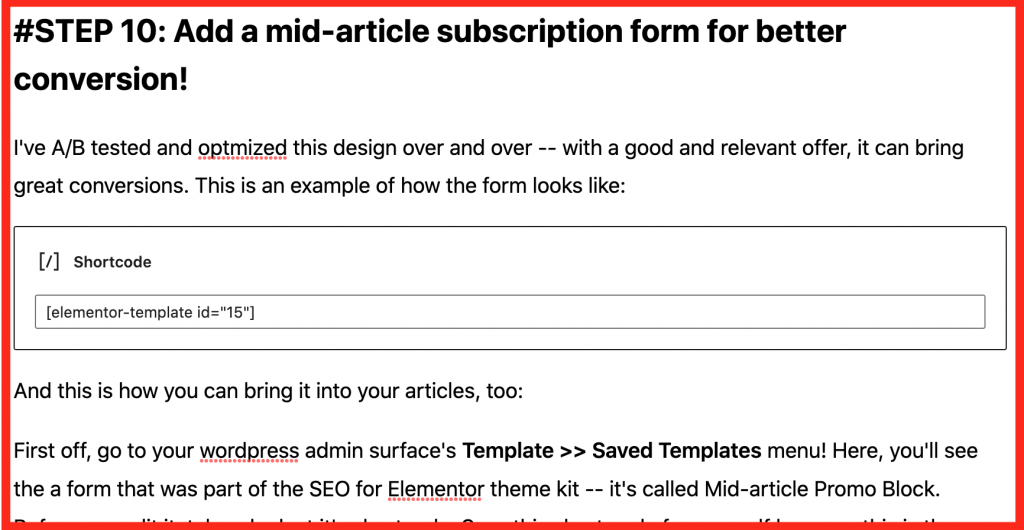
#STEP 10: Add a mid-article subscription form for better conversion!
I’ve A/B tested and optmized this design over and over — with a good and relevant offer, it can bring great conversions. This is an example of how the form looks like:
And this is how you can bring it into your articles, too:
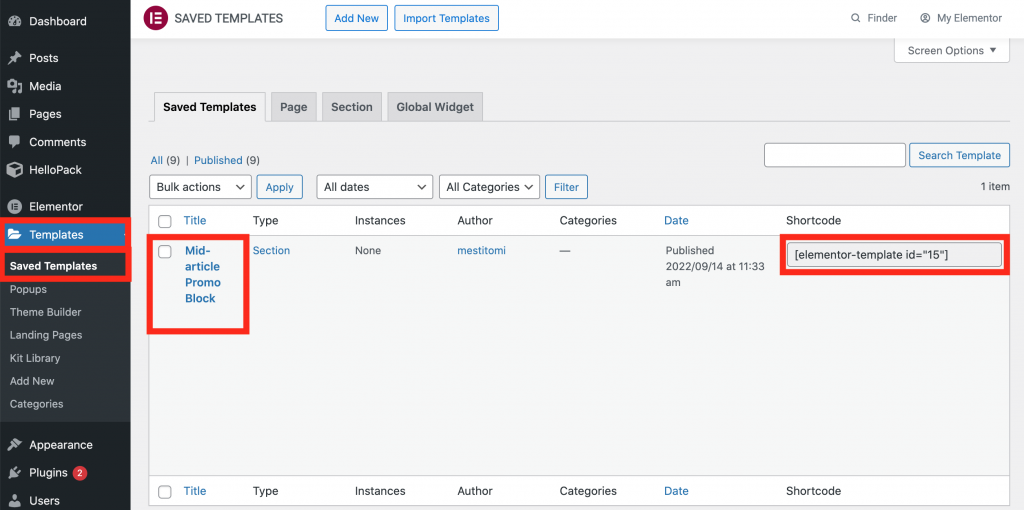
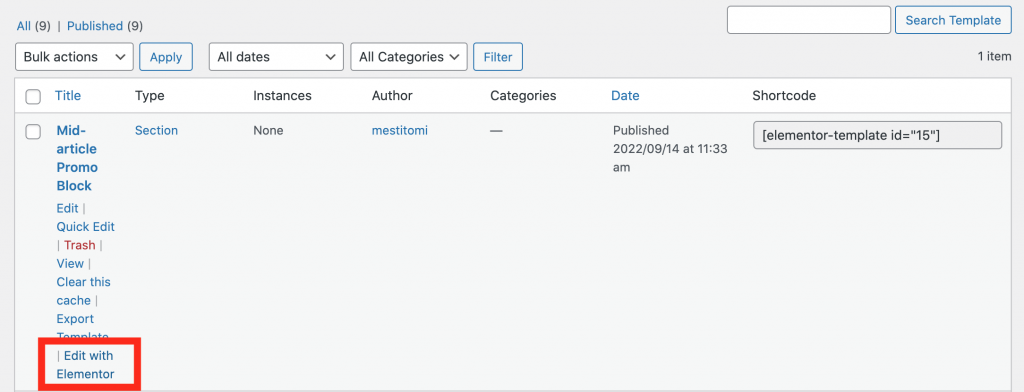
First off, go to your wordpress admin surface’s Template >> Saved Templates menu! Here, you’ll see the a form that was part of the SEO for Elementor theme kit — it’s called Mid-article Promo Block. Before you edit it, take a look at it’s shortcode. Save this short code for yourself because this is the way how you can implement your form into your posts/pages/articles:
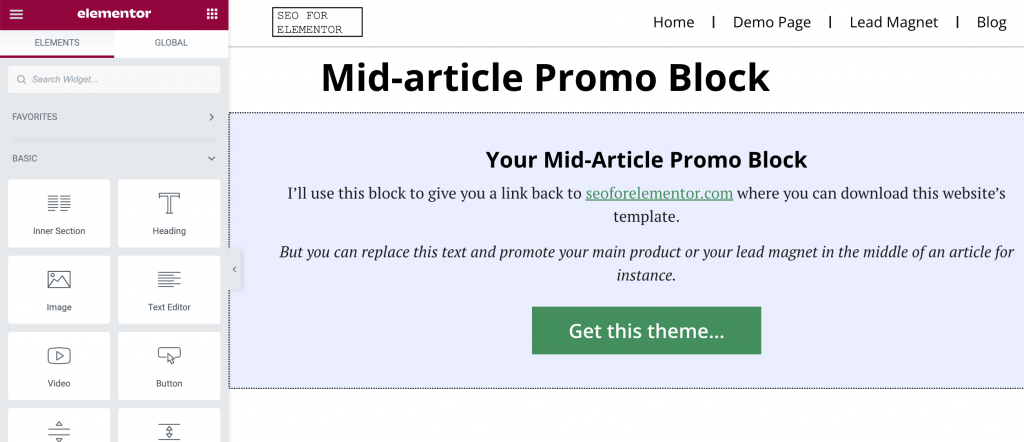
If you want to edit the form — which you should to change it’s wording — hover your mouse and click Edit with Elementor:
Here you can edit your promo block with Elementor’s drag&drop editor. Again, if you don’t know how to do that check out Elementor’s tutorials.
Note: don’t worry, the promo block won’t be this wide in the articles, it’s only the editor where you see it in this format. In real posts, it’ll follow the format of the post and it’ll look like my example above.
Once you are done with editing and save your changes. Now, if you use the shortcode from above (for me it was in your posts/articles, this promo block will popup.
This is how it looks in WordPress’ Gutenberg Editor:
And you have seen the frontend results above.
As I said: this worked for me — but feel free to tweak it further!
STEP #11: Set the post URL formats for better SEO results!
I mean, this should have been done before — but if you are new to WordPress, please set this for yourself.
Admin surface: Settings >> Permalinks.
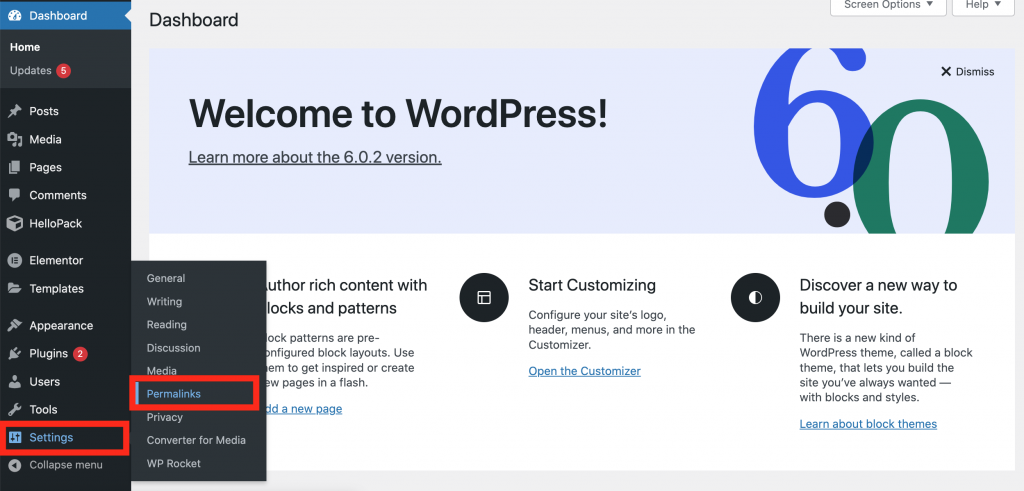
And set the permalink types to post names:
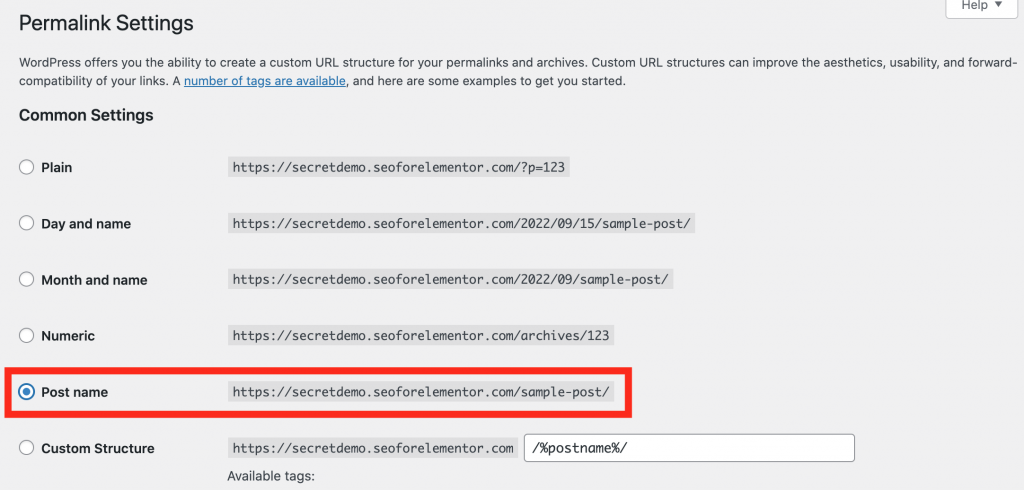
Don’t forget to scroll down and save changes!

STEP #12: iThemes Security for your WP security
This is not related to Elementor, SEO or CRO — but it’s an essential plugin if you don’t want to see your WordPress site hacked.
It’s called iThemes Security.
It’s an all-in-one security plugin… It has everything: 2fa, ddos-protection, bot-protection, vulnerability reports, etc.
I first installed it when my website was hacked and it instantly solved all my problems. (Luckily, I was able to recover my website — then after that iThemes just took care of the hackers and fixed all vulnerabilities I had on my website.) I recommend you to install it before your site gets hacked. (I mean: install it now. ;-))
It’s a premium plugin that costs $80 per year. Again: great value for money.
To get it:
- Go to Itheme’s website.
- Register and buy the plugin.
- Download the .zip file they give you.
- Install it on your website, just as we have done before with other premium plugins.
Once you are done, just follow their tutorials for optimal settings!
CONCLUSION
This is it!
We have installed everything — and I hope that you now have the SEO for Elementor theme kit set on your website… alongside everything else that will boost its SEO and conversion performance.
If you haven’t downloaded any of the tools in this article, here’s a list of them with the links (some of them are affiliate links):
Cheers,
Tomi